
ON THIS PAGE:
What Is Concrete Repair?
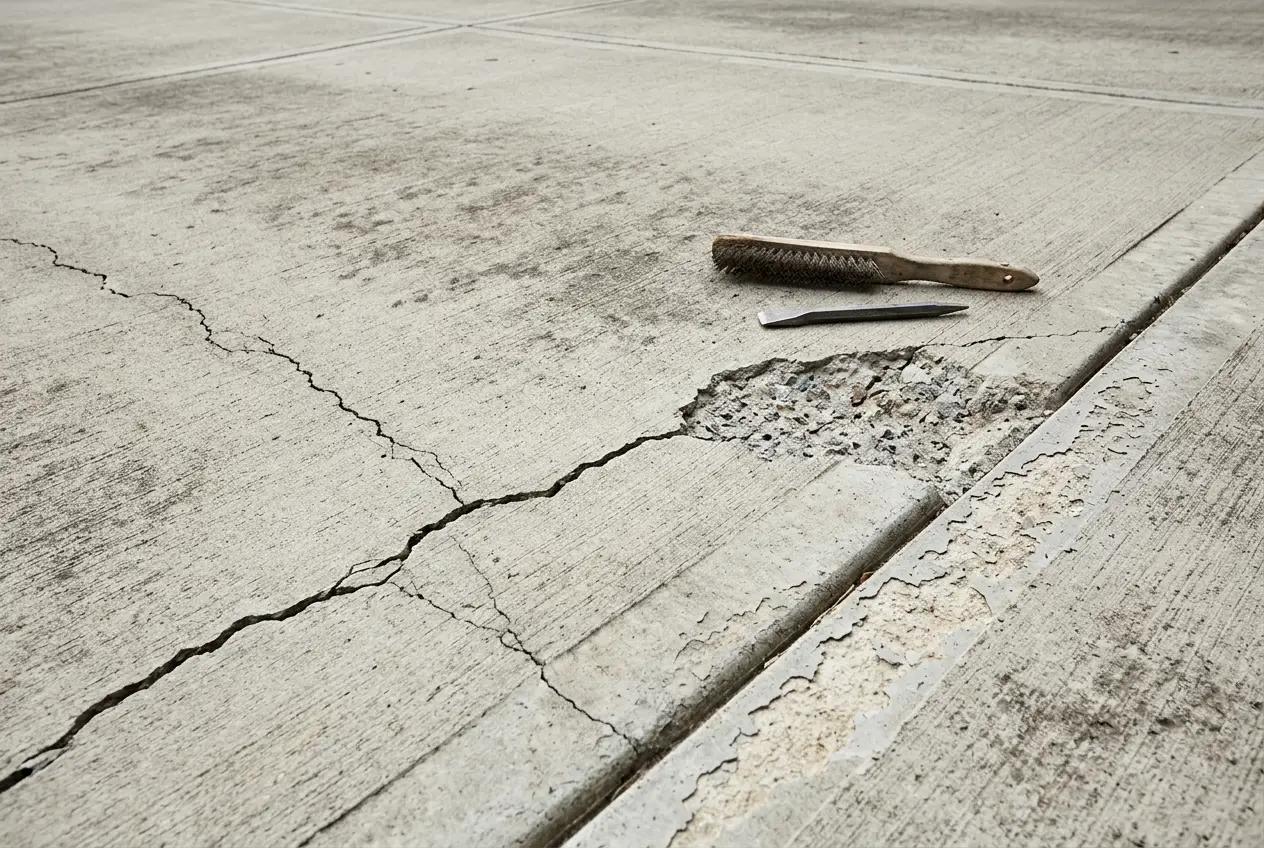
Concrete repair is the process of restoring damaged concrete to its original structural integrity, appearance, and serviceability. It encompasses everything from filling a hairline crack in a driveway to replacing extensively corroded sections of a structural wall. The goal is not simply to make the damage disappear — it is to stop the deterioration, restore the concrete's ability to perform its intended function, and prevent the damage from returning.
Concrete is a remarkably durable material, but it is not indestructible. It can crack, scale, spall, delaminate, erode, and stain — and each of these damage types has a different cause and requires a different repair approach. A crack caused by drying shrinkage needs a different fix than a crack caused by corrosion of embedded rebar. Surface scaling from freeze-thaw cycles requires a different strategy than spalling caused by impact damage. Understanding what caused the damage is the first step in choosing the right repair.
Why Timely Repair Matters
Concrete damage tends to progress rather than stabilize on its own. A small crack admits water, which freezes and expands, widening the crack. A minor spall exposes underlying aggregate and reinforcement to the elements, accelerating further deterioration. Corroded rebar expands with force enough to crack concrete from within, turning a surface problem into a structural one. The cost and complexity of repair escalate with the extent of the damage — a crack that costs $20 in sealant today can become a $2,000 spall repair next year if left unaddressed. Early intervention is almost always cheaper and simpler than delayed repair.
What This Guide Covers
This guide covers the full scope of residential and light-commercial concrete repair: how to evaluate and diagnose damage, the seven root causes that drive most concrete deterioration, crack repair methods matched to crack size and type, spalling and surface damage repair procedures, repair material selection criteria, step-by-step repair workflows, tools and safety, curing requirements, common mistakes, cost considerations, and prevention strategies. It is written for homeowners, DIYers, and construction professionals who need practical, accurate guidance on repairing concrete slabs, walls, driveways, patios, foundations, and other concrete elements.
Evaluating Concrete Damage
Before any repair begins, the damage must be properly evaluated. A repair that does not address the actual cause and extent of the damage is likely to fail — industry observations suggest that more than half of concrete repairs fail again within two years, often because the original damage was not correctly diagnosed. Evaluation determines what is wrong, how serious it is, what caused it, and whether the repair can be done by a homeowner or requires professional intervention.
Visual Inspection Checklist
Start with a systematic visual examination of the damaged area. Walk around the structure, take photos from multiple angles, and answer these questions in order:
| Question | What to Look For | What the Answer Tells You |
|---|---|---|
| Is the damage local or widespread? | One isolated spot versus multiple areas across the surface | Local damage suggests a specific cause (impact, one corroded bar); widespread damage suggests a systemic cause (poor mix, inadequate curing, salt exposure) |
| Is the damage superficial or deep? | Surface scaling versus deep spalling that exposes aggregate or rebar | Superficial damage can often be repaired with a surface treatment; deep damage requires removal to sound concrete and structural repair material |
| Is there corroded reinforcing steel visible? | Rust stains, exposed rebar, delamination around rebar locations | Corrosion is an active process — repairing over corroded rebar without addressing the corrosion guarantees the damage will return |
| Are cracks active or dormant? | Crack width measurement over time; whether crack edges are sharp or weathered | Active cracks are still moving and need flexible or structural repair; dormant cracks can be rigidly filled |
| What type of surface damage is present? | Scaling (thin flaking), spalling (chunk removal), delamination (hollow sections), erosion, pitting | Each damage type has a different cause and repair method — scaling from freeze-thaw needs different treatment than spalling from corrosion |
| Do you have construction records? | Mix designs, reinforcement drawings, placement dates, prior repair history | Records help identify whether the damage is related to construction defects, material issues, or service conditions |
Hammer Sounding for Delamination
Delamination — separation within the concrete that creates hollow sections beneath a surface that may still look intact — is one of the most commonly missed forms of concrete damage. A hammer is the simplest and most effective field tool for detecting it. Tap the concrete surface with a hammer across the suspect area, listening carefully to the sound returned.
| Sound | What It Indicates | Action |
|---|---|---|
| Hard, ringing, solid sound | Concrete is sound and bonded — no delamination | No repair needed in this area |
| Dull, hollow, drum-like sound | Delamination — a separation exists beneath the surface | Mark the area with spray paint; the delaminated section must be removed and repaired |
| Mixed sounds in adjacent areas | Partial delamination — some areas bonded, some separated | Map the full extent of delamination before planning the repair |
Outline detected delaminated areas with spray paint so the full extent of the damage is visible before repair begins. Use a tape measure to record the dimensions of each damaged area — this information is needed for material quantity estimates and cost planning. Take detailed notes and photos throughout the evaluation process. If the damage is extensive, non-destructive evaluation techniques such as infrared thermography, impact-echo testing, or ground-penetrating radar can map subsurface conditions without breaking into the concrete, but these are typically professional services used on larger structures.
When to Call a Professional for Evaluation
Some damage types exceed the scope of DIY evaluation and repair. Seek professional assessment when you observe diagonal cracks (which often indicate structural movement), cracks wider than about 1/4 inch that are actively growing, exposed corroded reinforcing steel, extensive delamination or spalling covering more than roughly a quarter of the surface, any signs of foundation settlement or movement, or damage in overhead or structural elements where failure would pose a safety hazard. Professional engineers and concrete repair contractors have the training and tools to assess structural conditions and specify repairs that meet code requirements.
Root Causes of Concrete Damage
Concrete fails for identifiable, well-documented reasons. Understanding the root cause of the damage in front of you is the single most important step in choosing a repair that lasts. Repairing the symptom without addressing the cause is the most common reason concrete repairs fail prematurely.
The Seven Damage Mechanisms
| Damage Type | Cause | Mechanism | Typical Symptoms | Prevention |
|---|---|---|---|---|
| Corrosion of reinforcing steel | Chloride ions from deicing salts or marine environment penetrate the concrete and destroy the alkaline passivating layer around the steel | Rust occupies greater volume than the original steel, creating internal expansive pressure that cracks and spalls the concrete from within | Cracking along rebar lines, rust staining, spalling that exposes corroded bars, brown water weeping from cracks | Adequate concrete cover depth, corrosion inhibitors, sealing surfaces, controlling chloride exposure |
| Freeze-thaw disintegration | Water absorbed into concrete pores freezes, expands approximately 9 percent in volume, and creates internal tensile stress | Repeated freeze-thaw cycles progressively break down the cement paste matrix; deicing salts worsen the effect by increasing water absorption | Surface scaling, flaking, peeling, progressive roughening of the surface, deterioration worsening over successive winters | Air-entrained concrete (4 to 7 percent air), proper curing before first freeze, sealing surfaces, reducing salt use |
| Alkali-aggregate reaction (AAR) | Reactive silica in certain aggregates reacts with alkalis in Portland cement to form an expansive gel | The gel absorbs water and expands, creating internal pressure that causes characteristic map cracking and deterioration | Pattern or map cracking, pop-outs, joint deterioration, expansion of the concrete element | Non-reactive aggregates, low-alkali cement, lithium admixtures, supplementary cementitious materials |
| Drying shrinkage | Water that is not consumed by hydration evaporates from the concrete as it cures | The concrete volume decreases by roughly 0.15 inches over 20 feet; because the slab is restrained by the subgrade, shrinkage creates tensile stress that causes cracking | Random cracks, cracks at re-entrant corners, cracks across slab panels, cracks that appear weeks or months after placement | Proper joint layout, adequate curing, shrinkage-reducing admixtures, controlled water-cement ratio |
| Plastic shrinkage | Surface water evaporates faster than bleed water can replace it, while the concrete is still plastic and has negligible strength | Rapid surface drying creates tensile stress in the green concrete, producing shallow random cracking before the concrete has hardened | Fine, shallow, random cracking pattern (crazing) on the surface; typically appears within hours of placement | Windbreaks, fogging, evaporation control, prompt curing, avoiding placement in hot windy conditions |
| Blisters and delamination | Premature finishing seals the surface while bleed water and air are still present beneath it | Trapped air and water form voids beneath the surface skin; the skin eventually separates from the concrete below, creating blisters and delaminated sections | Blisters, hollow-sounding areas under hammer tapping, surface sheets that break away in flakes or chunks | Proper finishing timing — wait for bleed water to evaporate; avoid over-finishing; manage bleed water |
| Cracks from structural loads | Applied loads exceed the concrete's tensile capacity, or inadequate reinforcement fails to control cracking | Concrete is strong in compression but weak in tension; when tensile stress exceeds capacity (roughly 10 percent of compressive strength), the concrete cracks | Diagonal cracks in walls and beams, wide cracks in slabs, cracking that progresses under load, deflection or displacement | Proper structural design, adequate reinforcement, load limits, professional engineering for structural elements |
Diagnosing the Cause from the Symptoms
The appearance and location of the damage often point to the underlying cause. Rust staining and cracking along rebar lines indicate corrosion. Scaling concentrated on horizontal surfaces exposed to deicing salts points to freeze-thaw damage worsened by salt. Map cracking across a slab surface suggests alkali-aggregate reaction. Random cracking that appears within the first few weeks is often drying shrinkage. Cracking that appears after the first winter on an unsealed exterior slab is typically freeze-thaw scaling. Diagonal cracks emanating from corners or door openings indicate structural movement. Matching the symptom pattern to the damage mechanism is the foundation of a repair that lasts.
Why Addressing the Root Cause Matters
A repair that does not address the root cause will fail again — often within one to two years. Patching spalled concrete over corroded rebar without treating the rebar means the corrosion continues, the steel keeps expanding, and the new patch cracks and spalls in the same location. Filling a crack caused by ongoing settlement without stabilizing the ground means the crack keeps moving and the fill material tears. Sealing a freeze-thaw damaged surface without improving drainage or re-applying sealant on schedule means the same damage returns the next winter. Every repair decision should start with the question: what caused this damage, and what must change so it does not happen again?
Concrete Crack Repair Methods
Cracks are the most common form of concrete damage and the most frequently repaired. The right repair method depends on the crack width, whether the crack is active or dormant, whether it runs horizontally or vertically, and whether it is in a structural element or non-structural flatwork. The following sections cover the four main crack categories and the repair methods matched to each.
Hairline Cracks (Under 1/8 Inch)
Hairline cracks are thin surface cracks that typically result from drying shrinkage or plastic shrinkage. They are primarily a cosmetic concern but should be sealed to prevent water infiltration and further deterioration. Repair is straightforward and within most homeowners' ability.
| Step | Action | Tool / Material |
|---|---|---|
| 1. Clean | Remove dirt, debris, and loose material from the crack | Wire brush, stiff bristle brush, or compressed air |
| 2. Wash | Rinse the crack and surrounding area clean | Pressure washer or garden hose with spray nozzle |
| 3. Dry | Allow the crack to dry completely before applying filler | Air dry or use compressed air to blow out moisture |
| 4. Fill | Apply self-leveling crack filler directly into the crack | Liquid cement crack filler or self-leveling polyurethane sealant |
| 5. Tool | Smooth the surface if needed; most self-leveling products need no tooling | Putty knife or finger (if product requires) |
| 6. Cure | Allow to cure per manufacturer instructions before exposing to traffic | 24 to 72 hours depending on product and temperature |
Typical products for hairline cracks include Quikrete Concrete Crack Seal (latex-based, pourable, 72-hour cure), DAP Liquid Cement Crack Filler (self-leveling, ready for light traffic in 45 minutes, full cure in 24 hours), and Sikaflex Self-Leveling Sealant (polyurethane, flexible, 3 to 5 day cure). One quart of a pourable product fills roughly 38 linear feet of 1/2-inch-wide, 1/4-inch-deep cracks. Temperature matters: most latex and polyurethane products require application above 45 degrees Fahrenheit.
Small Cracks (1/8 to 1/2 Inch)
Small cracks still have manageable width but are wide enough to retain debris and admit significant water. A flexible sealant is the standard repair, and a backer rod is needed if the crack is deeper than about 1/2 inch — without one, the sealant will sink into the void and waste material.
| Step | Action | Tool / Material |
|---|---|---|
| 1. Clean | Remove all loose material, dirt, and vegetation from the crack | Wire brush, chisel for loose edges, pressure washer |
| 2. Dry | Ensure the crack is clean and dry; moisture prevents proper sealant adhesion | Compressed air, heat gun (if damp) |
| 3. Backer rod | Insert foam backer rod into cracks deeper than 1/2 inch; position about 1/2 inch below the surface | Polyethylene foam backer rod, sized to crack width |
| 4. Seal | Apply flexible sealant with a caulking gun, filling the crack fully | Polyurethane or silicone sealant in caulking gun |
| 5. Tool | Smooth the sealant surface with a damp tooling implement | Putty knife, damp rag, or sealant smoothing tool |
| 6. Cure | Allow full cure before traffic exposure | 3 to 7 days depending on sealant type and depth |
Products suited to this category include Sikaflex Self-Leveling Sealant (fills up to 1.5 inches wide on horizontal surfaces, remains flexible and submersible), Sashco Slab Concrete Crack Filler (stretches up to three times crack width, handles up to 3-inch gaps, 1-week cure), and Loctite PL Self-Leveling Concrete Sealant (38 cents per foot, 7-day cure). For vertical cracks in walls and foundations, use a non-sag sealant that will not run out of the crack before it sets.
Large Cracks (1/2 to 3 Inches)
Large cracks require a substantial repair material — sealant alone will not bridge the gap or restore structural continuity. Premixed concrete patch compounds and polymer-modified mortars are the standard choices, applied in layers for deep cracks.
| Step | Action | Tool / Material |
|---|---|---|
| 1. Remove loose material | Chip away any cracked or deteriorated concrete until reaching sound material | Hammer, chisel, rotary hammer with chisel bit |
| 2. Square the edges | Undercut the crack edges slightly to create a mechanical key for the patch | Chisel, angle grinder with masonry blade |
| 3. Clean thoroughly | Remove all dust, debris, and loose particles; wash and let dry to SSD condition | Pressure washer, brush, compressed air |
| 4. Dampen | Saturate the crack with water; wipe off standing water so the surface is saturated but not wet | Garden hose, sponge |
| 5. Bond | Apply bonding agent to the prepared surface per product instructions | Bonding agent (latex or epoxy-based), brush or roller |
| 6. Fill in layers | Pack repair material into the crack in layers no thicker than 1/4 inch at a time | Premixed concrete patch, polymer-modified mortar, trowel, putty knife |
| 7. Finish | Smooth the surface and feather edges into the surrounding concrete | Trowel, sponge float |
| 8. Cure | Cure per manufacturer instructions — keep moist for best bond | Curing compound, plastic sheeting, water misting |
Products for large cracks include Red Devil Premixed Concrete Patch (ready-mixed, trowel-applied, 24-hour cure, suitable for vertical surfaces), Rust-Oleum Concrete Patch & Repair (two-part epoxy, stronger than concrete, 8-hour cure, covers 14 linear feet per kit), and Sakrete Repair products (cementitious, various set times). Apply deep repairs in multiple thin layers rather than one thick pour — thick layers cure unevenly, shrink more, and are prone to cracking and debonding.
Structural Cracks (Active, Diagonal, Wide)
Structural cracks — diagonal cracks, cracks wider than about 1/4 inch that are actively growing, cracks in load-bearing walls, beams, or columns — require professional evaluation before repair. These cracks indicate that the concrete element is experiencing loads or movements beyond its capacity, and a surface repair alone will not address the underlying structural issue. Professional repair methods include epoxy injection (which bonds the crack and restores structural continuity), carbon fiber reinforcement (which strengthens the element externally), and in severe cases, section replacement or external post-tensioning. Attempting to structurally repair a load-bearing element without engineering assessment is dangerous and voids any performance expectations.
Crack Repair Method Selection
| Crack Size | Location | Active? | Recommended Material | Application Method | Typical Cure Time |
|---|---|---|---|---|---|
| Hairline (< 1/8 in) | Any | No | Self-leveling liquid crack filler | Pour directly from bottle | 24–72 hours |
| Small (1/8–1/2 in) | Horizontal surfaces | No | Self-leveling polyurethane sealant | Caulking gun | 3–7 days |
| Small (1/8–1/2 in) | Vertical surfaces | No | Non-sag polyurethane or silicone sealant | Caulking gun, tool smooth | 3–7 days |
| Medium (1/2–1 in) | Any | No | Flexible acrylic latex sealant with backer rod | Caulking gun over backer rod | 1–2 weeks |
| Large (1–3 in) | Horizontal surfaces | No | Premixed concrete patch or polymer-modified mortar | Trowel, layered application | 24–48 hours |
| Large (1–3 in) | Vertical surfaces | No | Polymer-modified repair mortar | Trowel, layered application | 24–72 hours |
| Wide (> 3 in) | Any | No | Structural repair mortar, possibly with forms | Trowel or form-and-pour | 7+ days |
| Active / structural | Load-bearing elements | Yes | Professional assessment required — epoxy injection, carbon fiber, or section replacement | Professional methods only | Varies by method |
Spalling & Surface Damage Repair
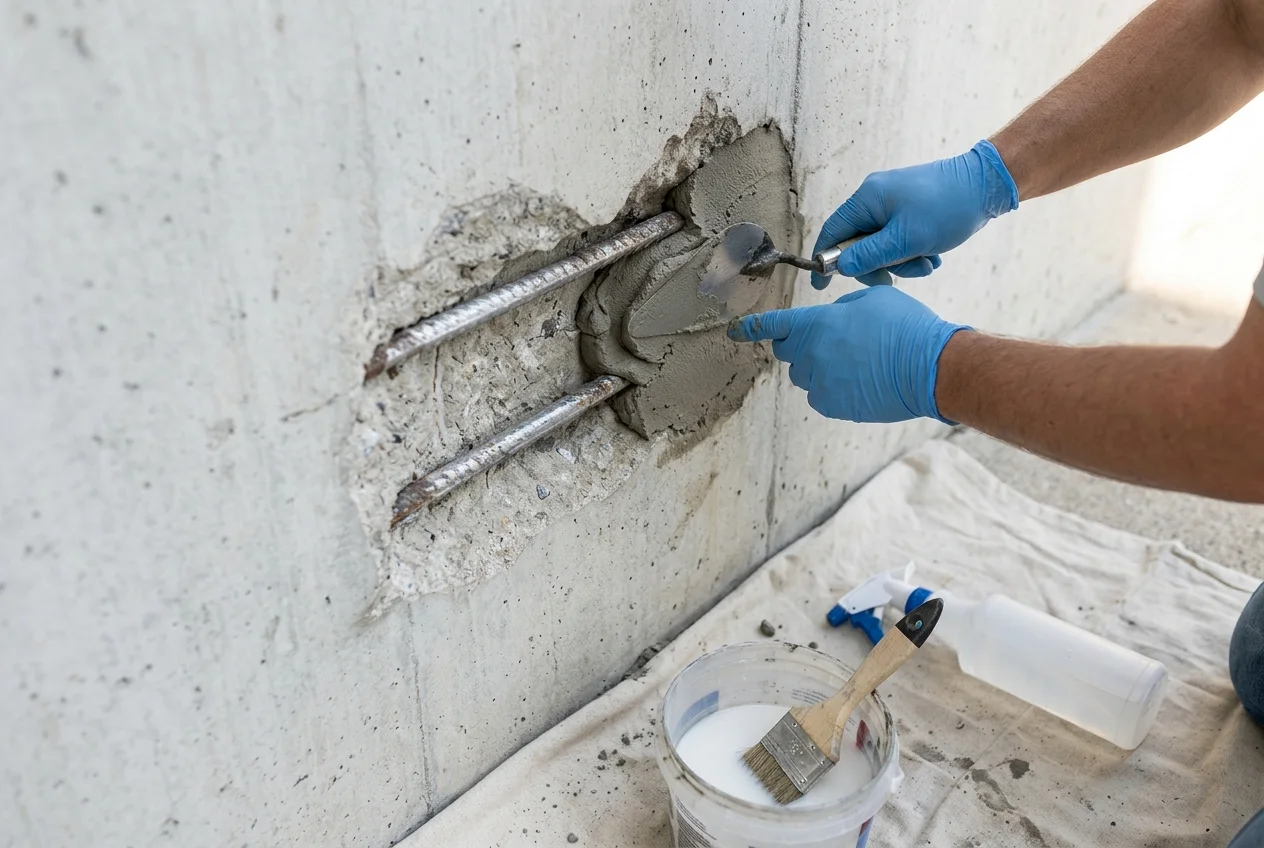
Spalling is the breaking away of chunks of concrete from the surface, often exposing aggregate and reinforcing steel beneath. Surface damage also includes scaling (thin flaking of the surface paste), delamination (separation creating hollow sections beneath the surface), erosion (loss of surface material from water or abrasion), and pitting (small localized surface cavities). Each damage type requires a different repair approach, but all share the same fundamental principle: remove all unsound material, prepare the substrate properly, apply the right repair material, and cure it correctly.
Understanding Spalling
Spalling occurs when internal pressure — from corroding rebar, freeze-thaw cycles, or trapped moisture — exceeds the concrete's surface tensile capacity. The surface breaks away, sometimes in dramatic chunks, sometimes in progressive flakes. Spalls are classified by depth: shallow spalls (up to about 1/4 inch) affect only the surface paste; moderate spalls (1/4 inch to 1 inch) expose aggregate and may partially reveal rebar; deep spalls (over 1 inch) expose significant areas of reinforcement and can compromise structural capacity in extreme cases. The depth of the spall determines the repair material, the preparation requirements, and whether professional intervention is needed.
Surface Scaling Repair
Scaling — the flaking and peeling of the surface paste, typically caused by freeze-thaw cycles and deicing salt exposure — is the most common form of surface damage on exterior concrete. Repair of moderate scaling involves removing all loose and flaking material, cleaning the surface to sound concrete, and applying a polymer-modified overlay or repair mortar that bonds to the prepared substrate and restores a uniform surface.
| Step | Action | Tool / Material |
|---|---|---|
| 1. Remove loose material | Scrape, chip, or pressure-wash away all flaking and delaminated surface material | Hand scraper, wire brush, pressure washer (2,500–3,000 psi) |
| 2. Clean to sound concrete | Continue removing material until reaching concrete that sounds solid under hammer tapping | Hammer, chisel, rotary hammer |
| 3. Clean surface | Wash the entire repair area, removing all dust and debris | Pressure washer, stiff brush |
| 4. Dampen | Bring the surface to saturated-surface-dry condition | Garden hose, sponge |
| 5. Bond | Apply bonding agent to the prepared area | Latex or epoxy bonding agent, brush or roller |
| 6. Apply overlay | Apply a thin polymer-modified overlay or repair mortar to the full prepared area | Resurfacing compound, trowel, squeegee, or spray equipment |
| 7. Texture | Match the surrounding surface texture while the overlay is still workable | Sponge float, broom (for broom-finished surfaces) |
| 8. Cure | Cure the overlay per manufacturer instructions | Curing compound, plastic sheeting, water misting — 24–72 hours |
Spall Repair (Depth 1/4 Inch to 1 Inch)
Moderate spalls require removal to sound concrete, proper edge preparation, bonding, and application of a structural repair mortar. The key quality factors are complete removal of unsound material, square or undercut edges that give the patch mechanical key, proper moisture condition of the substrate, and layered application for deep repairs.
| Step | Action | Tool / Material |
|---|---|---|
| 1. Chip to sound concrete | Remove all deteriorated material; extend the repair area beyond the visible damage to reach sound concrete | Hammer and chisel, rotary hammer |
| 2. Square and undercut edges | Create clean, square edges; undercut slightly to lock the patch in place mechanically | Chisel, angle grinder |
| 3. Treat rebar if exposed | If reinforcing steel is visible and corroded, clean it to near-white metal and apply a corrosion inhibitor or repair mortar compatible with treated rebar | Wire brush, needle scaler, corrosion inhibitor, encapsulating repair mortar |
| 4. Clean thoroughly | Remove all dust, debris, and loose particles from the repair area | Pressure washer, compressed air, brush |
| 5. Dampen to SSD | Saturate the substrate; wipe off standing water so the surface is damp but not wet | Garden hose, sponge |
| 6. Apply bonding agent | Brush bonding agent onto the prepared surface per product instructions | Bonding agent, brush or roller |
| 7. Mix repair mortar | Mix polymer-modified repair mortar or rapid-set hydraulic cement per manufacturer instructions | Mixing drill and paddle, bucket, measured water |
| 8. Apply in layers | Pack mortar firmly into the spall in layers no thicker than 1/4 inch; work from edges inward to eliminate air pockets | Trowel, pointing trowel, or gloved hands |
| 9. Finish surface | Smooth and texture the repair to match the surrounding concrete | Trowel, sponge float |
| 10. Cure | Cure per manufacturer instructions — keep the repair moist for maximum bond strength | Curing compound, plastic sheeting, wet burlap — 24 hours to 7 days |
Product choices for moderate spalls include Five Star Structural Concrete (2,500 psi in 1 hour, 8,000 psi at 28 days, form-and-pour capable, 0.5-inch minimum depth), Sakrete Repair products (cementitious, various set times and strengths), and rapid-set hydraulic cements for wet or cold conditions. The minimum practical repair depth for most cementitious repair mortars is about 1/4 inch — thinner applications do not bond reliably and are prone to shrinkage cracking and debonding.
Deep Spall Repair (Over 1 Inch)
Deep spalls that expose significant areas of reinforcing steel are the most demanding category of concrete repair and often warrant professional evaluation. The repair process follows the same fundamental steps as moderate spall repair — removal, preparation, cleaning, dampening, bonding, application, finishing, curing — but with additional considerations: rebar treatment (cleaning to near-white metal and applying corrosion protection), thicker material builds (which may require formwork or multiple cure cycles), and quality verification (ensuring full contact between repair material and substrate, especially at rebar interfaces). For very deep or large-volume repairs, form-and-pour methods using high-strength repair mortar or non-shrink grout may be necessary. The Concrete Reinforcement Basics guide covers rebar conditions and corrosion in more detail.
Surface Resurfacing
When surface damage is widespread rather than localized — extensive scaling, multiple small spalls, general surface deterioration — resurfacing the entire area may be more practical and cost-effective than repairing each defect individually. Concrete resurfacing compounds are thin-layer polymer-modified materials applied over the prepared surface to create a new, uniform wearing surface. Resurfacing is commonly used on driveways, patios, pool decks, and garage floors where the underlying concrete is structurally sound but the surface has deteriorated. The preparation requirements are the same as for localized repair: remove all loose material, clean thoroughly, dampen, apply bonding agent, and apply the resurfacing compound to the manufacturer's specified thickness (typically 1/8 to 1/2 inch). Curing times range from 24 to 72 hours depending on the product and conditions.
Repair Materials & Selection
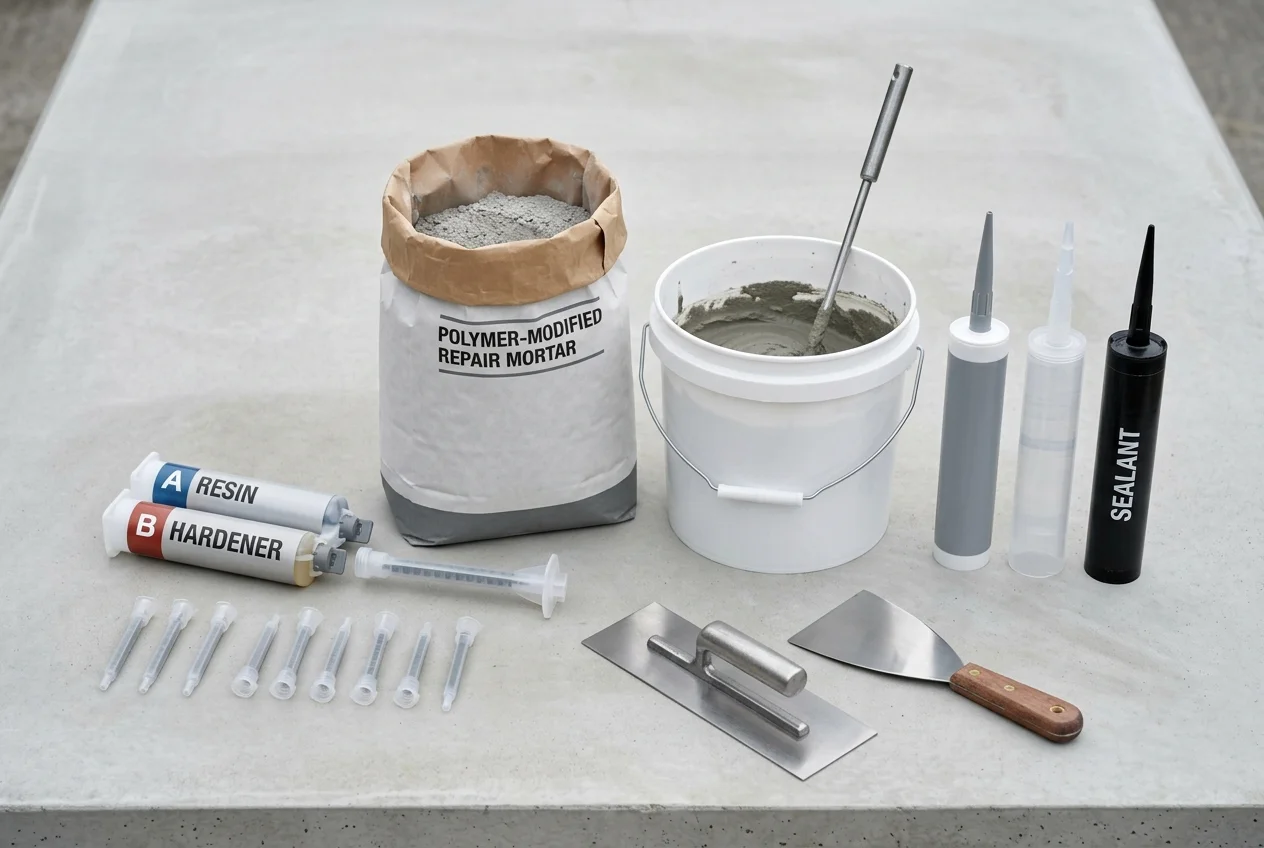
Selecting the right repair material is a decision with real consequences. A material that shrinks too much will debond from the substrate. A material that is too stiff will crack at the interface with the existing concrete. A material that bonds poorly will fail under traffic or weather. The selection criteria below, drawn from established concrete repair practice, help match the material to the repair conditions.
Repair Material Types
| Material Type | Composition | Best For | Advantages | Limitations |
|---|---|---|---|---|
| Polymer-modified cementitious mortar | Portland cement and aggregate with latex, acrylic, or other polymer modifier | Spalls, patches, overlays, vertical and overhead repairs | Good bond strength, low shrinkage, workable, widely available, bonds to damp substrate | Cementitious — requires curing; can be affected by freeze-thaw if not properly air-entrained |
| Hydraulic cement (rapid-set) | Calcium aluminate or calcium sulfoaluminate cement systems | Wet or cold conditions, leak sealing, rapid repairs, underwater applications | Sets in minutes even in water, high early strength, excellent for emergency repairs | Short working time, high heat of hydration in thick sections, limited bond strength compared to polymer-modified materials |
| Epoxy systems | Two-part epoxy resins with fillers, sometimes cement-filled | Structural crack injection, high-strength bonding, chemical resistance, anchoring | Exceptional bond strength, very low shrinkage, chemical resistant, waterproof when cured | Higher cost, requires mixing, temperature sensitive, can be difficult to apply on vertical surfaces |
| Polyurethane systems | One-part or two-part polyurethane resins and foams | Flexible crack sealing, foundation crack injection, waterproofing, movement joints | Flexible after cure, accommodates movement, waterproof, good adhesion to damp surfaces | Lower bond strength than epoxy, not structural, moisture-sensitive before cure |
| Cementitious overlays | Portland cement, fine aggregate, polymer modifiers, sometimes fibers | Surface resurfacing, wearing courses, decorative finishes | Bonds to concrete, matches existing concrete appearance, durable, available in various textures | Thin applications require careful substrate preparation, can crack if substrate moves |
| Latex-based liquid fillers | Latex-modified cementitious slurry | Hairline and small crack filling, surface treatment | Easy to apply (pourable), self-leveling options available, inexpensive | Not suitable for deep or wide repairs, limited structural value, requires dry substrate |
Selection Criteria
The International Concrete Repair Institute and the American Concrete Institute both emphasize that repair material selection is a multi-factor decision. The following criteria, in approximate order of importance, guide the selection process:
| Criterion | Why It Matters | What to Look For |
|---|---|---|
| Shrinkage | The existing concrete has already completed its shrinkage; if the repair material shrinks, it pulls away from the substrate and the bond fails | Low-shrinkage or non-shrink formulations; polymer-modified materials generally shrink less than plain cementitious mixes |
| Bond strength | Most repairs fail at the bond line; without good bond, the repair material does not work with the existing concrete as a composite | Materials specifically formulated for repair bonding; proper surface preparation (clean, sound, SSD, bonding agent) is equally important |
| Orientation compatibility | Overhead and vertical repairs need materials that will not sag or run before setting | Non-sag formulations for vertical and overhead work; flowable materials for horizontal applications and form-and-pour |
| Working time | Material must remain workable long enough to place, consolidate, and finish the repair | Adequate pot life for the repair size; rapid-set materials for time-critical or wet-condition work |
| One-part vs two-component | One-part materials are simpler to use; two-component materials often offer superior performance | Choose two-component systems when bond strength, chemical resistance, or low shrinkage is critical; one-part materials for convenience and smaller repairs |
| Dimensional compatibility | The repair material and existing concrete should have similar elastic modulus and thermal expansion to avoid stress at the interface | Cementitious materials are generally more compatible with concrete than rigid epoxies; flexible materials for movement joints |
| Freeze-thaw resistance | Exterior repairs in cold climates must withstand freeze-thaw cycles without scaling or cracking | Air-entrained cementitious materials; polymer-modified systems designed for exterior exposure |
| Water vapor permeability | Vapor pressure from within the concrete can debond repair materials that are too impermeable | Materials that allow some vapor transmission, especially for repairs over damp substrates |
| Strength | The repair must be at least as strong as the surrounding concrete for the application | Match or exceed the compressive strength of the existing concrete; structural applications require engineered materials |
| Abrasion resistance | Horizontal surfaces in traffic areas need materials that resist wear | High-strength, dense formulations for floors and driveways; polymer overlays for heavy traffic |
| Cost | Material cost matters but should not override performance requirements | Balance material cost with expected repair life — a more expensive material that lasts twice as long is usually the better value |
Structural Repair Products Comparison
The following table compares structural concrete rehabilitation products from Five Star Products, a leading manufacturer in this category. Compressive strengths are measured at 70 degrees Fahrenheit and represent typical published values — always verify current product data from the manufacturer before specifying materials.
| Product | Repair Size | 1-Day Strength | 28-Day Strength | Working Time | Min./Max. Depth | Application |
|---|---|---|---|---|---|---|
| Structural Concrete | Small to medium | 2,500 psi (3 hrs) | 8,000 psi | 15 minutes | 0.25 in / 12 in | Form & pour |
| Structural Concrete ES | Medium | 3,000 psi (6 hrs) | 7,700 psi | 60 minutes | 0.25 in / 12 in | Form & pour, form & pump |
| Structural Concrete ESX | Large volume | 3,000 psi (6 hrs) | 8,000 psi | 45 minutes | 0.5 in / 24 in | Form & pour, form & pump |
| Structural Concrete V/O | Small hand-applied | 2,500 psi (3 hrs) | 5,800 psi | 15 minutes | 0.25 in / 12 in | Hand-applied |
| Structural Concrete S300 | Large | 3,000 psi (6 hrs) | 8,000 psi | 60 minutes | 0.25 in / 1 in | Form & pour, form & pump |
| Highway Patch | Surface repair | 2,000 psi (2 hrs) | 7,000 psi | 10 minutes | 1 in / 6 in | Traffic-ready in 120 min |
| Highway Patch FR | Surface repair | 3,000 psi (3 hrs) | 7,500 psi | 15 minutes | 1 in / 6 in | Fiber-reinforced, traffic-ready in 180 min |
| Rapid Surface Repair (RSR) | Thin surface | 2,000 psi (1 hr) | 8,000 psi | 5 minutes | 0.5 in / N/A | Self-leveling polyurethane hybrid |
These are commercial-grade products typically used by contractors. For residential DIY repairs, equivalent performance is available from retail products such as Sakrete Repair, Quikrete Vinyl Concrete Patcher, and various polymer-modified repair mortars available at building supply stores. The selection principles are the same regardless of product scale: match the material to the repair conditions, prepare the substrate properly, and cure correctly.
Step-by-Step Repair Procedures
While each repair is unique, the fundamental workflow is consistent across concrete repair projects. Following a systematic process ensures that each critical step is completed in the right order and that the repair has the best possible chance of lasting.
The General Repair Workflow
| Step | What You Do | Why It Matters |
|---|---|---|
| 1. Evaluate | Assess the damage type, extent, and root cause using the evaluation methods described above | Choosing the wrong repair method because the cause was misdiagnosed is the most common reason repairs fail |
| 2. Address the root cause | Fix what caused the damage before repairing the damage itself — improve drainage, treat corrosion, control movement | Without this step, the same damage will recur regardless of repair quality |
| 3. Remove unsound material | Chip, grind, or break away all deteriorated concrete until reaching sound, solid material | Repair material bonded to unsound concrete will fail with the substrate beneath it |
| 4. Prepare the substrate | Square or undercut edges, clean thoroughly, bring to saturated-surface-dry condition | Proper preparation is the single biggest factor in repair bond strength |
| 5. Apply bonding agent | Brush on a compatible bonding agent per product instructions | Bonding agents bridge the interface between old and new concrete, dramatically improving adhesion |
| 6. Apply repair material | Place the repair material in layers appropriate to its thickness limitations, working from edges inward | Thick single layers cure unevenly, shrink more, and are prone to cracking and debonding |
| 7. Finish | Smooth and texture the repair to match the surrounding surface | A proper finish improves appearance and reduces water infiltration at the repair edges |
| 8. Cure | Maintain moisture and temperature conditions per the repair material's requirements | Curing is when the repair material develops its strength and bond — skipping or shortening cure time compromises the repair |
Worked Example: Repairing a Spalled Driveway Area
The following walkthrough applies the general workflow to a common residential repair: a 2-foot by 1-foot area of a concrete driveway where the surface has spalled to a depth of about 1/2 inch, exposing coarse aggregate and partial rebar. The spall was caused by freeze-thaw scaling worsened by deicing salt use.
| Step | Action | Details |
|---|---|---|
| Evaluate | Identify damage type and cause | Spalling to 1/2-inch depth; aggregate exposed; one rebar visible with light surface rust; cause is freeze-thaw scaling from salt exposure. Damage is local (one area), not widespread — suitable for DIY repair with root-cause modification. |
| Address root cause | Modify salt usage | Switch to a calcium chloride-based deicing product (under 2% concentration) or sand for traction; plan to seal the driveway after repair to reduce water infiltration. |
| Remove unsound material | Chip to sound concrete | Using hammer and chisel, remove all loose material and extend the repair about 1 inch beyond the visible spall to reach sound concrete. Square the edges. |
| Treat exposed rebar | Clean and protect the rebar | Wire-brush the visible rebar to remove loose rust; apply a corrosion-inhibiting primer to the cleaned steel. |
| Clean | Wash the repair area | Pressure-wash the full prepared area, removing all dust and debris. Allow to dry briefly. |
| Dampen | Bring to SSD condition | Flood the prepared area with water, let it soak in, then sponge off standing water. The concrete should look dark and damp but have no free water on the surface. |
| Bond | Apply bonding agent | Brush a latex bonding agent over the entire prepared surface, including the edges and exposed rebar. |
| Mix repair mortar | Prepare polymer-modified mortar | Mix a vinyl-modified concrete patcher per manufacturer instructions — slightly drier than a typical concrete mix to reduce shrinkage. |
| Apply in layers | Build up the repair | Press mortar firmly into the spall in two 1/4-inch layers, working from the edges inward. For the second layer, pack the mortar around and over the rebar to provide cover. Consolidate each layer to eliminate air pockets. |
| Finish | Match surrounding texture | Smooth the surface with a steel trowel, then lightly texture with a sponge float to match the surrounding broom-finished driveway. |
| Cure | Keep the repair moist | Cover with plastic sheeting or apply curing compound per the product instructions. Keep traffic off the repair for at least 24 hours; full traffic readiness in 24 to 48 hours depending on the product. |
| Seal (follow-up) | Protect the entire driveway | After the repair has cured fully (typically 28 days), apply a penetrating concrete sealer to the entire driveway surface to reduce future water infiltration and salt damage. |
Tools & Equipment
Having the right tools on hand before starting a repair prevents delays and ensures each step can be executed properly. The table below organizes concrete repair tools by category and purpose.
Tools by Category
| Tool | Category | What It Does | When to Use It |
|---|---|---|---|
| Safety glasses | Safety | Protects eyes from flying debris and dust | Whenever chipping, grinding, or mixing materials |
| N95 respirator or dust mask | Safety | Filters silica dust and cement dust | Whenever cutting, grinding, chipping, or mixing cementitious materials |
| Work gloves | Safety | Protects hands from abrasion, chemicals, and caustic cement | Throughout the entire repair process |
| Hammer and chisel | Demolition | Removes loose and unsound concrete; squares repair edges | Damage removal and substrate preparation |
| Rotary hammer with chisel bit | Demolition | Rapid removal of deteriorated concrete on larger repairs | Large spalls, extensive damage removal |
| Angle grinder with masonry blade | Preparation | Cuts clean edges, grinds high spots, prepares substrate | Squaring edges, smoothing, cutting to depth |
| Wire brushes (various sizes) | Cleaning | Removes loose rust, debris, and contaminated material | Rebar cleaning, surface preparation, cleaning repair edges |
| Pressure washer | Cleaning | Thoroughly cleans concrete surfaces and removes dust | Surface preparation, cleaning before repair application |
| Stiff bristle brush | Cleaning | Manual cleaning of cracks and small repair areas | Cleaning narrow cracks, small spalls, detailed areas |
| Compressed air | Cleaning | Blows dust and debris out of cracks and prepared surfaces | Final cleaning before applying repair material |
| Caulking gun | Application | Applies sealant and crack filler from cartridges | Crack sealing, joint sealing, applying sealant from tubes |
| Trowels (pointing, margin, finishing) | Application | Applies, consolidates, and finishes repair mortar | Packing mortar into spalls and cracks, finishing surfaces |
| Putty knives | Application | Applies patch compound in small areas, smooths surfaces | Small crack filling, patching, detail work |
| Mixing drill and paddle | Mixing | Mixes cementitious repair materials to uniform consistency | Mixing repair mortar, grout, and patch compounds |
| Mixing bucket | Mixing | Holds material during mixing | All cementitious material mixing |
| Measuring container | Mixing | Measures water for consistent mix ratios | All material mixing — consistency depends on accurate water measurement |
| Backer rod | Crack repair | Foam filler that supports sealant in deep cracks | Cracks deeper than 1/2 inch before sealant application |
| Spray bottle or garden hose | Moisture control | Dampens substrates, keeps tools clean, supports curing | Substrate preparation, keeping tools wet during work, curing |
| Curing compound or plastic sheeting | Curing | Retains moisture in the repair during curing | Immediately after repair material application |
| Tape measure | Measurement | Measures damage extent, repair dimensions, material quantities | Evaluation, planning, material estimation |
| Spray paint (marking) | Marking | Outlines damaged areas identified during evaluation | Mapping delamination and damage boundaries |
The most common toolset for residential concrete repair — crack filling, small spall repair, and surface patching — is a hammer, chisel, wire brushes, pressure washer or garden hose, caulking gun, trowel, putty knife, mixing drill and paddle, measuring container, and curing supplies. Adding a rotary hammer and angle grinder covers larger repairs and more extensive damage removal.
Safety Precautions
Concrete repair involves hazards that are easy to overlook but serious to ignore. Cement dust contains crystalline silica, which causes silicosis with prolonged exposure. Wet cement is highly caustic and can cause chemical burns to skin and eyes. Power tools, overhead work, and structural repairs each carry their own risks. The precautions below are not optional — they are part of every professional repair job and should be part of every DIY repair as well.
Personal Protective Equipment
| Hazard | PPE Required | Notes |
|---|---|---|
| Silica and cement dust | N95 respirator minimum; half-face respirator with P100 cartridges for extended work | Wet cutting and dust extraction reduce airborne dust; never dry-grind concrete without respiratory protection |
| Flying debris (chipping, grinding) | Safety glasses with side shields, or sealed goggles | Flying chips from chipping operations can cause serious eye injuries |
| Skin contact with wet cement | Chemical-resistant gloves (nitrile or rubber), long sleeves, knee pads | Wet cement is caustic (pH 12–13); it burns skin and destroys protective skin oils — rinse immediately with clean water if contact occurs |
| Noise from power tools | Hearing protection when using rotary hammers, grinders, or pressure washers | Prolonged exposure to power tool noise causes permanent hearing damage |
| Working at height | Proper ladder or scaffolding, fall protection where required | Never overreach from a ladder; have someone spot you when working on elevated surfaces |
Job-Site Safety Practices
Work in ventilated areas when using solvents, epoxies, or chemical cleaners. Keep a clean water source nearby for immediate skin or eye flushing — water with an eyewash station is standard on professional jobs. Mix small batches of rapid-set materials to avoid waste and chemical burns from hot hydration. Keep children and pets away from repair areas, especially where caustic materials are being mixed or applied. When working near electrical wiring or conduit in walls, have the circuits de-energized before cutting or chipping. If the repair involves overhead work or structural elements, use appropriate fall protection and never work alone where a fall or injury could go unnoticed.
Curing Repaired Concrete
Curing is the process of maintaining adequate moisture and temperature in the repair material so that hydration — the chemical reaction that gives cementitious materials their strength — can continue at the proper rate. Just as with original concrete placement, curing is what determines whether a repair develops its full strength and bond. A repair that is applied correctly but not cured properly will be weaker, more porous, and more prone to cracking and debonding than one that is fully cured.
Why Repair Curing Matters
Repair materials cure in the same way as placed concrete — cement hydration consumes water and generates strength over time. But repairs are often thinner than original concrete pours, which means they lose moisture faster and are more vulnerable to premature drying. Thin layers are particularly sensitive: a 1/4-inch repair layer can lose its mix water to evaporation within hours if not protected, stopping hydration before the material reaches useful strength. Bond development also depends on curing — the interface between repair material and substrate needs sustained moisture to form a strong, lasting bond.
Curing Methods for Repairs
| Method | How It Works | Best For | Duration |
|---|---|---|---|
| Plastic sheeting | Plastic film laid over the repair to trap moisture | Horizontal repairs, small to medium areas, indoor or protected work | Minimum 24 hours; 3–7 days for full strength |
| Curing compound | Spray-on liquid forms a moisture-retaining membrane on the repair surface | Exterior repairs, areas where sheeting is impractical | 7 days minimum for most cementitious materials |
| Wet curing (water misting) | Repair kept continuously moist with periodic water misting | Structural repairs, hot weather, thick repair sections | 3–7 days, keeping the surface continuously damp |
| Wet burlap | Damp burlap laid over the repair and kept wet | Exterior repairs where sheeting or compound is not practical | 3–7 days, burlap kept continuously damp |
| Polymer latex cure | Some polymer-modified materials do not require separate curing — the polymer itself seals the surface | Thin polymer-modified overlays and patch compounds | Follow product instructions — some require no separate cure |
Curing Timeline
Initial set — when the repair material becomes rigid enough to support light traffic — ranges from 3–5 minutes for rapid-set hydraulic cements to 4–6 hours for standard polymer-modified mortars. Full traffic readiness (light foot traffic) typically requires 24 hours for fast-setting products and 48–72 hours for standard products. Full design strength develops over 7 to 28 days depending on the material, temperature, and moisture conditions. Vehicle traffic should be kept off repairs for a minimum of 24 to 48 hours, and ideally until the repair has cured for at least 7 days. Cold temperatures slow curing dramatically — at temperatures below 50 degrees Fahrenheit, cementitious materials cure slowly enough that insulated blankets or heated enclosures may be necessary. The Concrete Curing Basics guide covers curing science and methods in more detail.
Common Repair Mistakes
Most concrete repair failures are not caused by bad products or bad concrete — they are caused by mistakes in diagnosis, preparation, material selection, or curing. The table below lists the most common mistakes, their causes, and how to avoid them.
Mistakes and Prevention
| Mistake | Cause | Result | Prevention |
|---|---|---|---|
| Ignoring the root cause | Repairing the damage without addressing what caused it | The same damage recurs within one to two years | Diagnose the cause before choosing the repair method; address drainage, corrosion, movement, or exposure conditions |
| Inadequate surface preparation | Repairing over loose, contaminated, or unsound material | Bond failure — the repair debonds from the substrate | Remove all unsound material, clean thoroughly, bring to SSD condition, apply bonding agent |
| Wrong material for the application | Selecting a material without considering shrinkage, bond, orientation, or exposure | Cracking, debonding, running on vertical surfaces, freeze-thaw damage | Match material to the repair conditions using the selection criteria above |
| Applying too thick in one layer | Trying to fill a deep repair in a single pass | Uneven curing, shrinkage cracking, debonding, trapped air pockets | Apply in layers no thicker than about 1/4 inch at a time; consolidate each layer |
| Skipping bonding agent | Assuming the repair material will bond without help | Reduced bond strength, especially on vertical and overhead surfaces | Always apply a compatible bonding agent to the prepared surface per product instructions |
| Working on wet or frozen surfaces | Rushing the job without checking substrate conditions | Poor bond, material dilution, freeze damage to fresh repair | Bring the substrate to SSD condition; never apply cementitious materials to frozen surfaces |
| Inadequate curing | Treating application as the end of the job | Weak repair material, reduced bond strength, premature cracking and wear | Cure per manufacturer instructions — plastic sheeting, curing compound, or wet curing for the full specified duration |
| Applying in wrong weather | Working in extreme heat, cold, wind, or direct sun without protection | Rapid moisture loss, shrinkage cracking, cold damage, reduced bond | Work in moderate temperatures (50–90°F); shade the work area; protect from wind; avoid freezing conditions |
| Repairing over corroded rebar without treatment | Patching over active corrosion to make the surface look better | Corrosion continues, expansion continues, the new patch fails in the same location | Clean rebar to near-white metal, apply corrosion inhibitor, use encapsulating repair material |
| Ignoring structural damage | Attempting to repair load-bearing elements without professional assessment | Failed repair, potential structural safety hazard, voided insurance or warranty | Recognize the signs of structural damage (diagonal cracks, active movement, wide cracks) and call a professional |
Two of these mistakes — ignoring the root cause and inadequate surface preparation — account for the majority of premature repair failures. Both are preventable with careful diagnosis and disciplined preparation. The repair process exists for a reason: each step builds on the one before it, and skipping steps creates defects that are invisible until the repair fails.
When to Call a Professional
DIY concrete repair is appropriate for a wide range of non-structural damage, but some situations exceed the scope of homeowner work. Recognizing the difference protects both the structure and the person doing the work.
Signs That Require Professional Evaluation
| Condition | Why It Is Serious | Professional Response |
|---|---|---|
| Diagonal cracks (typically 30–60° from horizontal) | Often indicate structural shear stress, foundation movement, or inadequate support | Engineering assessment; may require structural repair, underpinning, or reinforcement |
| Cracks wider than 1/4 inch that are actively growing | Movement is ongoing — the underlying cause has not been addressed | Identify and address the movement source before repairing the crack |
| Exposed corroded reinforcing steel | Corrosion is an active, progressive process that will continue until addressed | Professional rebar treatment, possible section replacement, corrosion mitigation system |
| Extensive delamination or spalling (more than ~25% of area) | Suggests systemic causes — poor concrete quality, inadequate cover, widespread corrosion | Comprehensive repair strategy, possibly partial or full-depth reconstruction |
| Foundation movement or settlement | Structural integrity of the entire building may be affected | Geotechnical and structural engineering assessment; underpinning or stabilization |
| Overhead or overhead-adjacent damage | Falling concrete poses a safety hazard to people below | Immediate professional attention; temporary protection measures may be needed |
| Damage in load-bearing walls, beams, or columns | Structural capacity may be compromised | Structural engineering evaluation before any repair is attempted |
| Unknown damage cause | If you cannot determine what caused the damage, you cannot choose the right repair | Professional assessment to diagnose the cause and specify the repair |
Professional Repair Methods
Professional concrete repair contractors and engineers have access to methods and equipment beyond the typical DIY scope. Epoxy injection bonds structural cracks and restores load-carrying capacity — the crack is sealed at the surface, injection ports are installed at intervals, and low-viscosity epoxy is injected under pressure to fill the full depth of the crack. Carbon fiber reinforcement wraps or laminates are bonded to the surface of structural elements to add tensile strength without significant section buildup. Shotcrete (pneumatically applied concrete) is used for large-scale repairs, tunnel linings, and complex geometries. Underpinning and stabilization address foundation movement and settlement. These methods require specialized equipment, trained operators, and engineering oversight that are not available in the consumer repair market.
Prevention & Maintenance
The best concrete repair is the one that is never needed. Prevention is far less expensive and disruptive than repair, and a well-maintained concrete surface can last decades without significant intervention. The prevention strategies below address the main damage mechanisms covered in this guide.
Moisture Management
Water is the common thread through most concrete damage mechanisms — it drives freeze-thaw scaling, carries chlorides that corrode rebar, enables alkali-aggregate reaction, and causes drying and plastic shrinkage. Controlling moisture is the single most effective prevention strategy. Seal concrete surfaces with a penetrating sealer to reduce water absorption; maintain drainage away from concrete elements so standing water does not pond against walls or under slabs; fix plumbing leaks and irrigation overspray promptly; and ensure gutters and downspouts direct water well away from concrete surfaces.
Corrosion Prevention
For reinforced concrete exposed to chlorides — driveways treated with deicing salts, coastal structures, pool decks, and any concrete near road salt spray — corrosion prevention is critical. Ensure adequate concrete cover over reinforcing steel (2 inches minimum for most exterior residential applications, more in aggressive environments). Use corrosion-inhibiting admixtures in new concrete or apply them as surface treatments on existing concrete. Minimize deicing salt use; switch to calcium chloride-based products at lower concentrations, or use sand or alternative traction materials instead of salt. Reapply penetrating sealers on a regular schedule to reduce chloride penetration.
Freeze-Thaw Protection
Exterior concrete in cold climates must be air-entrained to survive freeze-thaw cycles. Air-entrained concrete contains 4 to 7 percent entrained air voids by volume — microscopic bubbles that give freezing water room to expand without cracking the concrete. For existing non-air-entrained concrete exposed to freeze-thaw conditions, surface sealing is the primary defense: a good penetrating sealer reduces water absorption and limits the moisture available for freezing damage. Keep deicing salt use to a minimum, ensure drainage keeps standing water off the surface, and inspect and reseal surfaces before each winter season.
Regular Inspection
Annual inspection of concrete surfaces catches damage while it is small and inexpensive to repair. Walk the perimeter of the property and inspect all concrete elements: driveways, walkways, patios, steps, foundation walls, and any structural concrete. Look for new cracks, changes in existing crack width, surface scaling, spalling, rust staining, and delamination (use a hammer to sound-test suspect areas). Check drainage — ensure water flows away from concrete surfaces and does not pond against walls. Inspect sealers and reapply on the schedule recommended by the sealer manufacturer. Document findings with photos and measurements so changes over time are visible.
Maintenance Schedule
| Task | Frequency | Notes |
|---|---|---|
| Visual inspection of all concrete surfaces | Annually (spring recommended) | Look for cracks, scaling, spalling, rust stains, drainage problems |
| Hammer sounding for delamination | Annually, or after severe winters | Tap suspect areas; hollow sounds indicate delamination requiring attention |
| Sealer inspection and reapplication | Every 1–5 years (product-dependent) | Penetrating sealers typically last 1–3 years; film-forming sealers 1–5 years |
| Crack monitoring | Annually | Measure crack widths and photograph; note any changes for professional review |
| Drainage clearing | Twice yearly (spring and fall) | Clear gutters, downspouts, and drainage channels; ensure water flows away from concrete |
| Deicing salt management | Each winter season | Use sparingly; prefer calcium chloride products at low concentration; consider sand for traction |
| Minor crack and spall repair | As needed (promptly when discovered) | Early repair of small defects prevents them from becoming large, expensive problems |
| Professional structural assessment | Every 5–10 years, or when damage warrants | Engineers can assess conditions that are not visible to the untrained eye |
Cost Considerations
Concrete repair costs vary widely depending on the damage extent, repair material, accessibility, and whether professional help is needed. The ranges below provide a general framework for budgeting — actual costs depend on local conditions and specific project requirements.
DIY Material Costs
| Product Type | Package Size | Typical Price Range | Coverage |
|---|---|---|---|
| Liquid crack filler | 1 quart | $4–$10 | Up to 38 linear feet of 1/2-in wide, 1/4-in deep cracks |
| Self-leveling sealant (caulk tube) | 10.1 oz cartridge | $6–$12 | Varies by crack width; roughly 20–30 linear feet of typical cracks |
| Self-leveling sealant (XL tube) | 29 oz cartridge | $12–$22 | Roughly 60–90 linear feet of typical cracks |
| Premixed concrete patch | 1 quart to 1 gallon | $8–$25 | Varies by spall size; a quart covers small patches |
| Polymer-modified repair mortar | 10–50 lb bag | $10–$50 | A 20-lb bag covers roughly 0.5–1 square foot at 1/2-inch depth |
| Hydraulic cement (rapid-set) | 4–50 lb bag | $8–$35 | A 10-lb bag covers small leaks and cracks |
| Bonding agent | 1 quart to 1 gallon | $8–$30 | 1 quart covers roughly 40–80 square feet depending on porosity |
| Backer rod | Various diameters, 50-ft coil | $5–$15 | 50 feet covers a long run of crack repair |
On a per-linear-foot basis, crack filler products range from about $0.34 to $0.75 per foot depending on the product. Spall repair materials cost roughly $3 to $10 per square foot at typical residential repair depths. These material costs do not include tools — if you do not already own a caulking gun, trowel, mixing drill, or pressure washer, add those to the budget for first-time repairs.
Professional Repair Costs
Professional concrete repair typically ranges from $5 to $15 or more per square foot, depending on the damage type and extent, accessibility, regional labor rates, and whether structural work is involved. Crack injection (epoxy or polyurethane) for foundation cracks commonly runs $250 to $800 per crack depending on length and accessibility. Extensive spall repair on foundation walls or structural elements can exceed $20 per square foot when rebar treatment, formwork, and engineered materials are required. The cost drivers are the area of damaged concrete that must be removed and replaced, the type of repair material required, whether rebar treatment or structural reinforcement is needed, and the accessibility of the repair location. The table below provides general ranges for common professional repair types.
| Repair Type | Typical Cost Range | Cost Drivers |
|---|---|---|
| Crack injection (foundation, per crack) | $250–$800 | Crack length, accessibility, whether water infiltration is present |
| Spall repair (residential flatwork) | $5–$12 per sq ft | Depth of spall, area size, rebar treatment needs |
| Spall repair (structural elements) | $10–$25+ per sq ft | Structural requirements, access difficulty, engineered materials |
| Surface resurfacing (driveway) | $3–$7 per sq ft | Area size, surface preparation, sealer included or not |
| Epoxy injection (structural cracks) | $400–$1,200+ per crack | Crack depth and length, structural requirements, engineering oversight |
| Carbon fiber reinforcement | $30–$80 per linear foot | Wall or beam dimensions, number of layers, access |
| Foundation wall repair (extensive) | $2,000–$10,000+ | Extent of damage, waterproofing needs, structural requirements |
Get multiple quotes for professional repairs — prices vary significantly between contractors. Ask each contractor about their repair method, the materials they will use, the warranty they offer, and whether they will address the root cause of the damage, not just the visible symptoms. A cheaper repair that fails in two years is not a bargain.
Frequently Asked Questions
Concrete cracks for several reasons: drying shrinkage as water evaporates during curing, plastic shrinkage when the surface dries too quickly after placement, structural loads that exceed the concrete's tensile strength, freeze-thaw cycles that expand water trapped in pores, corrosion of embedded reinforcing steel that expands and pressures the concrete from within, alkali-aggregate reaction between cement alkalis and reactive silica in the aggregate, and ground settlement or movement beneath the slab. Most cracks in residential concrete are caused by shrinkage and thermal movement rather than structural overload, but diagonal or actively moving cracks can indicate structural problems that require professional evaluation.
The repair method depends on the crack width and location. For hairline cracks under 1/8 inch, clean the surface and apply a self-leveling liquid crack filler directly from the bottle. For cracks between 1/8 and 1/2 inch, clean with a wire brush, insert a backer rod if the crack is deeper than 1/2 inch, and apply a polyurethane or latex sealant with a caulking gun. For cracks wider than 1/2 inch, remove any loose material, square the edges, dampen the surface, apply a bonding agent, and pack in a premixed concrete patch or polymer-modified mortar with a trowel. For active structural cracks wider than 1/4 inch that are still moving, have the concrete assessed by a professional before attempting repair.
Crack fillers and patches serve different purposes. Crack fillers are thin, flexible sealants — usually polyurethane, latex, or silicone-based — designed to fill narrow cracks and joints while remaining flexible enough to accommodate ongoing movement. They are applied with a caulking gun or poured directly from a bottle and are not intended to fill deep or wide voids. Concrete patches are thicker, cementitious or polymer-modified mortar mixtures designed to fill larger spalls, deep cracks, and surface voids. They are trowel-applied in layers, bond to the existing concrete, and harden to a structural finish. Use a crack filler for hairline and small cracks; use a patch for spalls, deep damage, and cracks wider than about 1/2 inch.
Spalling repair starts with removing all loose and unsound concrete — chip away with a hammer and chisel until you reach solid, sound material. Square the edges of the repair area, undercut slightly to give the patch mechanical key, and clean thoroughly with a pressure washer or stiff brush. Dampen the surface to a saturated-surface-dry condition so the existing concrete does not suck moisture out of the fresh repair material. Apply a bonding agent to the prepared area, then pack in a polymer-modified repair mortar or rapid-set hydraulic cement with a trowel, working from the edges inward to eliminate air pockets. For deep spalls over 1 inch, build up the repair in layers no thicker than about 1/4 inch at a time. Finish the surface to match the surrounding texture and cure per the manufacturer's instructions — typically 24 hours to 7 days depending on the product.
DIY concrete repair is appropriate for non-structural damage: hairline and small cracks, surface scaling, minor spalling, and cosmetic defects on flatwork such as driveways, patios, and walkways. These repairs use readily available products, standard hand tools, and techniques that most homeowners can master with careful preparation. Hire a professional when the damage is structural — diagonal cracks, cracks wider than 1/4 inch that are actively growing, exposed corroded reinforcing steel, extensive delamination covering more than about 25 percent of the surface, or any movement suggesting foundation settlement. Professional repair methods such as epoxy injection, carbon fiber reinforcement, and shotcrete application require specialized equipment and expertise beyond typical DIY scope.
The lifespan of a concrete repair depends on the quality of the preparation, the suitability of the repair material, whether the root cause was addressed, and the exposure conditions. Well-executed repairs using appropriate materials — proper surface preparation, bonding agent, correct material selection, and adequate curing — typically last 10 to 20 years on residential flatwork exposed to normal weather and traffic. Repairs that ignore the underlying cause of the damage — such as patching over corroded rebar without addressing the corrosion, or filling a crack caused by ongoing settlement without stabilizing the ground — often fail within one to two years. The key to long repair life is diagnosing why the damage occurred and addressing that cause before applying the repair.
There is no single best product — the right choice depends on the crack type and location. For hairline cracks on horizontal surfaces, a self-leveling polyurethane sealant such as Sikaflex or a latex-based pourable filler like Quikrete Concrete Crack Seal offers easy application and flexible performance. For cracks in foundation walls and vertical surfaces, a two-part epoxy or polyurethane injection system such as PC-Concrete Epoxy or a RadonSeal foundation crack repair kit provides structural bond and water resistance. For large cracks and spalls, a premixed polymer-modified patch compound such as Red Devil Premixed Concrete Patch or Rust-Oleum Concrete Patch & Repair gives trowel-applied durability. For rapid-set repairs in wet or cold conditions, a hydraulic cement such as UGL Drylok Fast Plug sets in minutes. Match the product to the crack size, orientation, exposure, and whether flexibility or structural strength is the priority.
DIY concrete repair material costs range from about $4 for a small tube of crack filler to $50 or more for a bag of structural repair mortar, depending on the product and quantity needed. On a per-linear-foot basis, crack filler products cost roughly $0.34 to $0.75 per foot of crack repaired, depending on the product. Professional concrete repair typically costs $5 to $15 or more per square foot, depending on the damage extent, accessibility, whether structural work is involved, and regional labor rates. The cost drivers are the area of damaged concrete that must be removed and replaced, the type of repair material required, and whether rebar treatment or structural reinforcement is needed. Extensive spalling or structural crack repair on foundations and walls is at the higher end of the range.
References
- Concrete Network, Concrete Repair: Best Products & How to Repair, concretenetwork.com — damage evaluation methodology, root causes of concrete deterioration, repair material selection criteria, and repair resources.
- American Concrete Institute, ACI 546R — Guide to Concrete Repair, concrete.org — comprehensive guide to concrete repair principles, methods, materials, and quality assurance.
- American Concrete Institute, ACI 224R — Control of Cracking in Concrete Structures, concrete.org — crack causes, crack control, and repair considerations for concrete structures.
- International Concrete Repair Institute, Concrete Repair Manual, icri.org — comprehensive reference on concrete repair assessment, materials, methods, and specifications.
- U.S. Bureau of Reclamation, Guide to Concrete Repair, usbr.gov — damage causes, repair methods, surface preparation, and material recommendations for concrete rehabilitation.
- Bob Vila, The Best Concrete Crack Fillers of 2026 for DIY Repairs, Expert-Tested, bobvila.com — product comparison, testing methodology, application guidance, and cost data for concrete crack fillers.
- Five Star Products, Concrete Rehab & Repair Solutions: Structural, Overlays, and Surface, fivestarproducts.com — structural repair product specifications including compressive strengths, working times, pour depths, and application methods.
- Portland Cement Association, Concrete Repair, cement.org — repair principles, material types, and best practices for cementitious concrete repair.
- ASTM International, ASTM C1583 — Standard Test Method for Tensile Strength of Concrete Surfaces and the Bond Strength or Tensile Strength of Concrete Repair and Overlay Materials by Direct Tension, astm.org — field test method for evaluating bond strength of repair materials.
- Sakrete, 5 Key Considerations for Concrete Repairs, sakrete.com — practical repair considerations including substrate preparation, material selection, and application guidance.
Disclaimer: This guide provides general educational information about concrete repair and is not engineering or construction advice. Actual repair requirements vary by concrete mix, damage type and extent, exposure conditions, structural loading, and local building codes. Damage evaluation is inherently limited without laboratory testing and professional engineering assessment. Structural concrete, foundation repairs, and repairs to load-bearing elements must follow the project specification, applicable building codes, and manufacturer guidelines. Always verify repair requirements with your local building department and a qualified concrete repair professional before starting work.