
ON THIS PAGE:
What Is Concrete Subgrade?
Concrete subgrade is the native in-situ soil beneath a concrete slab — the ground you start with after stripping topsoil and vegetation. It is the foundation layer that carries 100 percent of the slab's load, transferred downward through the concrete, any gravel base, and into the earth itself. Every decision about subgrade preparation — how deep to strip, how much to compact, what moisture content to target — determines whether the slab above performs for decades or cracks within a few years.
Most people think of concrete as the structure. In reality, the subgrade is the structure. Concrete is a surface finish; the soil beneath it does the heavy lifting. A 4-inch residential slab on a properly prepared subgrade can support a family home for the life of the building. The same slab on uncompacted fill, saturated clay, or organic soil will crack, settle, and heave — and the repair is far more expensive than doing the subgrade right the first time.
The Four Layers Beneath a Concrete Floor
The terms used in concrete construction refer to specific layers, each with a distinct function. Confusing them is common, and the confusion leads to wrong material orders and failed slabs. The table below defines each layer.
| Layer | What It Is | Material | Function |
|---|---|---|---|
| Subgrade | The in-situ soil, stripped and compacted | Native ground (sand, gravel, clay, silt) | Carries the slab load; primary support |
| Subbase | Engineered layer on top of subgrade | Crushed stone or gravel (typically #57) | Capillary break, drainage, uniform platform |
| Base course | Material directly under the slab | Often the same as subbase in residential work | Smooth, level surface for forming and pouring |
| Vapor barrier | Sheet placed between subbase and slab | 6-mil minimum polyethylene | Retards moisture vapor from entering the slab |
| Concrete slab | The finished floor surface | 3,000–4,000 PSI concrete | Walking/driving surface; distributes point loads |
In residential construction, the terms "subbase" and "base course" are often used interchangeably because the same layer of crushed stone serves both functions — it is the engineered layer above the subgrade and the material directly under the concrete. On commercial and industrial projects, the two may be separate layers with different specifications.
Why Subgrade Preparation Is the Most Important Step
The Portland Cement Association estimates that the majority of premature concrete slab failures trace back to subgrade problems rather than the concrete itself. Non-uniform support — soft spots under one section of the slab, hard spots under another — creates differential settlement. The slab bridges over the soft area, bears on the hard area, and cracks under its own weight or under traffic. This is not a concrete problem; it is a subgrade problem, and no amount of reinforcement or higher PSI will fix it.
Moisture is the second subgrade enemy. Clay soils expand when wet and shrink when dry — a cycle that can move the subgrade several inches over a year. Slabs on expansive clay without adequate moisture control crack from the bottom up as the soil pulls away and then pushes back. The fix is moisture management at the subgrade level: compaction at the right moisture content, capillary break with gravel, and vapor barrier where moisture-sensitive flooring is installed above.
Soil Types and How to Identify Yours
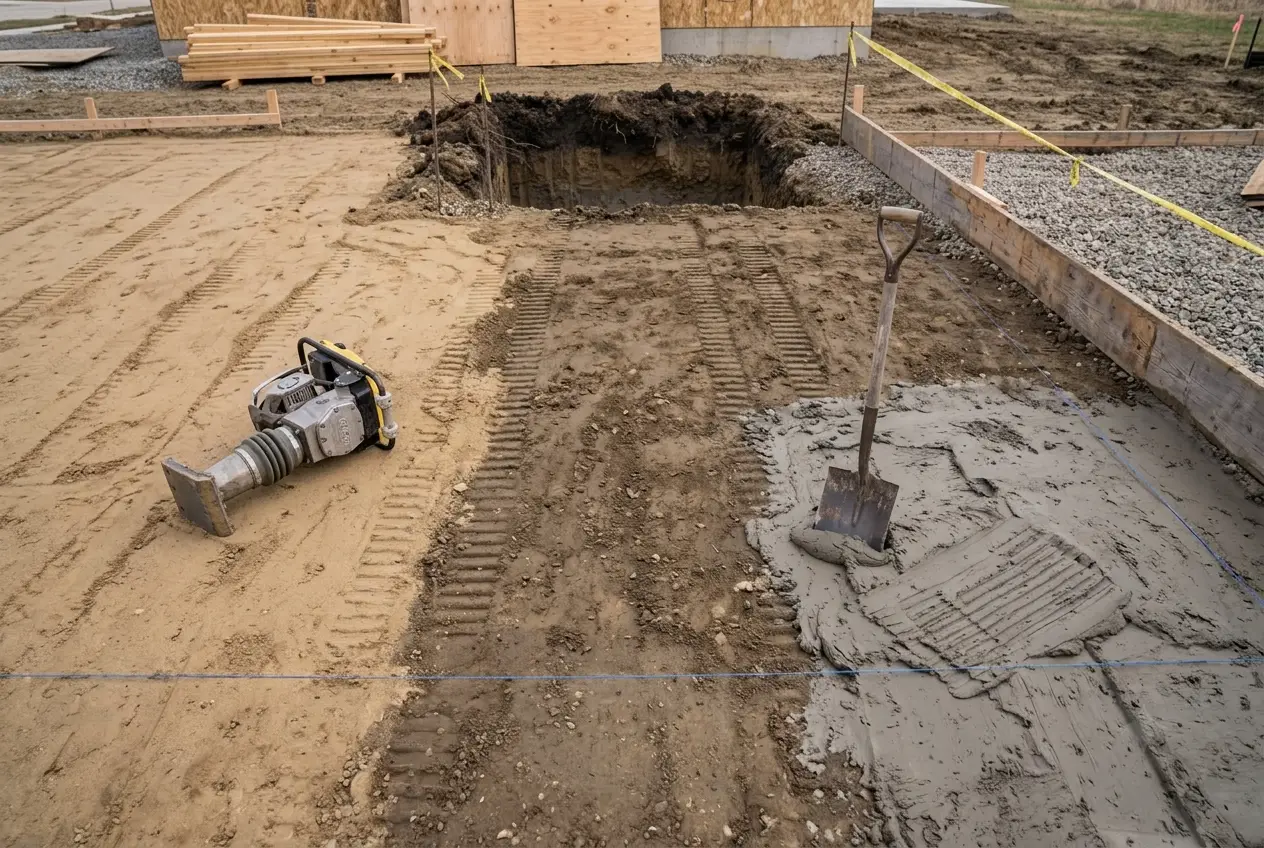
Not all soils behave the same way under a concrete slab. Sand and gravel drain freely and compact easily. Clay holds water, expands and shrinks with moisture changes, and is the most common cause of subgrade failure. Silt falls in between — it drains poorly and compacts unpredictably. Knowing what soil you have determines how you prepare it, how thick the gravel base needs to be, and whether you need a vapor barrier or geotextile fabric.
Soil Classification Table
The table below summarizes the soil types most common under residential slabs, using both the Unified Soil Classification System (USCS) and the AASHTO system. Support rating describes how well the soil carries concrete slab loads after proper compaction.
| Soil Type | USCS | AASHTO | Support | Frost Potential | CBR Range |
|---|---|---|---|---|---|
| Crushed stone | GW / GP | A-1-a | Excellent | None | 30–80 |
| Gravel | GW / GP | A-1-a | Excellent | Very slight | 30–80 |
| Sand | SW / SP | A-1-b / A-3 | Good | Very slight | 10–40 |
| Silty sand | SM / GM | A-2-4 / A-2-5 | Moderate | Moderate | 5–30 |
| Silt | ML | A-4 / A-5 | Poor | Very high | 1–15 |
| Clay | CL | A-6 | Very poor | High | 1–15 |
| Fat clay | CH | A-7-5 / A-7-6 | Very poor | High | 1–10 |
| Elastic silt | MH | A-5 | Very poor | Very high | 1–10 |
| Organic soil | OH / Pt | — | Unsuitable | — | — |
CBR stands for California Bearing Ratio — a laboratory test that measures a soil's resistance to penetration under load. A CBR of 10 or higher is considered adequate for residential slab subgrade; a CBR below 5 indicates soil that is too weak to support a slab without improvement.
How to Identify Your Soil at Home
You do not need a laboratory to get a working identification of your subgrade soil. Two simple tests give you enough information to make the right decisions about preparation and base depth.
The Jar Test
Fill a clear jar one-third full with soil from the exposed subgrade after stripping topsoil. Add water until the jar is two-thirds full, add a teaspoon of salt to help settle the particles, and shake vigorously for a full minute. Set the jar on a flat surface and let it settle undisturbed for 24 hours.
After 24 hours, the particles will have settled into visible layers. Sand settles first and sits at the bottom — it is the coarsest and heaviest. Silt settles next in the middle. Clay remains at the top, still suspended in the water. Measure the thickness of each layer. If sand makes up more than half the total, you have a granular subgrade that drains well and compacts easily. If clay makes up more than a quarter, you have a cohesive subgrade that needs moisture control and likely a thicker gravel base.
The Ribbon Test
Take a moist sample of subgrade soil and squeeze it between your thumb and forefinger, pushing it out into a ribbon. A soil that forms a long, flexible ribbon (more than 2 inches) is clay — cohesive, plastic, and prone to expansion. A soil that crumbles immediately or forms a short, brittle ribbon is sand or silt — granular, free-draining, and easy to compact. A soil that forms a short, slightly flexible ribbon (1 to 2 inches) is a silty clay or clayey sand — intermediate behavior that may need moderate moisture control.
Unsuitable Soils: What Must Be Removed or Stabilized
Some soils cannot be prepared to serve as a concrete slab subgrade no matter how well they are compacted. These materials must be excavated and replaced with approved fill, or chemically stabilized to reduce their problematic properties.
| Soil Condition | USCS | AASHTO | Why It Fails | Standard Fix |
|---|---|---|---|---|
| Peat / organic soil | Pt | — | Decomposes, loses volume, highly compressible | Remove completely; replace with granular fill |
| Organic silt/clay | OH | — | Organic matter decomposes; high moisture sensitivity | Remove; replace with approved fill |
| Fat clay | CH | A-7-5 / A-7-6 | High plasticity; expands significantly when wet, shrinks when dry | Moisture control, lime/cement stabilization, or excavation |
| Elastic silt | MH | A-5 | Low strength, high compressibility, frost-susceptible | Replace with granular fill or stabilize |
| Saturated fill | Various | — | Cannot be compacted to density; will continue to settle | Dewater, undercut, replace with compacted fill |
| Topsoil | — | — | Contains organic matter; decomposes under slab | Strip completely before any preparation begins |
What Goes Under a Concrete Slab
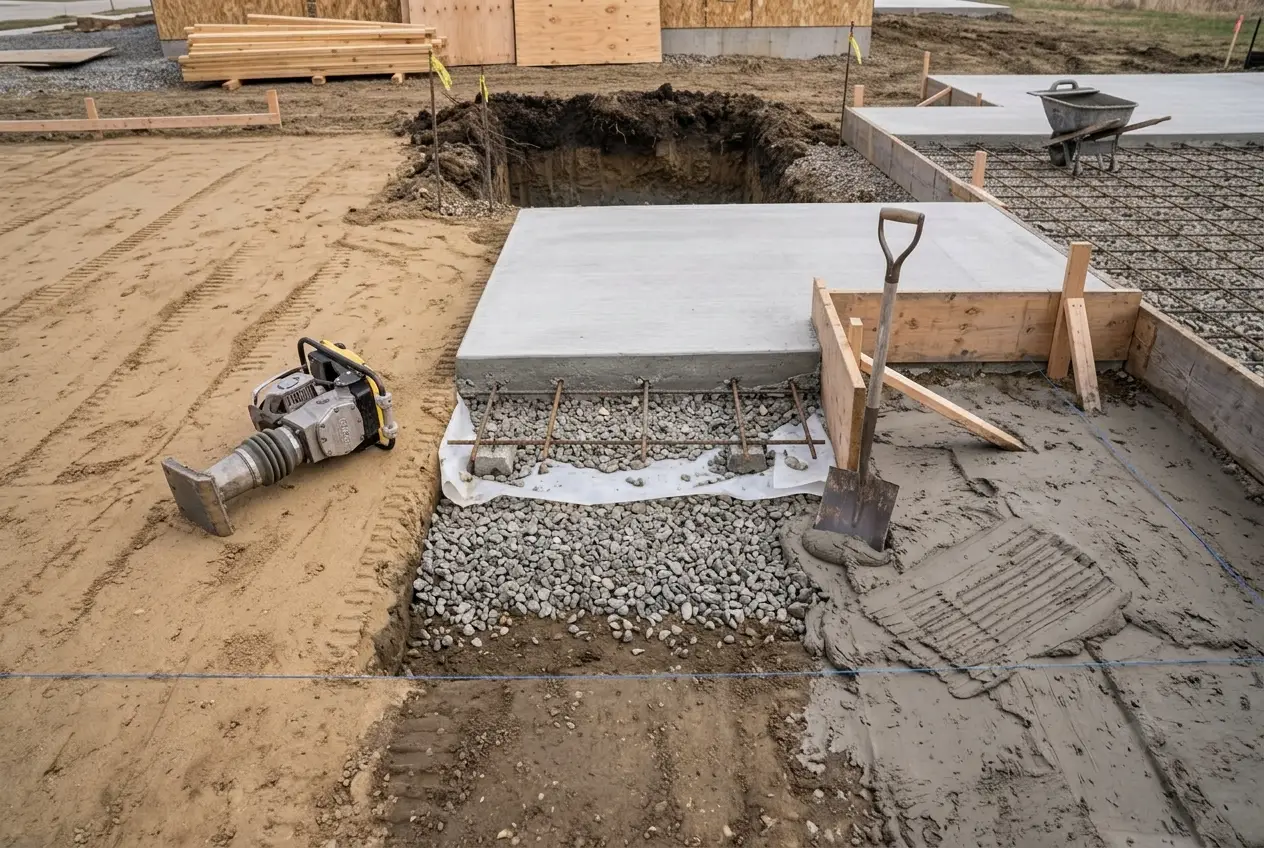
A concrete slab is not a single material — it is a layered system, and each layer has a specific job. The layer stack below represents the standard residential section for a slab on grade, such as a garage floor, basement slab, or patio. Understanding what each layer does and why it is there helps you order the right materials and prepare the subgrade correctly.
Standard Residential Layer Stack
| Layer (bottom to top) | Typical Thickness | Material | Function |
|---|---|---|---|
| 1. Subgrade | Native (undisturbed or compacted) | In-situ soil | Primary load support; carries slab and everything above it |
| 2. Subbase | 4–6" residential; 8"+ on clay | #57 crushed stone or gravel | Capillary break, drainage, uniform working platform |
| 3. Vapor barrier | 6-mil minimum | Polyethylene sheet | Retards moisture vapor from entering slab from below |
| 4. Reinforcement | Mid-depth on chairs | Rebar, wire mesh, or fiber | Controls cracking; carries tensile loads |
| 5. Concrete slab | 4–6" residential | 3,000–4,000 PSI concrete | Walking/driving surface; distributes point loads to subgrade |
When the Subbase Can Be Skipped
The subbase is the most commonly debated layer in residential concrete work. The short answer: in most cases you need it, but there are situations where it can be omitted.
Skip the subbase when: the subgrade is well-drained native soil (sand or gravel, not clay), it has been stripped of topsoil, compacted to 95 percent Standard Proctor, and proof-rolled with no soft spots. In this case the compacted native soil serves as both subgrade and base — it is already granular, already dense, and already free-draining.
Always install a subbase when: the subgrade is clay or silt, the site is poorly drained, the ground is filled or disturbed, you are pouring a driveway or garage slab that will carry vehicles, or the slab will receive moisture-sensitive flooring above. In these cases the gravel base is not optional — it is what keeps the slab dry, level, and crack-free.
As a practical rule: if you are pouring anything larger than a small shed pad or garden stepping-stone, install a gravel subbase. The cost of 4 to 6 inches of crushed stone is a small fraction of the cost of repairing a cracked, settled slab.
Subgrade Preparation Sequence
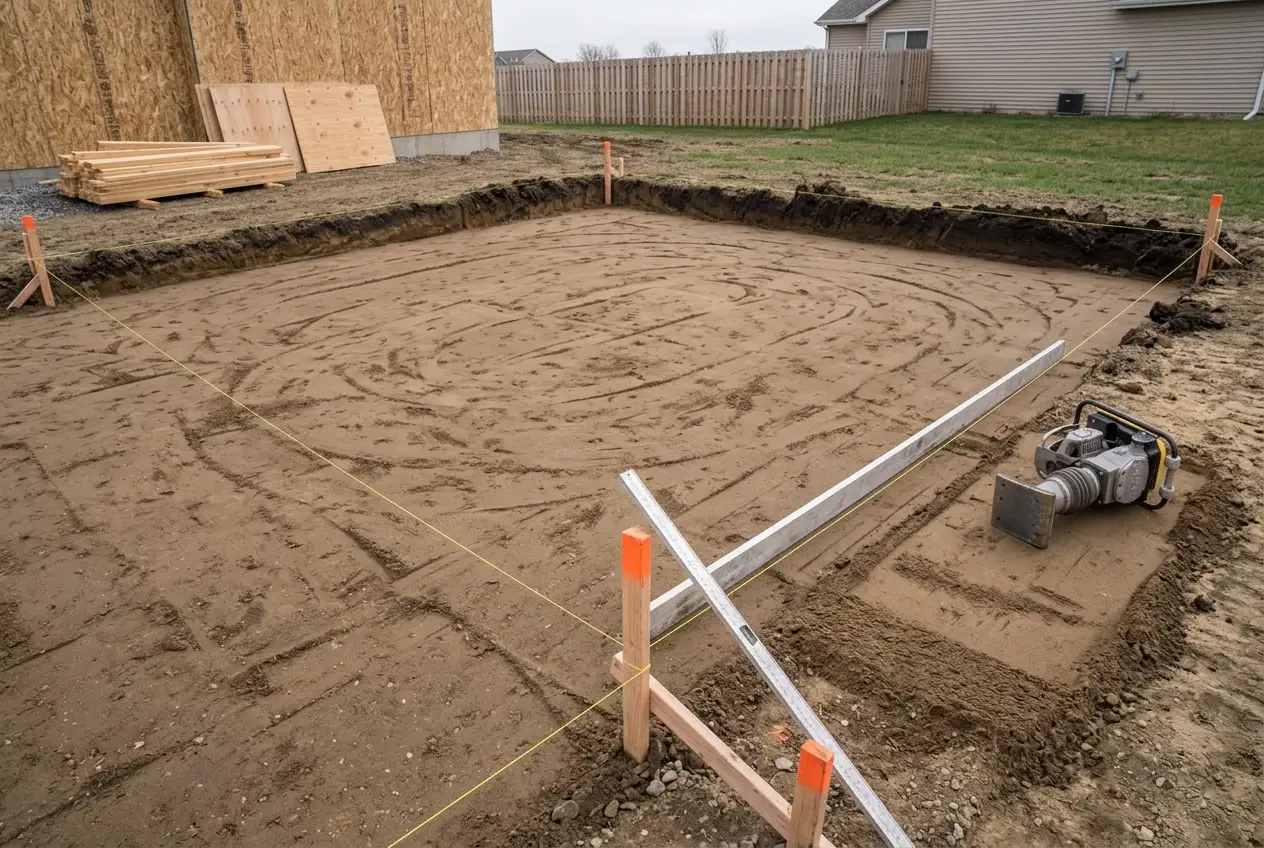
Subgrade preparation follows a specific sequence. Skipping steps — especially stripping topsoil and moisture conditioning — is the most common cause of subgrade failure. The sequence below is the standard practice for residential concrete slab work, drawn from ACI 302.1R, PCA guidance, and contractor specifications.
Step-by-Step Preparation
- Strip topsoil, vegetation, roots, and organic material. Excavate 6 to 12 inches (150–300 mm) below finished grade within the slab footprint and at least 500 mm (about 18 inches) beyond the slab perimeter. Topsoil contains organic matter that decomposes under a slab, creating voids and settlement.
- Remove stones larger than 3 inches. Large stones in the subgrade create point loads under the slab and prevent uniform compaction. They must be dug out, not compacted over.
- Identify soft spots, saturated zones, and variable material. Walk the stripped subgrade and probe it — a steel rod pushed into the ground reveals soft or wet areas that need to be undercut and replaced. Saturated clay that squelches underfoot will never compact to density.
- Remove soft or unsuitable material. Excavate soft spots to firm, competent soil. Replace with approved granular fill, compacted in lifts. Do not simply cover soft spots with gravel — the gravel will settle into the soft soil over time.
- Moisture-condition the subgrade to optimum. Add water if the soil is too dry; scarify and aerate if it is too wet. The target is within ±2 percent of the optimum moisture content for cohesive soils, ±3 percent for granular soils.
- Compact in lifts to the specified relative density. For residential slabs, this is typically 95 percent Standard Proctor. Lift thickness depends on the compaction equipment — see the lift thickness table below.
- Field density-test each lift. A nuclear density gauge or sand cone test confirms the lift meets the compaction specification before the next lift is placed. Do not rely on appearance alone.
- Fine-grade to the finished elevation tolerance. Grade the compacted subgrade to within ±½ inch of the designed elevation. This tolerance ensures the concrete slab has uniform thickness — every high spot in the subgrade steals slab thickness, and every low spot wastes concrete.
- Proof roll with a loaded truck. Drive a heavy vehicle (16–20 ton tandem dump truck) slowly across the subgrade. Look for pumping, rutting, or surface depression greater than ½ inch. Correct any soft spots found.
- Place the subbase in lifts, compact, and test. Spread crushed stone in 4 to 6-inch loose lifts, compact each lift, and verify density. The subbase should extend at least 6 inches beyond the slab edge on all sides.
- Place the vapor barrier (if required). Lay 6-mil or heavier polyethylene sheet on top of the compacted subbase, with seams overlapped by at least 6 inches and sealed with tape.
- Place reinforcement on chairs. Set rebar or wire mesh on supports that elevate it to mid-depth of the slab — never on the ground, never on the vapor barrier.
Topsoil Stripping: The Step Nobody Wants to Do
Topsoil removal is the most commonly skipped step in residential subgrade preparation, and the most consequential. Topsoil is organic soil — it contains decomposing plant material, root fragments, and microorganisms that continue to break down for years after the slab is poured. As the organic matter decomposes, it creates voids in the subgrade. The slab loses support, cracks, and settles into the voids.
The standard stripping depth is 6 to 12 inches, depending on how deep the topsoil extends. In forested or heavily vegetated lots, topsoil can be 12 to 18 inches deep. Use a probe or a shovel to find the transition from dark, organic topsoil to lighter, mineral subgrade soil — strip to that transition and a few inches below it.
Elevation Tolerance: Why ±½ Inch Matters
Finished subgrade elevation should be within ±½ inch of the designed grade. This is not a cosmetic requirement — it directly affects slab thickness. If the subgrade is ½ inch high in one area, the concrete slab in that area is ½ inch thinner than specified. A 5-inch slab designed for driveway loading that is only 4½ inches thick over a soft spot will crack under vehicle loads. Conversely, if the subgrade is ½ inch low, you pour ½ inch more concrete than planned across that area — wasted material and wasted money.
Compaction Basics: Proctor Test and Relative Density
Compaction is the process of densifying soil by removing air voids through mechanical effort — rolling, tamping, or vibrating. Denser soil is stronger soil: it carries more load, settles less, and resists water infiltration better. The question is always: how dense is dense enough? The answer comes from the Proctor test.
What Is the Proctor Test?
The Proctor test is a laboratory procedure that determines the maximum dry density a given soil can achieve and the moisture content at which that density occurs. A soil sample is compacted into a mold at several different moisture contents. At each moisture content, the dry density is measured and plotted on a graph. The curve rises to a peak — the maximum dry density — at a specific moisture content called the optimum moisture content (OMC).
Field compaction is then measured as a percentage of that laboratory maximum. When a specification says "95 percent relative density," it means the compacted subgrade in the field has achieved 95 percent of the maximum dry density found in the Proctor test.
Standard Proctor vs Modified Proctor
There are two Proctor test methods, and the difference matters because they produce different maximum densities for the same soil.
| Parameter | Standard Proctor | Modified Proctor |
|---|---|---|
| Test standard | ASTM D698 / AASHTO T99 | ASTM D1557 / AASHTO T180 |
| Compaction energy | 600 kN·m/m³ | 2,700 kN·m/m³ (about 4.5× more) |
| Represents | Light to moderate compaction equipment | Heavy compaction equipment |
| Maximum dry density | Lower | Higher |
| Optimum moisture content | Higher | Lower |
| Typical use | Residential subgrade, light traffic | Commercial/industrial base, heavy traffic |
| Specified RC (typical) | 95% for residential | 95–98% for commercial/industrial |
The key practical point: 95 percent Standard Proctor and 95 percent Modified Proctor are not the same density. Because the Modified Proctor uses much more energy, its maximum density is higher — so 95 percent of the Modified maximum is a denser, harder-to-achieve target than 95 percent of the Standard maximum. Residential subgrade specifications almost always reference the Standard Proctor; commercial and industrial specifications reference the Modified Proctor.
What 95 Percent Means in Practice
When a subgrade is compacted to 95 percent Standard Proctor, the soil particles are packed tightly enough that further compaction under service loads produces minimal settlement. At 95 percent, the air voids are small and disconnected — water cannot easily migrate through the soil matrix, and the soil's bearing capacity is near its maximum for the given moisture content. Below 90 percent, air voids remain connected, water can move freely through the subgrade, and the soil is susceptible to both settlement and frost heave.
Compaction Targets by Project Type
The compaction target depends on what the slab will carry and how it will be used. Residential slabs on grade — patios, garage floors, basement floors — have different requirements than industrial warehouse floors or highway pavement. The table below compiles the most commonly specified targets from PCA, ASCC, Concretemetric, and DOT specifications.
| Project Type | Subgrade RC | Subbase RC | Test Standard | Subbase Thickness |
|---|---|---|---|---|
| Residential house slab | 95% Std Proctor | 95% Std Proctor | ASTM D698 | 4" (100 mm) |
| Residential driveway | 95% Std Proctor | 95% Std Proctor | ASTM D698 | 6" (150 mm) |
| Residential patio / walkway | 95% Std Proctor | 95% Std Proctor | ASTM D698 | 4" (100 mm) |
| Light commercial | 95% Mod Proctor | 98% Mod Proctor | ASTM D1557 | 4–6" |
| Industrial / warehouse | 98% Mod Proctor | 98–100% Mod Proctor | ASTM D1557 | 6–8" |
| Pavement / hardstand | 95–98% Mod Proctor | 98% Mod Proctor | ASTM D1557 | 6–10" |
| Heavy industrial / port | 100% Mod Proctor | 100% Mod Proctor | ASTM D1557 | 8–12" |
For most homeowners reading this page, the residential row is the one that applies. A patio, walkway, or shed pad needs 95 percent Standard Proctor on the subgrade and 4 inches of compacted gravel. A driveway or garage slab needs the same compaction target but 6 inches of gravel to handle vehicle loads.
Testing frequency also scales with project size. A residential patio might require one density test per 200 square feet. A commercial warehouse floor might require one test per 100 square feet. The test results are recorded and become part of the project documentation — they are what proves the subgrade was prepared to specification.
Moisture Content and the OMC Window
Soil compacts best at a specific moisture content — not too wet, not too dry. Too dry, and the soil particles resist rearrangement; they lock together and cannot be packed tighter. Too wet, and the water acts as a lubricant that pushes particles apart, preventing them from reaching maximum density. The optimum moisture content (OMC) is the sweet spot where the soil achieves its highest dry density for a given compactive effort.
The OMC Window
In the field, you do not need to hit the OMC exactly — you need to be within an acceptable window around it. The standard window is:
| Soil Type | Target Window | Action if Too Dry | Action if Too Wet |
|---|---|---|---|
| Cohesive (clay, silty clay) | OMC ±2% | Add water with water truck; allow 2–4 hours for absorption before re-compacting | Scarify with disc or tiller; aerate by aerating in windrows; re-check moisture before compacting |
| Granular (sand, gravel, silty sand) | OMC ±3% | Add water; incorporate with compactor passes | Scarify and aerate; the wider window for granular soils means moderate wetness is more tolerable |
Why Moisture Matters More Than Compaction Effort
The relationship between moisture content and density is nonlinear. At moisture contents below OMC, increasing compactive effort produces diminishing returns — the soil simply cannot be packed tighter because the particles are locked in place. At moisture contents above OMC, additional compactive effort can actually decrease density, as the water pressure pushes particles apart (a condition called "pumping" in cohesive soils). This is why moisture conditioning comes before compaction in the preparation sequence: get the moisture right first, then compact.
For clay soils, the moisture content at which the soil is compacted also determines its behavior after the slab is poured. Clay compacted at or slightly above OMC will expand less when it becomes wet in service, because it is already near its maximum moisture state. Clay compacted too dry will absorb water from rain and groundwater, expand, and push upward against the slab — the classic cause of heaved and cracked concrete floors.
Lift Thickness and Compaction Equipment
Compaction is only effective within a limited depth beneath the compaction equipment. A plate compactor densifies soil effectively only a few inches below its base — try to compact a 12-inch lift with a plate compactor and the bottom half will never reach the specified density. This is why subgrade and subbase are placed in lifts, with each lift compacted and tested before the next is placed.
Maximum Lift Thickness by Equipment
| Equipment | Max Loose Lift | Approximate Compacted Thickness | Best For |
|---|---|---|---|
| Padfoot roller (cohesive soils) | 6" (150 mm) | 5" (125 mm) | Clay subgrade; large areas |
| Vibratory roller (granular soils) | 8" (200 mm) | 7" (175 mm) | Sand, gravel, crushed stone base |
| Plate compactor | 4–6" (100–150 mm) | 3–5" | Residential patios, small slabs, backfill |
| Hand tamper | 2–3" (50–75 mm) | 1.5–2.5" | Tight spaces, post holes, edges |
| Jumping jack (rammer) | 6–8" (150–200 mm) | 5–7" | Cohesive soils, narrow trenches |
Matching Equipment to Project Size
For a residential patio or small slab (under 500 square feet), a walk-behind plate compactor is adequate for both subgrade and subbase. For a driveway or garage slab (500 to 1,500 square feet), a walk-behind vibratory roller or a larger plate compactor speeds the work considerably. For full-building slabs or commercial work, a ride-on vibratory roller is standard.
The compaction equipment must also match the soil type. Sheepsfoot rollers (padfoot rollers with protruding feet) are designed for cohesive soils — the feet penetrate the lift and knead the clay particles together. Smooth-drum vibratory rollers are designed for granular soils — the vibration rearranges sand and gravel particles into a dense matrix. Using the wrong equipment for the soil type is one of the most common reasons subgrade compaction fails inspection.
Base Material Selection
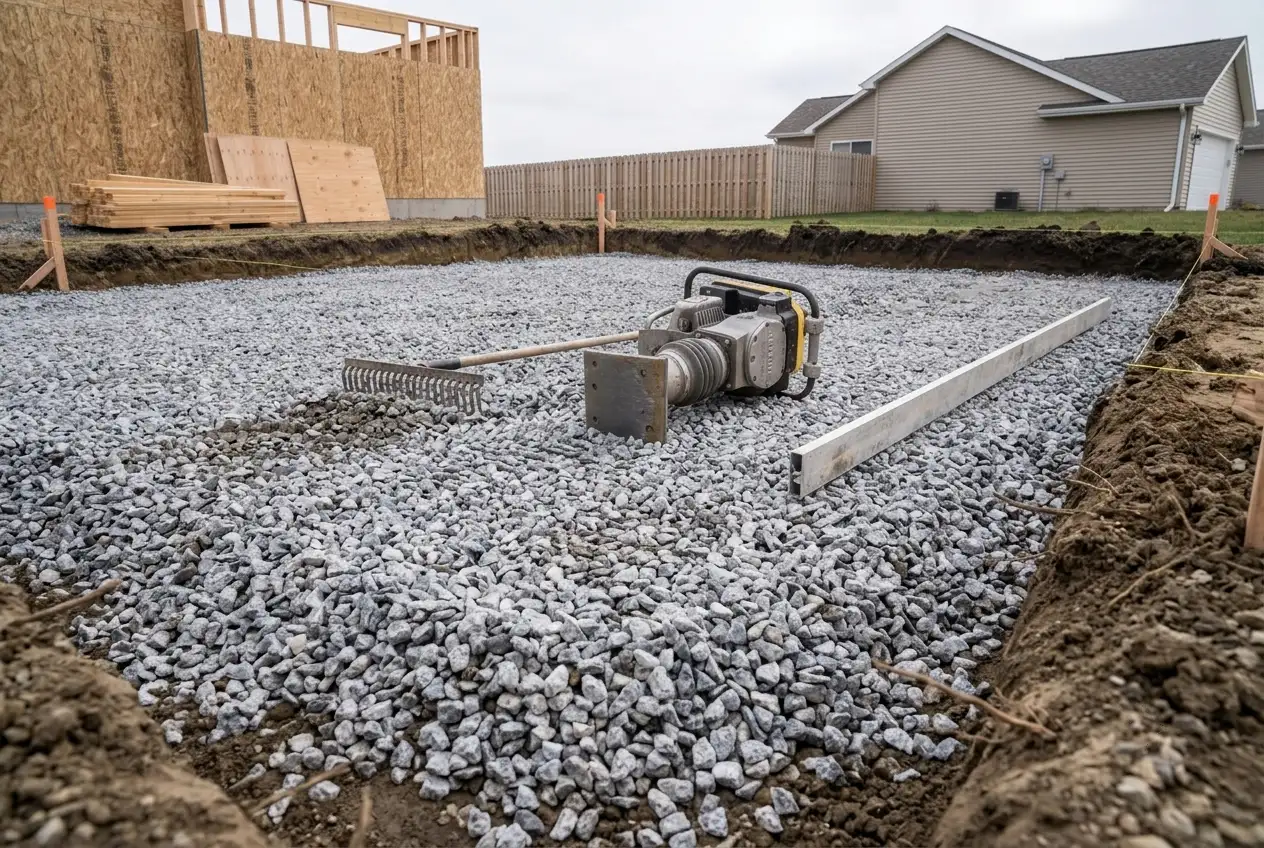
Not all gravel works equally well under a concrete slab. The base material selection affects drainage, compaction quality, capillary break performance, and long-term slab stability. The wrong material — rounded pea gravel, for example — will not stay compacted and will not provide an effective capillary break.
Base Material Comparison
| Material | Capillary Break | Drainage | Compaction | Best For |
|---|---|---|---|---|
| #57 crushed stone (open-graded) | Yes — 38–45% voids | Excellent | Good — angular particles lock together | Most residential slabs; garages, patios, basements |
| #67 crushed stone | Yes | Good | Good | Thin sections: sidewalks, small pads, shed floors |
| Road base / crusher run (dense-graded) | No — fines fill voids | Poor | Excellent — compacts very densely | Dry sites only; no moisture-sensitive flooring above |
| Pea gravel (rounded) | Partial | Good | Poor — rounded particles roll and shift | NOT recommended under concrete slabs |
| Sand | Partial | Good | Good | Capillary cushion layer over vapor barrier |
Why #57 Crushed Stone Is the Standard
#57 crushed stone is the most widely specified base material for residential concrete slabs, and for good reason. It is an open-graded aggregate — the particles are uniformly sized (roughly ¾ inch down to fine), with no smaller material filling the spaces between them. This produces a void ratio of 38 to 45 percent, which means the layer is more than one-third empty space by volume.
Those voids do two things simultaneously. First, they break the capillary connection between the wet subgrade soil and the concrete slab above. Groundwater rises through soil by capillary action — the same force that pulls water up a paper towel. In fine-grained soils, this capillary rise can lift moisture several feet above the water table. Open-graded stone interrupts that path: water cannot climb through a layer that is mostly air. Second, the voids provide drainage — any water that enters the base layer from above (rain, wash-down water, plumbing leaks) flows freely through the stone rather than sitting against the bottom of the slab.
Why Crusher Run Is a Problem Under Slabs
Crusher run (also called road base or dense-graded aggregate) contains a wide range of particle sizes, including fine material that fills the spaces between larger stones. This makes it excellent for compaction — it locks together into a dense, stable layer — but terrible for capillary break. When fines fill the voids, the layer behaves like soil for moisture purposes: groundwater can rise through it by capillary action just as it would through the native subgrade. For dry sites where moisture-sensitive flooring is not planned, crusher run is acceptable. For garages, basements, and any slab that will receive vinyl, wood, or carpet flooring, use open-graded stone instead.
Geotextile Fabric
A non-woven geotextile fabric placed between the subgrade and the gravel base serves as a separation and filtration layer. It prevents the gravel from sinking into soft subgrade soil and prevents fine soil particles from migrating up into the gravel and filling the voids. Geotextile is recommended on clay soils, filled ground, and any site where the subgrade is softer than the gravel base. It is inexpensive — $0.50 to $1.50 per square foot installed — and it extends the life of the base layer significantly on problem soils.
Base Depth by Project Type
The required gravel base depth depends on what the slab will carry, what the subgrade soil is, and how well the site drains. The minimum for any concrete slab on grade is 4 inches of compacted crushed stone, per ACI 302.1R. Most residential projects need more than the minimum.
Base Depth Reference Table
| Project Type | Base Depth | Material | Notes |
|---|---|---|---|
| Walkway, patio, garden path | 4" compacted | #57 or #67 crushed stone | Minimum per ACI 302.1R; adequate for pedestrian loads on granular subgrade |
| Shed pad, small outbuilding | 4–6" compacted | #57 crushed stone | 6" if the structure has a floor system or will store heavy items |
| Residential driveway | 6" compacted | #57 crushed stone | Standard for vehicle loads; increase to 8" on clay soil |
| Garage slab | 6" compacted | #57 crushed stone | Same as driveway; vehicles park on this slab |
| Basement floor slab | 4–6" compacted | #57 crushed stone | Vapor barrier always required; 6" if below water table |
| Clay or filled subgrade (any use) | 8"+ compacted | #57 + geotextile fabric | Geotextile between subgrade and gravel prevents fines migration |
| Poorly drained site (any use) | 6–8" + perimeter drain | #57 crushed stone | French drain or weeping tile around perimeter to dewater subgrade |
How to Calculate Gravel Needed
Gravel volume = Area × Depth. For a 12-foot by 20-foot patio with a 4-inch base:
- Area = 12 × 20 = 240 square feet
- Depth in feet = 4 ÷ 12 = 0.333 feet
- Volume = 240 × 0.333 = 80 cubic feet
- Convert to cubic yards: 80 ÷ 27 = 2.97 cubic yards (order 3 cubic yards)
- Convert to tons (crushed stone ≈ 1.4 tons per cubic yard): 3 × 1.4 = 4.2 tons
The Gravel Calculator handles this calculation automatically — enter the slab dimensions and base depth, and it returns the volume in cubic feet, cubic yards, and tons.
Compaction and Settlement Allowance
Gravel compacted in place occupies less volume than loose gravel delivered to the site. A general rule: order 10 to 15 percent more gravel than the loose volume calculation suggests, to account for compaction. For the patio example above, ordering 3.5 cubic yards instead of 3 cubic yards ensures enough material remains after compaction to achieve the full 4-inch depth.
Vapor Barrier Placement
A vapor barrier is a sheet of polyethylene plastic placed between the subbase and the concrete slab to retard the upward movement of moisture vapor. It is not waterproofing — liquid water can still flow around it — but it dramatically reduces the amount of water vapor that migrates through the slab and into the finished floor above.
When a Vapor Barrier Is Required
The requirement for a vapor barrier depends on what is installed above the slab:
- Always required: enclosed floors with moisture-sensitive flooring — vinyl, linoleum, wood, carpet, rubber, or coatings. Moisture vapor migrating through the slab can damage these finishes, cause adhesive failure, and promote mold growth.
- Always required: basements and below-grade slabs, where hydrostatic pressure pushes groundwater against the slab from below.
- Always required: slabs over filled ground or sites with a high water table.
- Recommended: garage slabs, even in mild climates — tire traction and stored chemicals make moisture management worthwhile.
- Optional: open outdoor patios, walkways, and pool decks that are exposed to weather and will not receive moisture-sensitive flooring. In these applications, a vapor barrier adds cost without a clear performance benefit.
Installation Details
The standard vapor barrier for residential slabs is 6-mil polyethylene sheeting — 0.006 inches thick. Heavier sheeting (10-mil or 15-mil) is more puncture-resistant and is specified for commercial and industrial floors where construction traffic will cross the barrier before concrete is poured.
- Placement: lay the sheet directly on top of the compacted subbase, before reinforcement and concrete.
- Seams: overlap adjacent sheets by at least 6 inches and seal the overlap with vapor-barrier tape or compatible adhesive.
- Perimeter: extend the sheet up the inside of the forms by at least 4 inches, or turn it outward under the slab edge, depending on the detailing specified.
- Penetrations: seal around pipes, conduits, and anchors that pass through the barrier with compatible mastic or tape.
- Damage repair: patch any tears or holes with vapor-barrier tape before pouring. A compromised barrier is worse than no barrier — it creates a false sense of moisture protection.
Vapor Barrier Classes
ASTM E1745 classifies vapor barriers by their performance under sustained hydrostatic pressure and their resistance to puncture and tearing. Class A is the most stringent — appropriate for slabs over saturated soils or below-grade conditions. Class B and C are adequate for above-grade residential slabs on well-drained subgrades. For most residential garage and basement slabs, a 6-mil polyethylene sheet meeting Class C is sufficient.
Proof Rolling and Field Verification
Proof rolling is the final field check on subgrade compaction before concrete is placed. It involves driving a heavy loaded vehicle — typically a 16 to 20-ton tandem dump truck — slowly across the entire compacted subgrade surface and observing the soil's response.
What Proof Rolling Reveals
Density testing confirms that the soil has been compacted to the specified relative density at the points where tests were taken. Proof rolling confirms that the subgrade as a whole — including areas between test points — can carry heavy loads without excessive deflection. The two tests complement each other:
- Pumping — water and fine soil particles forced up through the subgrade surface under the truck's tires. Indicates saturated conditions or inadequate compaction in fine-grained soils.
- Rutting — permanent deformation in the wheel path. Indicates the soil is too weak or too wet to support the load.
- Surface depression — a soft spot that depresses under the truck and does not fully rebound. Any depression greater than ½ inch indicates an unsupported area that must be undercut and replaced.
- Rocking or movement — the truck bounces or the surface shifts under load. Indicates voids, large stones, or inadequate compaction at depth.
How to Perform a Proof Roll
- Complete all subgrade compaction, moisture conditioning, and fine-grading.
- Ensure the loaded truck has a realistic weight — a tandem dump truck loaded with gravel or soil (16–20 tons) is the standard; an empty truck is not a meaningful test.
- Drive slowly (walking pace) across the full width and length of the slab footprint, covering the entire area, not just the center.
- Observe the surface behind the truck for pumping, rutting, or depression. Mark any soft spots with spray paint or stakes.
- After the truck passes, re-inspect the marked soft spots. Depressions that do not rebound indicate the need for undercutting.
- Undercut soft spots to firm soil, replace with compacted granular fill, and re-proof roll the corrected area.
Density Testing Methods
Field density testing is performed on each compacted lift, in addition to (not instead of) proof rolling. The two most common methods are:
| Method | Standard | Time per Test | Accuracy | Best Use |
|---|---|---|---|---|
| Nuclear density gauge | ASTM D6938 | 5–10 minutes | ±1–2% | Most projects; fast, repeatable |
| Sand replacement | ASTM D1556 | 45–90 minutes | Very high | Verification, dispute resolution, reference method |
| Dynamic cone penetrometer | — | Minutes | Correlative | Rapid CBR estimate; screening tool |
The nuclear density gauge is the workhorse of subgrade testing — it gives a reading in minutes and is accurate enough for most acceptance decisions. The sand cone method is slower but more precise, and it is used when density results are disputed or when a higher degree of confidence is required. Both methods measure dry density, which is then compared to the Proctor maximum to calculate the relative compaction percentage.
Problem Soils and When to Call a Professional
Some subgrade conditions exceed the scope of standard residential preparation. Recognizing these conditions early — before you order concrete or start forming — saves the cost of a failed slab and the far greater cost of demolishing and replacing it.
Expansive Clay Soils
Expansive clay (USCS CH, AASHTO A-7-5/A-7-6) expands when it absorbs water and shrinks when it dries. This volume change can move the subgrade several inches over a year, lifting the slab in wet seasons and leaving it unsupported in dry seasons. The resulting cracks are typically wide, stepped, and concentrated in areas of moisture change — near downspouts, irrigation heads, plumbing leaks, or areas where the soil dries faster under the slab than at its edges.
Mitigation strategies for expansive clay:
- Compact at or slightly above optimum moisture content — clay compacted too dry will expand when it gets wet.
- Install an 8-inch gravel subbase with geotextile fabric to provide a capillary break and reduce moisture fluctuations in the clay.
- Use a vapor barrier on all slabs over expansive clay, including outdoor slabs.
- Stabilize the clay with lime or cement if the plasticity index is high and the slab is structural.
- Control surface drainage — keep downspouts discharged away from the slab, and prevent irrigation water from pooling at the slab edge.
- For severe cases, hire a geotechnical engineer to design a moisture-management system — often a combination of subgrade stabilization, capillary break, and perimeter drainage.
High Water Table
A high water table means the soil is permanently or seasonally saturated. Saturated soil cannot be compacted to density — the water in the soil pores prevents particles from packing together, and any compactive effort simply pushes the water around. Signs of a high water table include standing water in excavations, consistently wet soil at depth, and a musty smell from organic material in saturated fill.
Mitigation strategies for high water table:
- Dewater the excavation before compacting — sump pumps, well points, or gravity drainage to a lower elevation.
- Install a perimeter French drain or weeping tile system to lower the water table around the slab.
- Use a thicker gravel subbase (8–12 inches) to provide a capillary break and working platform above the water table.
- Place a Class A vapor barrier (ASTM E1745) for maximum moisture protection.
- For persistent high water tables, consult a geotechnical engineer — slab-on-grade construction may not be appropriate without significant drainage infrastructure.
Organic Soils and Fill
Peat, organic silt, and organic clay (USCS Pt, OH) are unsuitable as slab subgrade under any circumstances. Organic matter decomposes under the slab, creating voids that lead to severe, progressive settlement. Fill soil is similarly problematic if it was not placed and compacted in engineered lifts — loose fill settles under load, and the settlement is often uneven.
The fix is excavation and replacement: remove all organic or uncontrolled fill to competent native soil, then rebuild the subgrade with approved granular fill placed and compacted in lifts. This is not a DIY job for large areas — the volume of material to be removed and replaced is significant, and the cost is substantial. For small areas (under a patio or walkway), it can be done with a mini-excavator or by hand in narrow strips.
When to Hire a Geotechnical Engineer
Consider hiring a geotechnical engineer when any of the following conditions apply:
- Expansive clay soils with high plasticity index (PI above 15)
- High water table or consistently saturated subgrade
- Organic soils, peat, or unknown fill material present
- Heavy structure — multi-car garage, workshop, commercial slab, or equipment pad
- Slope or irregular grade requiring engineered fill placement
- Previous slab failures on the same site
- Jurisdiction requires a geotechnical report for permitting
A geotechnical investigation typically involves soil borings, laboratory testing (moisture content, Atterberg limits, Proctor, CBR), and a written report with subgrade design recommendations. The cost ranges from $1,500 to $5,000 depending on the site and the extent of testing — a significant investment, but far less than the cost of demolishing and replacing a failed slab on problem soil.
Worked Example: 12×20 Patio on Clay Soil
This worked example walks through a complete subgrade preparation calculation for a common residential project: a 12-foot by 20-foot concrete patio on clay subgrade soil. The numbers follow the tables and guidance on this page.
Project Parameters
| Parameter | Value | Source |
|---|---|---|
| Slab dimensions | 12 ft × 20 ft (240 sq ft) | Project design |
| Subgrade soil type | Clay (A-7-5, fat clay) | Identified by ribbon test |
| Compaction target | 95% Standard Proctor | Residential subgrade spec |
| Subbase depth | 4 inches compacted | Base depth table — patio on clay: 4–6" |
| Subbase material | #57 crushed stone + geotextile | Clay soil recommendation |
| Compaction equipment | Walk-behind plate compactor | Project size under 500 sq ft |
| Lift thickness | 3 inches loose per lift | Plate compactor max lift: 4–6" |
| Vapor barrier | Optional for open patio | Vapor barrier section |
Step 1: Subgrade Area and Stripping
Topsoil stripping extends 6 inches below finished grade within the slab footprint and 18 inches beyond the perimeter. For calculation purposes, we strip the slab area plus a 1.5-foot margin on all sides:
- Stripped area = (12 + 3) × (20 + 3) = 15 × 23 = 345 square feet
- Stripping depth = 6 inches = 0.5 feet
- Volume to remove = 345 × 0.5 = 172.5 cubic feet
- Convert to cubic yards: 172.5 ÷ 27 = 6.4 cubic yards of topsoil to remove
Step 2: Subbase Gravel Volume
The subbase extends 6 inches beyond the slab edge on all sides and is placed 4 inches thick compacted:
- Subbase area = (12 + 1) × (20 + 1) = 13 × 21 = 273 square feet (slab area + 6-inch overhang on each side)
- Compacted depth = 4 inches = 0.333 feet
- Compacted volume = 273 × 0.333 = 90.9 cubic feet
- Convert to cubic yards: 90.9 ÷ 27 = 3.37 cubic yards compacted
- Add 15% for compaction settlement: 3.37 × 1.15 = 3.87 cubic yards — order 4 cubic yards
- Convert to tons (1.4 tons/cubic yard): 4 × 1.4 = 5.6 tons of #57 crushed stone
Step 3: Compaction Lifts
The gravel subbase is placed in lifts, each compacted and tested before the next is placed. With a plate compactor rated for 4–6 inch loose lifts, and a target of 4 inches compacted thickness:
- Number of lifts = 4 inches compacted ÷ 3 inches compacted per lift ≈ 2 lifts
- Each lift: spread 3 inches loose, compact with plate compactor in overlapping passes, verify density
- Field density test after each lift (nuclear density gauge or sand cone)
Step 4: Geotextile Fabric
Clay subgrade requires geotextile fabric between the subgrade and the gravel base:
- Fabric area = 273 square feet (same as subbase area)
- Cost at $0.50–$1.50 per square foot: 273 × $0.50 = $136.50 to 273 × $1.50 = $409.50
- Geotextile cost range: $135–$410
Step 5: Cost Summary
| Item | Quantity | Cost Range | Notes |
|---|---|---|---|
| #57 crushed stone (delivered) | 4 cubic yards (5.6 tons) | $190–$315 | $45–$75 per ton delivered |
| Plate compactor rental | 1 day | $50–$80 | Walk-behind unit adequate for this size |
| Geotextile fabric | 273 sq ft | $135–$410 | Non-woven, 4 oz/sq yard minimum |
| Vapor barrier (optional) | 273 sq ft | $40–$85 | 6-mil polyethylene; optional for open patio |
| Topsoil disposal | 6.4 cu yd | $100–$200 | Dump fees vary by location |
| Total DIY material + rental | — | $515–$1,090 | Excludes concrete, forms, and reinforcement |
The Gravel Calculator confirms the stone quantity: enter 13 × 21 feet at 4-inch depth and it returns 3.37 cubic yards compacted, or about 3.9 cubic yards ordered with a compaction allowance. The Concrete Calculator handles the slab volume separately — 240 square feet at 4-inch thickness is 3 cubic yards of concrete.
Frequently Asked Questions
Subgrade is the native in-situ soil beneath a concrete slab — the ground you start with after stripping topsoil. Subbase is an engineered layer of gravel or crushed stone placed on top of the prepared subgrade to provide a capillary break, improve drainage, and create a uniform working platform. The subgrade carries the ultimate load; the subbase distributes that load and keeps moisture away from the slab. Most residential concrete slabs need both layers, though a subbase can be skipped when the subgrade is well-drained, undisturbed native soil.
A compacted gravel subbase of 4 to 6 inches is standard for most residential concrete slabs. Walkways, patios, and shed pads typically need 4 inches of compacted crushed stone. Driveways and garage slabs need 6 inches. If the subgrade is clay soil, filled ground, or poorly drained, increase to 8 inches and consider adding geotextile fabric between the subgrade and the gravel. For a 12-by-20-foot patio with a 4-inch subbase, you need about 3 cubic yards of #57 crushed stone.
A vapor barrier is required for enclosed floors — garages, basements, and living-space slabs — where moisture-sensitive flooring such as vinyl, wood, or carpet will be installed. For open outdoor patios and walkways that will be exposed to weather, a vapor barrier is optional. A 6-mil polyethylene sheet placed on top of the compacted subbase, directly under the concrete, is the standard installation. If the subgrade has a high water table or the site is known to be wet, a vapor barrier is recommended even for outdoor slabs.
Ninety-five percent compaction means the subgrade soil has been compacted to 95 percent of its maximum dry density as determined by a Standard Proctor test (ASTM D698). The Proctor test is a laboratory procedure that finds the driest density a given soil can reach at its optimum moisture content. Achieving 95 percent of that value in the field means the soil is dense enough to support concrete without excessive settlement. Residential slabs typically require 95 percent Standard Proctor compaction on the subgrade.
Yes — but only if the dirt is well-drained native soil that has been stripped of topsoil, graded, moisture-conditioned, and compacted to at least 95 percent Standard Proctor. Pouring concrete directly on uncompacted fill, organic soil, or saturated clay is the most common cause of slab cracking and settling. Even when the subgrade is adequate, a thin layer of compacted gravel improves the pour by providing a uniform surface for the forms and a capillary break that keeps ground moisture out of the slab.
Six inches of compacted crushed stone is the standard base thickness under a residential concrete driveway. This depth provides adequate load distribution for passenger vehicles and creates a reliable capillary break. On clay soils or filled ground, increase to 8 inches and place a geotextile fabric between the subgrade and the gravel to prevent fines migration. The gravel should be compacted in 2 to 3-inch lifts using a plate compactor or vibratory roller, achieving at least 95 percent Standard Proctor density.
Proof rolling is driving a heavy loaded vehicle — typically a 16 to 20-ton tandem dump truck — slowly across the compacted subgrade just before placing concrete. The truck's weight reveals soft spots, pumping, or surface depression that density testing alone may miss. Any depression greater than half an inch indicates an unsupported area that must be undercut and replaced. Proof rolling is a deflection test, not a density test — it confirms the subgrade can carry construction traffic and the slab's long-term load without differential settlement.
Hire a geotechnical engineer when the site has expansive clay soils, a high water table, organic or peat soils, significant fill, or when you are building a heavy structure such as a multi-car garage, workshop, or commercial slab. An engineer performs soil borings, laboratory testing, and provides a subgrade design with compaction requirements, base specifications, and moisture control recommendations. For simple residential patios and walkways on native granular soil, a geotechnical investigation is usually not necessary.
References
- American Concrete Institute, ACI 302.1R — Guide for Concrete Floor and Slab Construction, concrete.org — subgrade preparation, base construction, vapor retarder, and proof rolling requirements.
- Portland Cement Association, Subgrades and Subbases for Concrete Pavements, cement.org — soil classification, CBR requirements, compaction specifications, and subbase material criteria.
- Federal Highway Administration, Bases and Subbases for Concrete Pavement, fhwa.dot.gov — pumping conditions, frost heave, base material permeability, and construction best practices.
- Wisconsin Department of Agriculture, Trade and Consumer Protection, ATCP 33 Concrete Design Standards, Chapter 4, datcp.wi.gov — subgrade modulus, expansive soil guidance, and subbase specifications.
- Iowa State University, Section 6E-1: Subgrade Design and Construction (SUDAS), intrans.iastate.edu — subgrade suitability table, compaction equipment by soil type, and CBR requirements.
- ConcreteNetwork, Subgrades and Subbases for Concrete, concretenetwork.com — subgrade/subbase definitions, soil type guidance, and compaction equipment selection.
- American Society of Concrete Contractors, Base Preparation for Decorative Concrete, ascconline.org — in-place density specification, proof rolling procedure, and base elevation tolerance.
Disclaimer: This guide provides general educational information about concrete subgrade preparation and is not engineering or architectural advice. Actual subgrade requirements vary by soil type, climate, jurisdiction, and site-specific conditions. Compaction specifications, base thickness, and moisture control requirements must be confirmed with your local building department and, where problem soils are present, with a qualified geotechnical engineer. Always verify requirements with a qualified professional before starting work.