
ON THIS PAGE:
What Is a Roof Drip Edge and Ridge Cap?
Roof drip edge and ridge cap are the two components that finish a shingle roof at its lowest and highest points — the bookends of the water-shedding system. The drip edge is a formed metal strip, bent into an L or a T profile, fastened along the eaves (the bottom edges above the gutters) and the rakes (the sloped edges at the gable ends). Its job is to catch the water leaving the shingle surface and throw it clear of the fascia: without it, surface tension pulls water back along the underside of the first course, onto the fascia board, and eventually into the soffit and the wall below. The ridge cap is a pre-formed cap shingle — wider, thicker, and pre-bent at the factory — installed across the horizontal ridge where the two slopes meet and up each hip line. Field shingles stop 1 to 2 inches short of the peak, and the ridge cap shingles bridge that gap, sealing the seam against wind-driven rain while covering the ridge vent slot when one is present.
Thinking about them together matters because they are installed on the same job, quoted on the same estimate, and governed by the same code family — and because both are the first items cut from a low bid. Drip edge is a few hundred dollars of metal on a full roof; ridge cap is a few bundles of shingles. Contractors working on razor-thin pricing skip the rake drip edge (it is less visible than the eave) or substitute field shingles cut into thirds for real ridge cap shingles (it saves a couple hundred dollars of material). Both shortcuts fail quietly: the first rots the rake fascia over 5 to 10 years, the second voids the manufacturer's system warranty on the entire roof. The roof drip edge and ridge cap therefore deserve the same attention as the field shingles they bookend. This guide covers where each piece goes, what the code requires, how to measure and calculate quantities for both, and what the materials cost — everything needed to specify the roof drip edge and ridge cap correctly, whether you are reading a bid or holding the hammer.
Three vocabulary points run through the rest of the page. A linear foot (LF) is one foot of edge length — the unit both components are measured and sold in, regardless of piece length. The eave is the horizontal lower edge of the roof; the rake is the sloped edge of a gable; the ridge is the horizontal peak, and a hip is a sloped peak where two planes meet on a hip roof. And roof edge flashing is the broader trade term for the drip edge and any similar perimeter metal — the flashing that lives on the boundary of the roof, as opposed to the step, valley, and counter flashing that handles joints and penetrations inside it. Quantities here are stated in linear feet and whole pieces or bundles, because that is how the material is sold at the supply house.
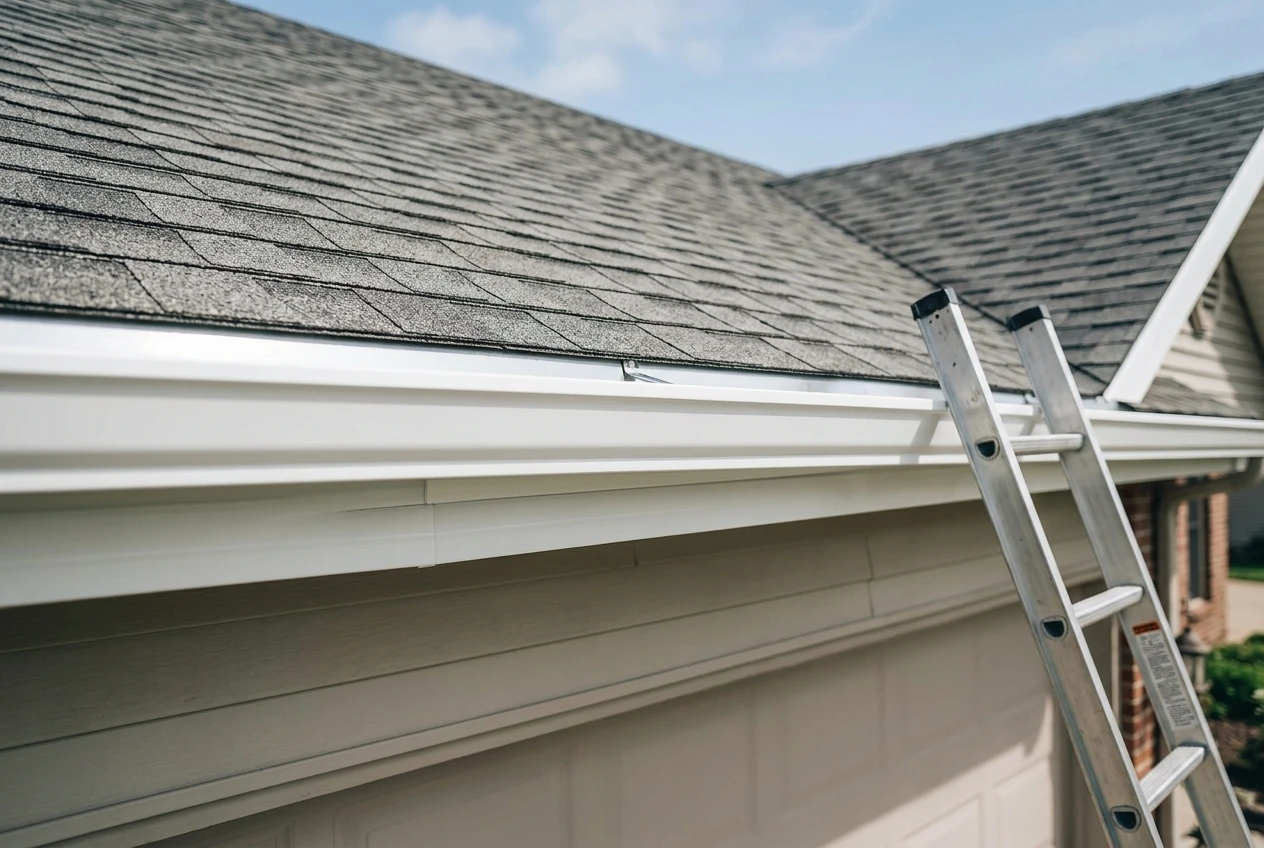
Where Each Goes: Placement Rules for Roof Drip Edge and Ridge Cap
Placement is where the roof drip edge and ridge cap earn their keep, and it is also where installation most often goes wrong. The placement rules for the roof drip edge and ridge cap are short, they come straight from the model code and manufacturer practice, and they apply to every asphalt shingle roof in the country — a roof drip edge and ridge cap done right once never comes back on a punch list.
Drip edge at the eaves goes under the underlayment. The metal is fastened to the bare sheathing first, its top flange lying flat on the deck, its bottom leg and kick-out hanging 1/4 to 1/2 inch past the fascia. The ice-and-water membrane and underlayment then lap over the top flange by at least 2 inches. Water running down the deck or backing up in an ice dam travels over the metal and out — never onto the wood beneath. Drip edge at the rakes goes over the underlayment. The underlayment is laid first, trimmed flush with the rake edge, and the drip edge is fastened on top of it, so water running down the underlayment's edge is captured and directed out over the fascia. The mnemonic roofers use is eaves under, rakes over. Get the sequence backwards at the eave and wind-driven water gets under the metal onto the sheathing; get it backwards at the rake and underlayment runoff wicks onto the rake fascia.
The code backing this is IRC R905.2.8.5: drip edge is required at eaves and rake edges of shingle roofs, adjacent pieces must be overlapped at least 2 inches, the metal must extend at least 1/4 inch below the roof sheathing and at least 2 inches up onto the deck, and fasteners are spaced no more than 12 inches on center. At the corner where an eave run meets a rake run, the rake piece always laps over the eave piece, and the eave metal sits under the underlayment while the rake metal sits over it — the corner is the one spot where both rules meet, and it is the most common place for leaks to start when the sequence is reversed.
| Roof Location | Component | Layering | Key Dimensions |
|---|---|---|---|
| Eave (horizontal lower edge) | Drip edge | Under the underlayment — metal first, membrane over its flange | 2 in onto deck, ¼ in below sheathing, 2 in piece laps, kick-out ¼–½ in past fascia |
| Rake (sloped gable edge) | Drip edge | Over the underlayment — underlayment first, metal on top | Same 2 in / ¼ in / 2 in rules; corner laps over the eave piece |
| Ridge (horizontal peak) | Ridge cap shingles | Last component on the roof, over the vent slot if present | 2 nails per cap, 5 in exposure, starting at the downwind end |
| Hip (sloped peak) | Ridge cap shingles (hip cap) | Bottom-up from the eave end of each hip, before the ridge run | First piece doubled with a 6 in starter beneath; same nailing as ridge |
Ridge cap placement runs last and runs downwind. After the field shingles are complete and the ridge vent (if any) is fastened over the sawed slot, cap shingles start at the end of the ridge the prevailing wind hits first and work across, so each successive cap laps over the previous one with the wind blowing across the seam, not into it. On a hip roof, each hip is capped first, starting at the bottom where the hip meets the eave and working up to the peak; the horizontal ridge is finished after all hips converge. Cap pieces are set at their rated exposure — typically 5 inches — so each cap covers the nail heads of the piece below it. The result is a continuous sealed line from the bottom edge of the roof, up every rake, over every hip, and across the ridge: roof drip edge and ridge cap as one system, meeting at the peak.
Drip Edge Profiles and Roof Edge Flashing Materials
Roof edge flashing comes in standardized profile letters, and the letters matter: the wrong profile at the wrong edge is the second most common installation mistake after getting the underlayment sequence backwards. The drip edge half of the roof drip edge and ridge cap pair is the part with profile choices — the cap shingle on top has only coverage and brand to select. Profiles differ in how far the horizontal leg reaches across the deck and how aggressively the bottom kick throws water away from the fascia.
| Profile | Shape | Where It Belongs | Notes |
|---|---|---|---|
| Type C (L-style) | Simple 90° bend, roughly 1½ in up the deck × 1½ in down the face | Rakes; sheds, outbuildings, older homes | Cheapest profile; no extended kick — ARMA accepts it, but it leaves water closer to the fascia than Type D |
| Type D (T-style / D-metal) | L-shape with an extended horizontal hem — about 2 in vertical leg × 4 in hem — and a kick-out at the bottom | Eaves on most residential roofs | The preferred eave profile: the long hem reaches into the gutter and the kick throws water ½ in clear of the fascia |
| Type F (gutter apron) | D-style with a hemmed front lip for stiffness and a deeper kick | Eaves over gutters; re-roofs installed over existing shingles | Hem stiffens the long leg and pushes water further out; +10–15% over baseline in installed pricing |
| Type T (wind flange) | D-shape with an extra deck flange extending up and across the sheathing | High-wind and hurricane zones | Resists wind uplift at the eave; the profile coastal inspectors most often specify |
Material choice follows exposure and budget. Aluminum (.024 to .032 inch) is the default for most homes — it does not corrode, comes in colors matched to fascia and gutters, and runs about $0.75 to $1.75 per linear foot. Galvanized steel (29 gauge minimum; 24 gauge preferred where wind is a factor) is stiffer and 10 to 20 percent cheaper but rusts from the cut edges once the zinc coating is exhausted, typically 20 to 30 years in. Copper (16 ounce, or 0.69 mm minimum) is the architectural choice for slate, shake, and copper-gutter projects — 50 to 100 years of service at $4.50 to $8.00 per linear foot, four to six times aluminum's material cost. Vinyl and plastic profiles exist but are UV-brittle, crack within 10 to 15 years, and are not accepted as code-compliant roof edge flashing in most jurisdictions. Pieces are roll-formed and sold in 10-foot and 10.5-foot lengths — occasionally 8 feet — with overhangs at the fascia commonly ranging 2 to 5 inches depending on gutter position, and the standard rule of thumb is a 2-inch end lap between pieces, tightened to 3 inches in coastal wind zones with a bead of sealant in the lap.
Fastening the metal is simple but unforgiving: 1-1/4 inch galvanized roofing nails through the top flange only, 12 inches on center maximum (8 to 10 inches where ARMA's technical guidance or coastal codes apply), never through the vertical leg or the kick-out, and never spaced so wide that the joint flutters open in wind. Nails must bite at least 3/4 inch into solid sheathing, and aluminum drip edge takes aluminum or stainless nails — galvanic mismatch between steel nails and aluminum metal corrodes the fastener hole within a few seasons.
Ridge Cap Shingles: Types, Coverage, and Materials
Ridge cap shingles are not optional decoration at the peak — they are the closure piece for the roof's highest seam, and modern manufacturer warranties treat them as part of the tested system. Two construction types exist. Cut caps are field shingles cut into thirds at the factory slot lines — the old practice, still common on budget jobs: about 200 pounds per square, flexible enough to bend but not to stay bent, cracking at the fold within 5 to 8 years, and (on every major architectural shingle line sold today) explicitly disallowed by the system warranty. Pre-formed caps are purpose-made: 320 to 450 pounds per square, pre-creased at the factory with a more flexible asphalt blend, rated to bend 60 to 120 degrees without cracking, and the only type that keeps an enhanced manufacturer warranty intact. Pre-formed caps also carry their own wind-test ratings — ASTM D3161 Class F (110 mph) for standard caps, ASTM D7158 Class H (150 mph) for premium caps — independent of the field shingle's rating.
| Cap Product Type | Coverage per Bundle | Wind Rating | Typical Material Cost |
|---|---|---|---|
| Cut from 3-tab shingles | ~16.7 LF (25 pieces at 8 in exposure) | None of its own | $25 – $35 per bundle of 3-tab; voids system warranty |
| Standard manufactured cap | ~20 LF | D3161 Class F (110 mph) | $45 – $65 per bundle |
| Long-coverage manufactured cap | ~30 – 33 LF | D3161 Class F (110 mph) | $48 – $72 per bundle |
| Premium / high-profile cap | ~20 LF | D7158 Class H (150 mph) | $68 – $95 per bundle |
Coverage is printed on the wrapper and varies by product — roughly 16.7 linear feet for cut caps, 20 linear feet for most standard hip-and-ridge products, 30 to 33 linear feet for long-coverage caps — and it is the single number the ridge cap quantity calculation turns on. One rule accompanies it: the cap must come from the same manufacturer as the field shingles. Mixing a GAF cap onto Owens Corning shingles (or the reverse) gives both manufacturers a reason to deny the system warranty, and the enhanced warranty tiers — GAF's Golden Pledge, Owens Corning's Platinum, CertainTeed's SureStart — all require their own branded cap plus a minimum count of other branded accessories. Color matching has the same discipline: get the field shingles and caps from the same dealer at the same time, ideally same-lot, because cap shingles weather at a slightly different rate than the field and a replacement bundle two years later will read a shade off.
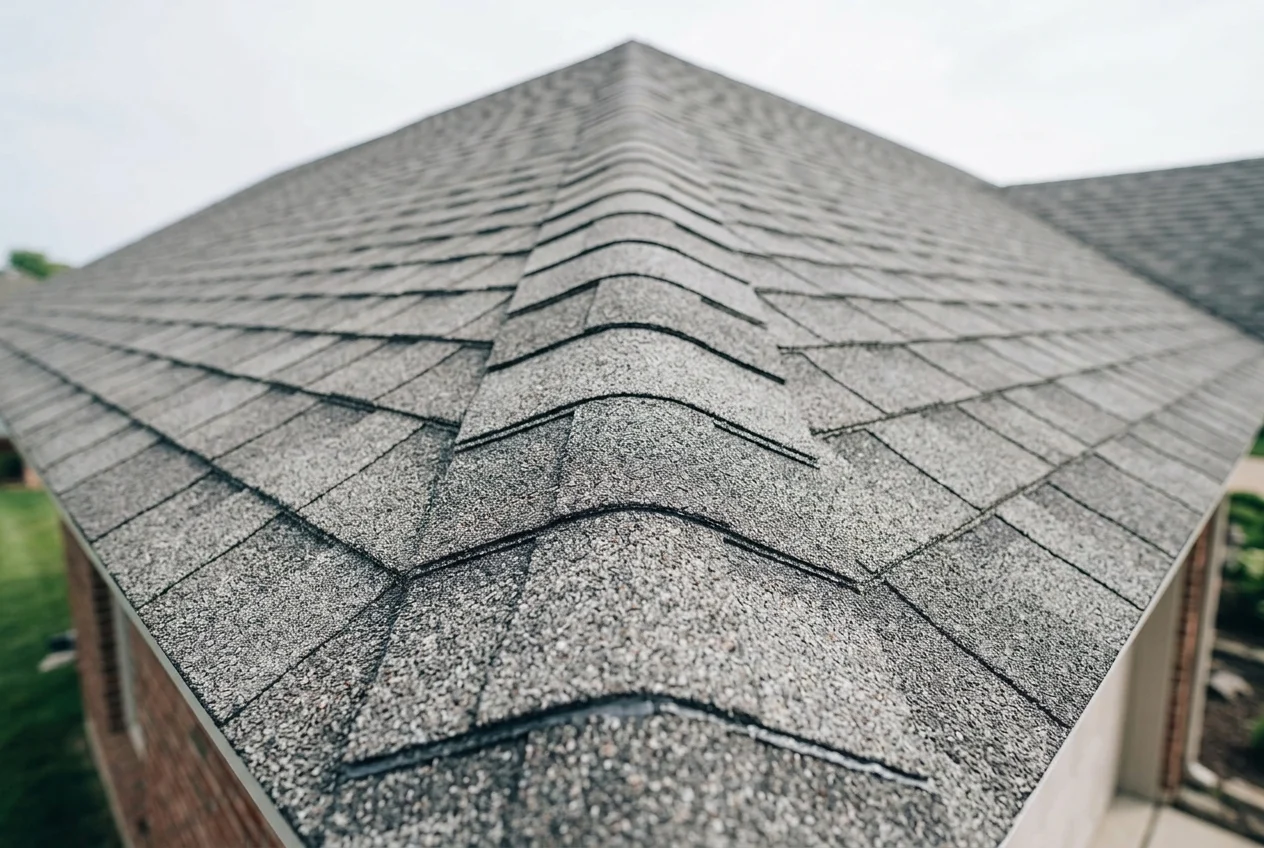
Quantities differ sharply by roof shape. A gable roof's ridge is simply the building length — a 2,400-square-foot two-story gable typically carries 40 to 60 linear feet of ridge and nothing else. A hip roof has a shortened main ridge plus four hips: the same footprint runs 120 to 150 linear feet total, so hip roofs need two and a half to three times the cap material of a gable. Dormers, ells, and cross gables add their own short ridges — every place two slopes meet above the field needs cap. Nailing is specified in IRC R905.2.8.3: two nails per cap piece, about 1 inch in from each edge and 5½ to 6 inches up from the exposed end, so the next cap at its 5-inch exposure covers the heads. Above 110 mph wind zones, four nails per piece plus a bead of asphalt roof cement under the leading edge becomes the standard. Exposed nail heads on a ridge are not cosmetic — each uncovered penetration is a direct leak path at the roof's most wind-loaded line.
How Much Drip Edge Do I Need?
Working out how much drip edge do I need is a perimeter problem with two rounding rules layered on top. The roof drip edge and ridge cap quantities are both calculated in linear feet and converted to whole saleable units — pieces of metal for one, bundles of shingles for the other — and both punish the estimator who rounds down. Start by measuring every edge where metal will run — both eaves and all rakes — then convert that length into whole pieces. The roof drip edge and ridge cap counts both come from this one walk around the building.
- Measure the eaves. For a simple rectangle, the eave total is two times the building length (the wall parallel to the ridge). Add the eave overhang if the roof extends past the wall in that direction.
- Measure the rakes with the slope, not the ground width. A rake is the hypotenuse of the roof plane: slope factor = √(1 + (pitch ÷ 12)²). At 6/12 the factor is 1.118; at 4/12 it is 1.054; at 12/12 it is 1.414. Multiply the run (half the building width, plus the rake overhang) by the slope factor, then by 4 for a gable (two slopes at each end). Hip roofs have no rakes — rakes = 0, and only the four eaves count.
- Subtract the lap, add the waste. Each piece loses its overlap length at the joint — 2 inches of a 10-foot stick leaves 9 feet 10 inches of usable metal. Then add a waste allowance: 10 percent for a plain gable, 12 to 15 percent for a hip, 15 to 20 percent for a roof with dormers and valleys where cuts multiply.
- Divide and round up — separately for eaves and rakes. Pieces = total length × (1 + waste) ÷ (piece length − lap). Round each edge up to a whole piece: eave profile and rake profile are usually different metals, so offcuts do not transfer between them. Round up, never down.
- Count the fasteners if nails are on your list. At 12 inches on center, plan roughly one nail per foot of metal plus two extra per piece for the end laps.
Worked example. A 40 × 60 foot gable house at 6/12 pitch with 1-foot overhangs everywhere: eaves = 2 × 60 = 120 LF. Rake run per slope = (20 + 1) × 1.118 = 23.5 LF; four rakes = 94 LF. Total perimeter = 214 LF. With 10-foot pieces, a 2-inch lap (9.83-foot usable), and 10 percent waste: 214 × 1.10 = 235.4; 235.4 ÷ 9.83 = 23.9 → 24 pieces. Eaves and rakes would each be rounded on their own subtotals in practice (13 eave pieces, 11 rake pieces at these numbers), because the two edges take different profiles. Most single-family homes fall between 150 and 250 linear feet of total edge — about 16 to 26 ten-foot pieces — with the spread driven by roof perimeter, overhang depth, pitch, and how many gables the plan has. For quick budgeting before a bid arrives: take the house footprint perimeter, double it if the roof has gables (to catch the rakes), and divide by 10.
Two measurement traps cause most quantity errors. First, entering the ground-level width as the rake length: on a 40-foot-wide 6/12 roof, each rake actually runs about 23.5 feet against the 21-foot ground projection — miss the slope factor and you come up short at the last gable. Second, forgetting the separate rounding: counting 214 feet worth of metal as "21 pieces because 21 × 10 = 210 is close" runs out mid-rake once laps and cuts are subtracted. The formula above with per-edge rounding never under-buys, and a couple of leftover sticks of drip edge are cheaper than a second trip to the supplier mid-installation. Run the roof drip edge and ridge cap takeoffs in the same sitting so both counts land on one material list.
How to Calculate Ridge Cap Quantity
How to calculate ridge cap comes down to total cappable length and the coverage figure printed on the bundle — two numbers, one division, one round-up. Compared with the drip edge perimeter math, the roof drip edge and ridge cap calculations differ only in what they divide by: usable metal length on one side, bundle coverage on the other.
- Add every ridge line. Horizontal ridge + all hip lines + each dormer, ell, or cross-gable ridge. On a gable this is usually just the building length; on a hip it is the shortened main ridge plus four full-length hips.
- Add the waste allowance. 10 percent covers the cut at each end and the occasional cracked cap; use 15 percent on complex roofs with many short ridges where each one starts and ends with a cut.
- Divide by the coverage on your bundle. Bundles = (total LF × 1 + waste) ÷ coverage per bundle. Use the real number from the wrapper: about 16.7 LF for cut caps, 20 LF for most manufactured hip-and-ridge products, 30 to 33 LF for long-coverage caps.
- Round up to whole bundles. Partial bundles do not exist, and caps from two dye lots side by side on one ridge show a visible seam — get the full count once.
- Add the ridge vent in pieces, not bundles. If a vented ridge is planned: vent pieces = ridge length ÷ 4 feet per section (a 50-foot ridge needs 13 sections), sized before the cap goes down.
Worked example — gable. A 60-foot ridge, no hips, standard manufactured cap at 20 LF coverage: 60 × 1.10 = 66 LF; 66 ÷ 20 = 3.3 → 4 bundles. With a long-coverage cap at 33 LF: 66 ÷ 33 = 2.0 → 2 bundles — which is why comparing bundle price without checking coverage misleads: the $72 bundle covering 33 feet can be cheaper in total than the $52 bundle covering 20.
Worked example — hip. Same footprint with a 30-foot main ridge and four hips totaling 90 feet: 120 × 1.10 = 132 LF; at 20 LF coverage, 132 ÷ 20 = 6.6 → 7 bundles, more than double the gable count on an identical house. This is the single most common quantity surprise on hip-roof estimates, and it is predictable: hip roofs carry 2.5 to 3 times the cappable length of a gable of the same footprint. A typical cheat-sheet for budgeting: a small ranch gable needs 3 to 4 bundles, a mid-size two-story gable 4 to 5, a standard hip 6 to 8, and a large hip with dormers 8 to 12. Always measure — dormer ridges hide in takeoffs — but the bands catch magnitude errors before a bid is signed. Roof drip edge and ridge cap are usually priced together on the estimate, so a mistake in either shows up on the same line.
Drip Edge and Ridge Cap Materials Cost
Drip edge and ridge cap materials cost is one of the smaller lines on a roofing estimate — and one of the most commonly itemized, because both are easy for a homeowner to check against the bid. Together, the roof drip edge and ridge cap rarely exceed a few hundred dollars in material on a typical house. Current national bands:
| Component | Material Cost | Installed Cost | Typical House Total |
|---|---|---|---|
| Aluminum drip edge | $0.75 – $1.75 / LF ($7 – $12 per 10-ft piece) | $1.50 – $4.50 / LF | $250 – $1,000 on 160 – 220 LF |
| Galvanized steel drip edge | $0.65 – $1.50 / LF | $1.50 – $3.50 / LF | Same perimeter; material slightly lower |
| Copper drip edge | $4.50 – $8.00 / LF | $6.00 – $12.00 / LF | $900 – $1,800 on 150 LF |
| Ridge cap shingles (manufactured) | $40 – $80 per bundle (20 – 33 LF) | $5 – $12 / LF | 3 bundles ≈ $120 – $240 material; $150 – $600 installed on 50 LF |
| Standalone retrofit drip edge | Same material | $3.50 – $8.00 / LF | $525 – $1,200 — lifting the first course is the whole cost |
A few framing points keep the numbers honest. The installed drip edge band spans new work to retrofit: during a full reroof, laying the metal on bare decking is minutes of labor inside a larger job, so $1.50 to $3.00 per linear foot is typical; sliding it under an existing first course requires loosening, resealing, and redoing corners, which pushes standalone retrofits to $3.50 to $8.00. Copper and painted-steel upgrades track the metal market and regional labor, running two to four times aluminum's installed price. On ridge cap, the material-to-labor ratio flips with roof shape: a 50-foot gable ridge is a half-day of detail work with modest material, while a 130-foot hip carries nearly three times both. And the comparison that puts the totals in perspective — fascia replacement runs $15 to $30 per linear foot and sheathing rot repair $1,500 to $4,000 when a missing drip edge is finally discovered 8 to 15 years later. The $250 to $1,000 of drip edge and few hundred dollars of ridge cap are the cheapest insurance on the roof. Keep the roof drip edge and ridge cap as separate labeled lines when comparing bids — combined "miscellaneous flashing" totals hide which one was cut.
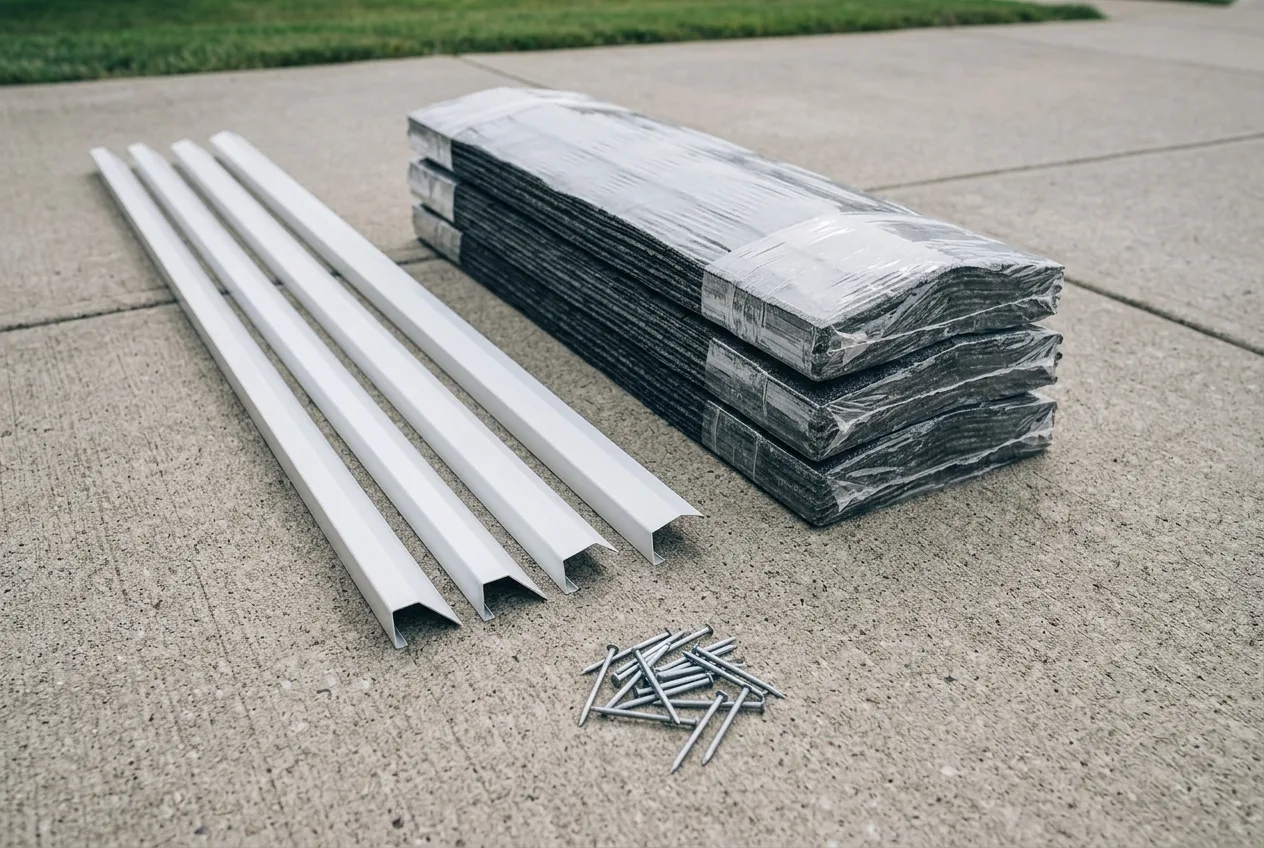
Installation Sequence: From Deck to Ridge Cap
The sequence below is the standard residential shingle-roof sequence — each step exists because the next one depends on it, and the two placement rules for the roof drip edge and ridge cap (eave metal first, cap shingles last) are the anchors of the whole list.
- 1. Prepare the deck edge. Fascia sound and plumb, sheathing edge straight and free of rot; replace damaged boards before any metal goes on.
- 2. Install eave drip edge first, before underlayment. Type D along every eave, fastened through the top flange at 12 inches on center, 2-inch end laps, kick-out hanging ¼ to ½ inch past the fascia toward the gutter.
- 3. Lay ice-and-water membrane over the eave metal where climate or code requires it — extending at least 24 inches past the warm-wall line in ice-dam country — then run the field underlayment over the eave drip edge's top flange.
- 4. Run underlayment out to the rakes and trim it flush with the rake edge; the rake metal will go over this layer.
- 5. Install rake drip edge over the underlayment — Type C, same fastening pattern, lapping over the eave piece at every corner by at least 2 inches.
- 6. Starter strip at eaves and rakes, aligned so it projects no further than the drip edge below it.
- 7. Field shingles course by course from the eave up, with step flashing embedded at walls as the courses rise.
- 8. Cut the ridge slot and set the ridge vent (if the roof is vented that way), fastened per the vent manufacturer's instructions.
- 9. Cap each hip bottom-up from the eave end to the peak, first piece doubled over a 6-inch starter, two nails per cap under the next piece's exposure.
- 10. Cap the horizontal ridge last, starting at the downwind end, working across so every lap faces away from the prevailing wind, and sealing the ridge-to-hip junction where the runs meet.
Fastener checklist alongside the sequence: 1-1/4 inch galvanized roofing nails for the metal (stainless in coastal air, aluminum nails with aluminum metal), 2-1/2 inch ring-shank nails where cap crosses a vent housing, two nails per cap piece at 5-inch exposure (four plus a sealant bead above 110 mph zones), and never a nail through the drip edge's vertical leg or kick-out. Inspection-worthy checkpoints — the ones an inspector or a sharp homeowner verifies before shingles bury them: eave metal under the membrane, rake metal over it, 2-inch laps at every joint, kick-out past the fascia, corner sequence right, and the correct drip edge profile at each edge. A correct drip edge installation before the starter strip is what lets the roof drip edge and ridge cap behave as one system once the roof is closed.
Common Drip Edge and Ridge Cap Mistakes
Nine errors account for most failures of the roof drip edge and ridge cap in the field — and every one of them is avoidable with the placement rules and quantity math above. None are exotic; most come from skipping a step in the roof drip edge and ridge cap sequence.
- Eave drip edge installed over the underlayment. The single most common error: wind-driven water and ice-dam backup now reach the sheathing above the metal instead of running over it. Fixing it means stripping the first courses back — repair cost grows with every shingle laid on top.
- Rake drip edge skipped entirely. Common on older homes and cheap bids — the rake looks fine until the fascia softens. The code has required drip edge at rakes as well as eaves since the 2012 IRC cycle, and rake-only omissions fail inspection in most jurisdictions today.
- Type C profile at the eave. A plain L with no extended hem leaves water close to the fascia where surface tension can pull it back. The kick-out profile exists precisely for the eave; use the right metal at each edge.
- Nails too far apart or through the vertical leg. Spacing beyond 12 inches opens joints in wind; nailing the face dimples the metal where water pools and cracks. Top flange only, 12 inches on center (tighter where coastal guidance says so).
- Cut 3-tab shingles used as ridge cap. Saves a couple hundred dollars, voids the system warranty on the whole roof, and cracks at the fold within 5 to 8 years. Every major manufacturer requires its own pre-formed cap for enhanced warranties.
- Ridge cap started into the wind, or laid top-down on a hip. Laps that face the prevailing wind catch it; hips capped from the peak down put every seam on the wrong side. Start downwind, cap hips bottom-up.
- Exposed nail heads on the cap. Nails set too close to the exposed edge never get covered by the next cap — 192 leak points on an 80-foot ridge if every cap misses. Hold the 5½-to-6-inch set-back from the exposed end.
- Wrong fastener length at a vented ridge. A 1-1/4 inch nail will not reach the deck through the vent housing. Vented ridges take 2-1/2 inch ring-shank nails through cap and housing; solid ridges take 1-3/4 inch.
- Cap brand different from the field shingle brand. Mixing manufacturers gives both warranties a loophole and usually mismatches color and profile — match field and cap together, same manufacturer, same color line.
Frequently Asked Questions
Roof drip edge and ridge cap are the two edge components that close a shingle roof at its bottom and top. The drip edge is a formed metal strip — L-shaped or T-shaped — fastened along the eaves and rakes that carries water past the fascia and into the gutter instead of letting it wick back under the first course of shingles. The ridge cap is a pre-formed cap shingle, thicker and pre-bent than a field shingle, installed across the horizontal ridge and up any hip lines to seal the joint where two roof slopes meet. Together they handle the two places a roof is most vulnerable: the lower edge where water leaves the surface, and the peak where wind drives rain into the seam.
At the eave, the drip edge goes on first, directly on the sheathing, and the underlayment laps over its top flange — eaves under. At the rake, the sequence reverses: the underlayment goes down first and the drip edge is fastened over it — rakes over. The International Residential Code requires drip edge at both eaves and rake edges of shingle roofs (IRC R905.2.8.5), and this interleaving keeps water from reaching the deck at either location: at the eave, meltwater and ice-dam backup run over the metal; at the rake, water running down the underlayment is directed out over the fascia instead of onto it. At the corner where the two edges meet, the rake piece always laps over the eave piece.
Measure the full perimeter where drip edge will be installed — all eave runs plus all rake runs — then divide by the usable length of one piece and round up, adding a waste allowance for cuts and laps. For a rectangular gable house that is 40 by 60 feet with a 6/12 pitch and 1-foot overhangs, the eaves total 120 linear feet and the four rakes total about 94 linear feet, so roughly 214 linear feet overall. With 10-foot pieces, 2-inch end laps, and a 10 percent waste allowance, that is about 24 pieces. Most single-family homes land between 150 and 250 linear feet, or 16 to 26 ten-foot pieces. Round every result up — you cannot get a partial piece, and offcuts from the eaves rarely fit the rakes.
Add the length of the horizontal ridge plus every hip line plus any dormer or wing ridges, add about 10 percent for waste, then divide by the coverage printed on the bundle — coverage per bundle ranges from roughly 16.7 linear feet for caps cut from 3-tab shingles to 20 linear feet for most manufactured hip-and-ridge products and up to 33 linear feet for long-coverage caps, and round up to whole bundles. A 60-foot gable ridge at 20 linear feet of coverage per bundle with 10 percent waste is 66 feet ÷ 20 = 3.3, so 4 bundles. A hip roof with a 30-foot ridge and 90 feet of hips is 120 feet × 1.10 = 132 feet ÷ 20 = 6.6, so 7 bundles — which is why a hip roof needs far more ridge cap than a gable of the same footprint.
Yes — a ridge vent sits in the slot cut along the peak, and ridge cap shingles cover it. The cap is installed over the vent housing with fasteners long enough to reach through the housing into the deck (2-1/2 inch ring-shank nails on a vented ridge, against 1-3/4 inch nails on a solid ridge), lapped so the prevailing wind blows across the seam rather than into it. Skipping the cap leaves the vent slot open at the edges, and installing field shingles cut to fit over the vent performs worse, looks worse, and on most systems voids the manufacturer warranty. The vent and the cap are one assembly: the vent exhausts air, the cap weather-seals it.
Roof edge flashing — the drip edge — runs along the open perimeter of the roof: the eaves at the bottom and the rakes at the gable ends, where water must be thrown clear of the fascia. Other flashing handles interruptions in the roof surface: step flashing where a roof plane meets a wall, valley flashing in the intersection of two slopes, and counterflashing and pipe boots around chimneys, vents, and penetrations. The rule of thumb is location — edge flashing protects the boundary of the roof, and the rest protects the holes and joints inside it. A roof can be correctly flashed at every penetration and still rot its fascia if the drip edge is missing.
Drip edge and ridge cap materials are modest line items relative to the rest of a roof. Aluminum drip edge runs about $0.75 to $1.75 per linear foot in material — $7 to $12 per 10-foot piece at retail — galvanized steel about $0.65 to $1.50 per linear foot, and copper about $4.50 to $8.00; installed with labor during a reroof, drip edge lands around $1.50 to $4.50 per linear foot, or roughly $250 to $1,000 on a typical 160-to-220-foot perimeter. A bundle of manufactured ridge cap shingles runs about $40 to $80 and covers 20 to 33 linear feet, so a 50-foot gable ridge needs 3 bundles for about $120 to $240 in material; installed, ridge cap runs about $5 to $12 per linear foot. Both components together usually total a few hundred dollars on a full roof replacement.
Retrofit drip edge installation on a finished roof is possible but awkward: the lowest course of shingles must be loosened and lifted, the metal slid under it and over the underlayment at rakes or onto the deck at eaves, and the shingle re-seated and resealed. The work is fiddly, the seal on the lifted course is never as strong as factory adhesion, and corners are hard to rebuild cleanly, which is why most roofers recommend doing the drip edge installation during a full re-roof rather than as a standalone job. On a roof with 10 or more years of shingle life left and visible fascia damage, a careful retrofit is worth it; on a roof near the end of its life, fold the cost into the replacement instead.
References
- International Code Council, International Residential Code (IRC) — Section R905.2.8.5 (Drip Edge) and R905.2.8.3 (Roof Covering Fastening), codes.iccsafe.org — required locations, 2-inch lap, ¼-inch and 2-inch extension dimensions, 12-inch fastener spacing, and cap fastener placement.
- Asphalt Roofing Manufacturers Association (ARMA), Installation of Drip Edge at Eaves and Rakes — Technical Bulletin, asphaltroofing.org — eave/rake underlayment sequencing, self-adhered membrane exception, 8–10 inch nailing guidance, and shingle overhang dimensions.
- National Roofing Contractors Association (NRCA), NRCA Roofing Manual — Steep-Slope Roofing Systems, nrca.net — industry practice for perimeter metal, hip and ridge application, and vented-ridge assemblies.
- ASTM International, ASTM D3161 (Wind Resistance of Shingles) and ASTM D7158 (Wind Uplift Performance), astm.org — standard wind test classes cited for ridge cap products.
- IKO (roofing manufacturer), Guide to Drip Edges for Shingle Roofs, iko.com — profile types C, D, and F, material specifications, and step-by-step eave, corner, and ridge application details.
- Insurance Institute for Business & Home Safety (IBHS), Fortified Roof standard and wind-driven rain guidance, ibhs.org — research on edge metal performance and sealed-roof details in high-wind events.
- Occupational Safety and Health Administration (OSHA), Fall Protection in Construction — 29 CFR Part 1926 Subpart M, osha.gov — fall-protection requirements applying to ridge and rake work above 6 feet.
Disclaimer: This guide provides general educational information about roof drip edge and ridge cap — placement rules, profile and material options, quantity math, and typical national price ranges for both components. It is not engineering, architectural, or code advice for a specific project. Cost bands vary by region, roof shape, pitch, access, and labor market; coverage figures and piece lengths vary by manufacturer — always confirm against the product wrapper. Drip edge requirements, lap dimensions, and fastener spacing come from the International Residential Code as adopted and amended locally, and local amendments or manufacturer instructions may be stricter; verify current requirements with your authority having jurisdiction before work begins. Roof work at height requires fall protection compliant with applicable federal, state, and local rules.