
ON THIS PAGE:
What Is Roof Underlayment?
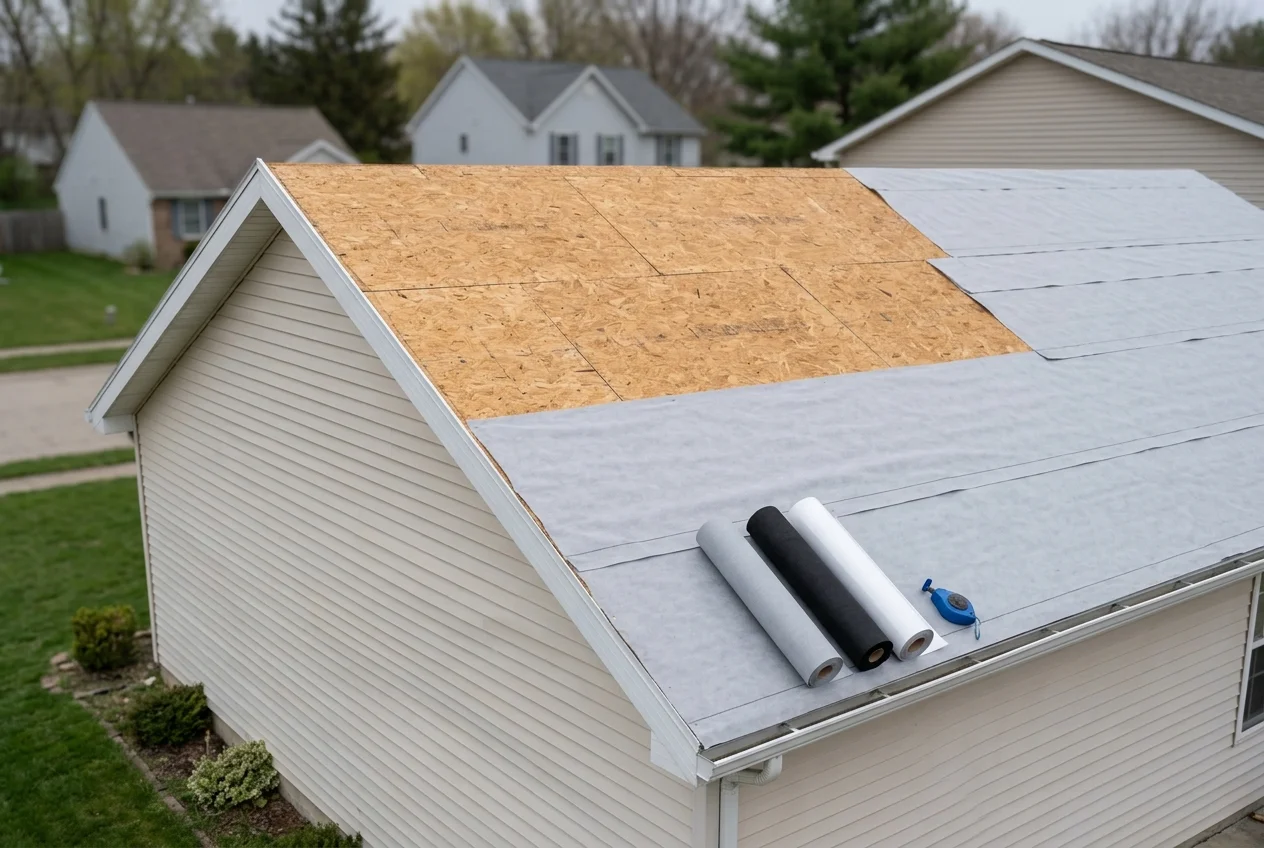
Roof underlayment is a barrier layer installed directly on the roof deck — the plywood or OSB sheathing — between the sheathing and the final roofing material. On a typical residential asphalt-shingle roof, the assembly from bottom to top is: rafters or trusses, roof deck (sheathing), roof underlayment, then shingles. The underlayment's job is to be the secondary line of defense. If wind lifts a shingle, if a tree branch tears a course, or if an ice dam backs water up under the eave edge, the underlayment is what keeps that water out of the attic and out of the ceiling below until the shingle is repaired or replaced.
Underlayment is not a substitute for a good roofing material, and it is not a permanent waterproofing layer in the way a fully adhered membrane is on a low-slope commercial roof. On steep-slope residential roofs, most underlayments are water-resistant rather than fully waterproof — they shed water that reaches them, but they are designed to be covered by shingles within a short installation window. The exception is self-adhering rubberized asphalt membrane (ice and water shield), which is waterproof and is used precisely where water is most likely to back up: eaves, valleys, walls, and penetrations.
Why Underlayment Is Not Optional
On most code-compliant roof assemblies, underlayment is a required component — not an upgrade. The International Residential Code (IRC) R905.1 specifies which underlayment materials are required by roof slope and roof covering, and manufacturer installation instructions for asphalt shingles, metal panels, and tile all assume an underlayment layer beneath the finished roofing. Skipping underlayment to save a few hundred dollars creates a roof that has no backup if the primary covering fails — and the primary covering will eventually fail somewhere, at some point, on every roof. The question is not whether the underlayment will be needed; it is whether it will be there when it is.
How This Guide Uses the Terms
You will see several related terms in manufacturer catalogs, code text, and contractor quotes. Roof underlayment is the general term for any barrier layer on the deck beneath the roofing material. Felt underlayment or asphalt felt underlayment refers specifically to asphalt-saturated organic or fiberglass mat — the traditional #15 and #30 products. Synthetic underlayment refers to polypropylene or polyethylene sheet products that have largely replaced felt on new residential roofs. Ice and water shield (or self-adhering membrane, or polymer-modified asphalt underlayment) is the waterproof peel-and-stick layer used at vulnerable details. Field underlayment is the layer that covers the main field of the roof between the detailed areas. This guide uses "underlayment" as the umbrella term and names the specific type wherever the distinction matters.
Why Underlayment Matters
Every roofing material has a failure mode. Asphalt shingles crack, curl, and blow off in wind. Metal panels can be lifted at fastener points. Tile can break under foot traffic or storm debris. When that happens, the roof deck is exposed — and the underlayment is the only thing between that exposure and the attic insulation, the ceiling drywall, and the contents of the rooms below.
Protection During Installation
Underlayment also protects the deck during the roofing installation itself. A re-roof that tears off old shingles in the morning and installs new ones in the afternoon may have hours of open-deck exposure if a rain shower arrives between tear-off and re-cover. Underlayment installed immediately after tear-off (or left in place if it is sound) keeps that window from becoming a soaked-insulation problem. On new construction, underlayment installed after sheathing and before shingles protects the deck during the framing-to-finishing timeline, which can be weeks or months.
Ice Dam Protection
In cold climates, ice dams form when heat escaping from the attic melts snow on the upper roof; the meltwater runs down to the colder eave edge, refreezes, and builds a dam that traps liquid water behind it. That water is then driven back up under the shingles by capillary action and wind. Without ice and water shield at the eave, that water reaches the deck, the insulation, and eventually the ceiling. With ice and water shield — a self-adhering waterproof membrane bonded directly to the deck at the eave — the water has nowhere to go. IRC R905.1.2 addresses this directly by requiring ice dam protection at eaves in specified conditions, with the required coverage distance varying by climate and local code adoption.
Wind-Driven Rain
Wind-driven rain does not fall straight down. It hits the roof at an angle, forces water sideways under shingle courses, and can penetrate gaps that would never leak in calm weather. Underlayment catches that sideways water and sheds it down the slope to the eave. This is one reason synthetic underlayment — with its higher tear resistance and longer UV exposure tolerance — has become the standard on production crews: it stays intact and functional during the days or weeks a roof might be partially exposed between courses.
Roof Underlayment Types
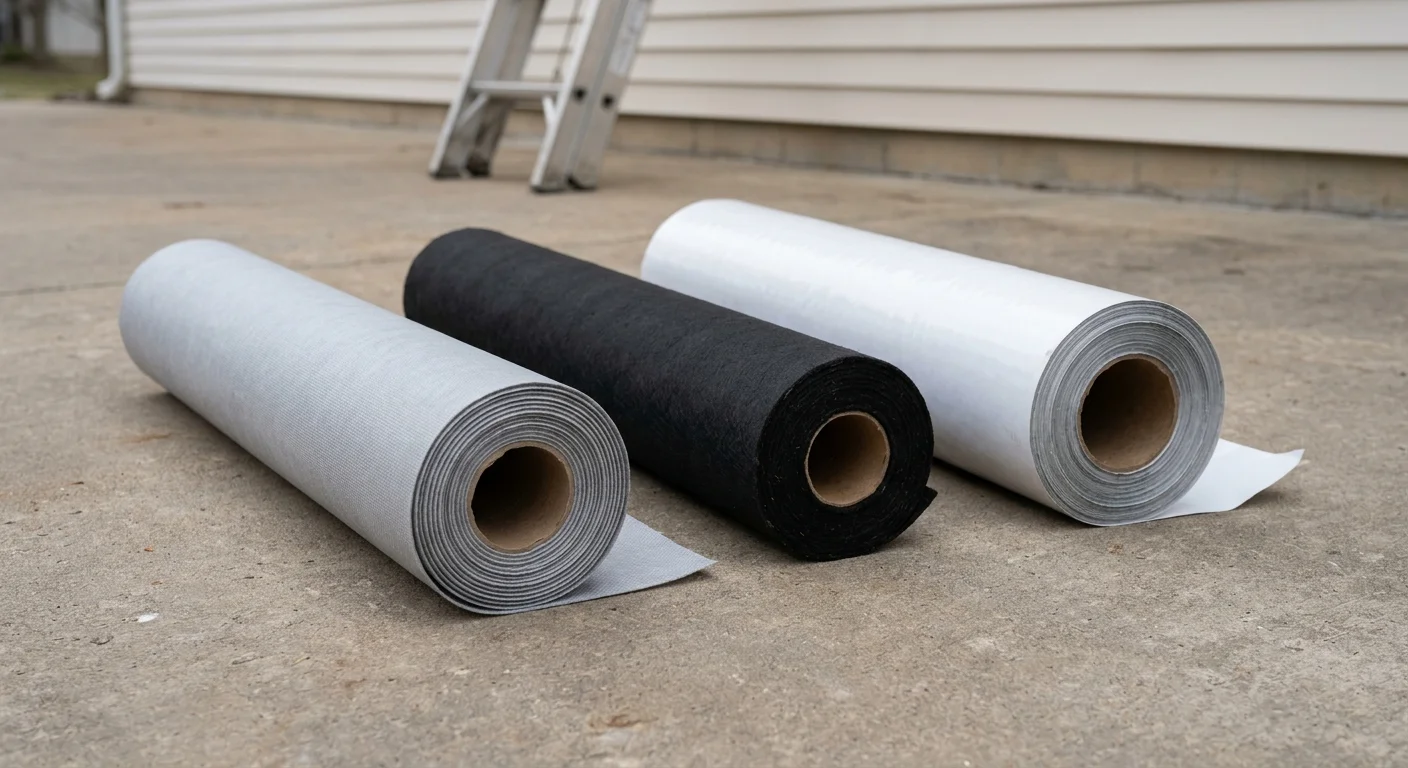
There are three basic roof underlayment categories, distinguished by composition and attachment method. Understanding each one — what it is made of, how it is fastened, and where it is used — is the foundation of every underlayment decision on a roofing project.
Asphalt Felt Underlayment (#15 and #30)
Asphalt-saturated felt — also called asphalt felt underlayment, tar paper, or roofing felt — is the traditional underlayment material. It is made by saturating a cellulose (organic) or fiberglass mat with asphalt. The two common weights are #15 and #30, named for the approximate weight per square (100 sq ft). #15 felt is lighter and thinner; #30 felt is heavier and more durable. Both are sold in rolls: #15 felt commonly covers about 400 sq ft per roll (36 in × 144 ft) and #30 felt commonly covers about 200 sq ft per roll (36 in × 72 ft). Felt is fastened with roofing nails or staples. Its main advantage is cost and familiarity — it has been on residential roofs for a century. Its disadvantages are real: it tears when walked on, wrinkles when it gets wet, cracks in cold weather, and has a short UV exposure window (30 to 60 days) before the asphalt hardens and the mat becomes brittle. Felt is vapor-permeable, which is sometimes described as a "smart" vapor-retarding property — it allows modest amounts of moisture vapor to pass through rather than trapping it entirely.
Synthetic Underlayment
Synthetic roof underlayment is made of woven or non-woven polypropylene or polyethylene. It is the dominant field underlayment on modern residential roofing crews. Synthetic rolls are much larger than felt rolls — commonly 4 ft × 250 ft, covering about 1,000 sq ft per roll — which means fewer rolls to carry up the ladder and fewer end laps per roof. Synthetic is lighter per square foot than felt, far more tear-resistant under foot traffic and wind, UV-stable for 90 to 180+ days during installation, and typically non-vapor-permeable. It requires cap nails or cap staples (not bare staples) for proper fastening, per most manufacturers' instructions. Synthetic costs more per roll than felt, but the larger roll size, reduced waste, and reduced fastener count often bring installed cost to parity or better. ASTM D8257 is the standard commonly cited for synthetic underlayment products. The Roof Shingle Calculator and Roofing Calculator both use synthetic-underlayment roll coverage (about 1,000 sq ft per roll) as their default underlayment estimate.
Self-Adhering Rubberized Asphalt Membrane (Ice and Water Shield)
Ice and water shield is a self-adhering, waterproof membrane made of rubberized asphalt laminated to a polyethylene or polypropylene film. It comes with a peel-off release liner; the installer removes the liner and presses the membrane directly onto the deck, where the asphalt bonds to the wood and seals around any fastener that later penetrates it. Because it is waterproof and self-sealing, it is used at the locations most vulnerable to backed-up water: the eave edge (ice dams), valleys (concentrated water flow), walls and chimneys (vertical intersections), and around plumbing stacks and other penetrations. Ice and water shield is an ADDITIONAL layer — it goes over the field underlayment or directly on the deck in some code paths, not instead of field underlayment on a steep-slope roof. A common roll size is 36 in × 66.7 ft, covering about 200 sq ft per roll. ASTM D1970 is the standard commonly cited for self-adhering polymer-modified asphalt underlayment.
Rubberized Asphalt vs Field Underlayment — Different Jobs
It is worth being precise here, because the terms overlap in casual conversation. All self-adhering membranes are rubberized asphalt; not all rubberized asphalt is called "ice and water shield" on the label. The functional distinction is where it is used. Field underlayment — felt or synthetic — covers the main roof area between detailed zones. Ice and water shield covers the detailed zones themselves. On a typical cold-climate residential roof, the assembly might be: ice and water shield at the eave (3 ft to 6 ft up the slope), ice and water shield in the valleys, ice and water shield at wall and chimney flashings, then synthetic underlayment over the entire remaining deck, then shingles over everything. The layers work together; neither replaces the other on a code-compliant steep-slope assembly.
Felt vs Synthetic Underlayment
The felt vs synthetic underlayment question is one of the most common material decisions on a residential roofing project — and one of the most misunderstood. Both are acceptable under IRC R905.1 when properly classified and installed; the choice comes down to handling, exposure tolerance, vapor behavior, fastening, and installed cost. The comparison table below consolidates the differences that matter on the jobsite.
| Property | Asphalt Felt (#15 / #30) | Synthetic Underlayment |
|---|---|---|
| Material | Cellulose or fiberglass mat saturated with asphalt | Woven or non-woven polypropylene / polyethylene |
| Common Roll Size | #15: 36 in × 144 ft (~400 sq ft/roll) #30: 36 in × 72 ft (~200 sq ft/roll) |
48 in × 250 ft (~1,000 sq ft/roll) |
| Weight | Heavier per square foot | Lighter per square foot |
| Tear Resistance | Tears easily under foot traffic and wind | Far more tear-resistant; non-skid surfaces available |
| UV Exposure Window | 30–60 days before hardening and brittleness | 90–180+ days UV-stable during installation |
| Wet / Cold Behavior | Wrinkles when wet; can crack in cold weather | Wrinkle-resistant; performs in a wider temperature range |
| Vapor Permeability | Vapor-permeable ("smart" vapor retarder) | Typically non-vapor-permeable |
| Fastening | Roofing nails or staples | Cap nails or cap staples (required by most manufacturers) |
| Roll Cost | Lower per roll | Higher per roll |
| Installed Cost | Often competitive on small roofs | Often competitive or lower on larger roofs (fewer rolls, fewer fasteners) |
| Market Position (new residential) | Declining share; still common on re-roofs and budget work | Dominant on production crews; most specified product |
| Code Standard | ASTM D226 / D2626 / D4869 | ASTM D8257 |
When Felt Still Makes Sense
Felt has not disappeared, and for good reason on certain projects. On a small re-roof — a garage, a porch, a quick tear-off-and-recover — the lower roll cost and the fact that felt can be fastened with ordinary staples (no cap-nail gun needed) keep it practical. On very short installation windows where the deck will be covered the same day, felt's short UV tolerance does not matter. And on some historic or preservation projects, the original assembly used felt and the replacement is expected to match it. The key is knowing the limitations: if the roof will be left exposed for more than a few days, if the crew will be walking on the underlayment extensively, or if cold or wet conditions are expected during installation, synthetic is the better choice.
When Synthetic Is the Clear Choice
On any new residential roof, on any roof with a multi-day installation window, on steep roofs where crews will be walking on the underlayment extensively, and on any roof where code or manufacturer instructions specify synthetic, synthetic underlayment is the standard. The larger roll size alone changes the logistics: a 2,885 sq ft roof takes about 3 rolls of synthetic (at 1,000 sq ft/roll) versus about 8 rolls of #15 felt (at 400 sq ft/roll) or 15 rolls of #30 felt (at 200 sq ft/roll). Fewer rolls means fewer trips up the ladder, fewer end laps to seal, and fewer chances for a lap to be missed. The tear resistance means the underlayment survives the crew walking on it while they install flashing, drip edge, and shingles — something felt struggles with on larger roofs.
Roll Coverage & How Many Rolls You Need
Calculating roof underlayment rolls is straightforward once you know two numbers: the measured roof surface area and the product's coverage per roll. Coverage varies by product type, and the roll sizes below are the common residential specifications — always confirm against the label on the actual product you are using.
| Underlayment Type | Common Roll Size | Coverage per Roll | Typical Use |
|---|---|---|---|
| #15 Asphalt Felt | 36 in × 144 ft | ≈ 400 sq ft | Field underlayment on small roofs; budget re-roofs |
| #30 Asphalt Felt | 36 in × 72 ft | ≈ 200 sq ft | Heavier field underlayment; low-slope double-layer applications |
| Synthetic Underlayment | 48 in × 250 ft | ≈ 1,000 sq ft | Field underlayment — dominant on new residential roofs |
| Ice and Water Shield | 36 in × 66.7 ft | ≈ 200 sq ft | Eaves, valleys, walls, penetrations — ADDITIONAL to field underlayment |
The Roll-Count Formula
Use this formula for field underlayment:
Rolls needed = Ceiling of [ (Roof area × Pitch factor × Sections × (1 + Waste %)) ÷ Coverage per roll ]
- Roof area — measured roof surface area in sq ft (footprint × pitch multiplier, or a plane-area takeoff). Do not use bare footprint; the pitch multiplier matters.
- Pitch factor — 1.0 if you already used a measured surface area; use the pitch multiplier only if you are converting from footprint.
- Sections — number of separate roof planes or sections if the underlayment will be rolled per section (some crews roll per plane rather than running continuous courses across the whole roof).
- Waste % — 10% to 15% for laps, cut-outs around penetrations, and roll-end scrap. Some installers use the product's labeled coverage without adding waste; others add 10% to 15%. Follow the manufacturer's installation instructions.
- Coverage per roll — from the table above (or the product label).
For ice and water shield, do NOT apply this formula to the entire roof area. Ice and water shield is measured by the detail requirement — eave strip length × width, valley length × width, flashing area — not by blanket roof-area coverage. Estimate ice and water shield separately: eave strip = eave length × required coverage width (commonly 3 ft to 6 ft, or up to 24 in past the interior wall line in cold climates); valley = valley length × valley width (commonly 36 in); wall/chimney = perimeter × required height.
Where Does Roof Underlayment Go?
Roof underlayment covers the entire roof deck, laid in horizontal courses from the eave up to the ridge. Each course overlaps the one below it (commonly 2 in to 4 in side laps, with head laps per the manufacturer's instructions — commonly 4 in for synthetic). The overlap direction matters: courses are laid starting at the eave, with each successive course overlapping the top edge of the one below, so water running down the slope always flows over a lap edge, never under it.
Drip Edge Layering
The relationship between underlayment and drip edge is specific and often got wrong on DIY work. At the eave, the drip edge goes on FIRST — directly on the deck — and the underlayment goes over it, so water running off the drip edge flows over the top of the underlayment and off the roof. At the rake (the sloped gable edge), the underlayment goes on first, and the drip edge goes over it, so water running down the rake flows over the drip edge and off the roof. This eave-first, rake-second sequence is standard in manufacturer installation instructions and is one of the details that separates a roof that drains correctly from one that wicks water backward under the edge metal.
Layer Map: A Typical Cold-Climate Asphalt Roof
| Location | Layer(s) | Notes |
|---|---|---|
| Eave edge (ice dam zone) | Drip edge → Ice and water shield → Field underlayment → Shingles | Ice and water shield covers eave strip (3 ft–6 ft, or per code: up to 24 in past interior wall line) |
| Main roof field | Field underlayment (synthetic or felt) → Shingles | Underlayment courses from eave to ridge, side laps 2–4 in, head laps per manufacturer |
| Valleys | Ice and water shield → Field underlayment → Valley flashing → Shingles | Ice and water shield at valley before field underlayment; metal valley flashing over membrane |
| Walls and chimneys | Ice and water shield → Field underlayment → Step flashing / counter flashing → Wall finish | Membrane runs up the vertical surface behind the flashing |
| Penetrations (plumbing stacks, vents) | Ice and water shield (boot area) → Field underlayment → Pipe boot flashing → Shingles | Membrane under the boot seals around fasteners |
| Rake edges (gable ends) | Field underlayment → Drip edge → Shingles | Drip edge OVER underlayment at rakes (opposite of eave) |
| Ridge | Field underlayment (rolled over ridge) → Ridge cap shingles | Underlayment continues over the ridge for continuity |
The table above describes a common cold-climate assembly. In warm climates where ice dams are not a concern, the eave ice and water shield may be omitted or reduced, and field underlayment may run directly to the eave over the drip edge. Always confirm against the adopted IRC edition in your jurisdiction and the shingle manufacturer's installation instructions — both govern, and the stricter of the two controls.
Ice and Water Shield

Ice and water shield is the waterproof layer in the underlayment assembly. Where field underlayment (felt or synthetic) is water-resistant — it sheds water that reaches it but is not designed to hold standing water — ice and water shield is waterproof and self-sealing. It bonds directly to the deck, and any fastener driven through it (from shingles, flashing, or trim) is sealed by the rubberized asphalt around the penetration. This is why it is used at exactly the locations where water pressure is highest: the eave, the valley, the wall-to-roof intersection, and around every penetration.
Where Ice and Water Shield Goes
| Location | Why | Common Application |
|---|---|---|
| Eave edge | Ice dams trap water behind them at the eave; wind-driven rain hits the eave at an angle | Strip from eave up the slope: 3 ft–6 ft in many climates; up to 24 in past interior wall line in cold climates (IRC R905.1.2) |
| Valleys | Valleys concentrate water flow from two roof planes; leaks here are common on older roofs | Membrane laid in the valley before field underlayment; metal valley flashing over the membrane |
| Walls and chimneys | Vertical-to-horizontal intersections are high-risk leak points | Membrane runs up the vertical surface behind step flashing or counter flashing |
| Penetrations | Pipe boots and vents are fastened through the deck; water can back up under the boot | Membrane under the boot area; boot installed over the membrane |
| Full deck (low slopes) | Very low slopes allow water to linger; self-adhered membrane provides continuous waterproofing | Full-deck self-adhered polymer-modified asphalt underlayment commonly required below 4:12 in many jurisdictions |
Ice and Water Shield Is ADDITIONAL, Not Instead
One of the most common underlayment mistakes is treating ice and water shield as a replacement for field underlayment. It is not — not on a steep-slope roof. Ice and water shield covers the detailed zones; field underlayment covers the rest of the deck. The only exception is very low-slope or specialty roofing systems where code and manufacturer instructions require a full-deck self-adhered membrane. On a conventional 4/12 to 12/12 residential roof, the assembly is ice and water shield at the details PLUS synthetic (or felt) underlayment over the remaining field. Estimating ice and water shield as a full-roof product is a costly error; estimating it as an afterthought at the eaves only is a code-compliance error in cold climates.
Eave Coverage Distance Varies by Code
The required ice-dam protection distance at the eave is not the same everywhere. The 2021 IRC R905.1.2 addresses ice dam protection, and the required distance from the eave — commonly stated as extending 24 inches past the interior wall line in cold climates — depends on climate zone and local code adoption. Some jurisdictions require 3 ft; some require 6 ft; some adopt the IRC formula-based approach that calculates the distance from eave to the interior wall line based on roof slope and climate. The safest approach is to check the adopted code edition in your jurisdiction and the shingle manufacturer's installation instructions, then apply the more stringent of the two. When in doubt, a 6 ft eave strip is a common planning value on cold-climate residential roofs.
IRC R905.1 Code Requirements
The International Residential Code (IRC) R905.1 is the governing text for underlayment on residential roofs in most U.S. jurisdictions. It does not pick a single product — it specifies which ASTM classifications are accepted, how underlayment must be applied by roof slope and roof covering, and how it must be fastened. The tables below summarize the key provisions. Always verify against the adopted edition of the IRC in your jurisdiction; amendments are common, and the edition in force locally is what the inspector will check.
Accepted Underlayment Standards (IRC R905.1.1)
| Standard | Material | Common Product |
|---|---|---|
| ASTM D226 | Asphalt-saturated organic felt (Type I / Type II) | #15 and #30 asphalt felt underlayment |
| ASTM D1970 | Self-adhering polymer-modified asphalt underlayment | Ice and water shield; full-deck self-adhered membranes |
| ASTM D2626 | Asphalt-saturated cellulose felt | Some felt underlayment products |
| ASTM D4869 | Asphalt-saturated organic felt for steep slopes | #15 and #30 felt (Type I–Type IV by weight) |
| ASTM D6380 Class M | Asphalt-coated glass-felt | Fiberglass-based felt underlayment |
| ASTM D6757 | Asphalt-coated glass-felt (with additional requirements) | Some fiberglass felt products |
| ASTM D8257 | Synthetic polymer-based underlayment | Synthetic roof underlayment (polypropylene / polyethylene) |
The code also requires that underlayment products carry the manufacturer's label identifying the standard, the coverage, and the fastening requirements — and that installation follow both the code tables and the manufacturer's printed installation instructions. Where the two conflict, the more stringent requirement controls.
Underlayment by Roof Slope (Summary)
| Roof Slope | Typical Underlayment Requirement | Notes |
|---|---|---|
| Above 4:12 | One layer of code-approved underlayment (felt or synthetic) over the entire deck | Standard steep-slope residential assembly; ice and water shield at details per climate |
| 2:12 to 4:12 | Ice and water shield or self-adhering polymer-modified asphalt underlayment under the roofing material | Lower slopes hold water longer; self-adhered membrane commonly required under shingles in this band |
| Below 2:12 | Roofing material must be specifically approved for slopes below 2:12; self-adhered polymer-modified asphalt underlayment commonly required over the entire deck | Conventional shingles are not approved below 2:12; specialty low-slope materials apply |
These are planning summaries, not the full code text. IRC R905.1.1(1) lists underlayment types by roof covering; R905.1.1(2) lists application requirements; R905.1.1(3) lists fastening requirements (including cap-nail spacing for synthetic underlayment and felt weight thresholds). R905.1.2 addresses ice-dam protection at eaves. R905.2.2 addresses minimum slope for asphalt shingles (commonly 2:12, with specific underlayment requirements in the 2:12–4:12 band). Consult the full code or a qualified professional for project-specific requirements.
Roofing Underlayment Installation
Roofing underlayment installation follows a specific sequence — the sequence of layers matters as much as the materials themselves. The sequence below reflects mainstream residential practice and manufacturer installation instructions for asphalt shingle roofs. Deviate from it only when a specific product's instructions require a different sequence, and always follow the more stringent requirement.
Installation Sequence
- Prepare the deck. The sheathing must be clean, dry, sound, and free of protruding fasteners. Replace damaged or delaminated panels before laying any underlayment — underlayment on a weak deck is not a waterproof roof, it is a tarp over a problem.
- Install drip edge at the eaves. The eave drip edge goes on FIRST, directly on the deck, before any underlayment. This allows the underlayment to lap over the drip edge at the eave, so water flows off the drip edge and over the top of the underlayment.
- Install ice and water shield at the eaves (and other detailed zones). Peel the release liner and press the membrane directly onto the deck, starting at the eave edge and working up the slope. Smooth out air bubbles; bond is to the wood. Extend the membrane up the slope per code — commonly 3 ft to 6 ft, or up to 24 in past the interior wall line in cold climates. Ice and water shield at valleys, walls, chimneys, and penetrations is installed at the appropriate point in the sequence, typically before the field underlayment reaches that area.
- Lay field underlayment (felt or synthetic), starting at the eave. Roll out the first course along the eave, over the drip edge and over the ice and water shield where present. Side laps are commonly 2 in to 4 in; head laps are per the manufacturer (commonly 4 in for synthetic). Work from the eave up to the ridge, with each course overlapping the one below. Fasten per the manufacturer's pattern — cap nails or cap staples for synthetic, roofing nails or staples for felt.
- Install drip edge at the rakes. The rake drip edge goes on AFTER the field underlayment, over the top of it, so water running down the rake flows over the drip edge and off the roof. This is the opposite of the eave sequence — eave drip edge under the underlayment, rake drip edge over it.
- Install flashings at walls, chimneys, and penetrations. Step flashing at wall-to-roof intersections, counter flashing at chimneys, pipe boots at plumbing stacks — all installed over the underlayment, with ice and water shield behind them where required.
- Install shingles or other roofing material. Starter strip at the eave, then field shingles, then hip and ridge cap. The underlayment is fully covered at this point and begins its long-term service life beneath the roofing material.
Lap Directions and Fastening
Underlayment courses must overlap in the correct direction — each course overlapping the top edge of the course below — so that water running down the slope always flows over a lap edge. Side laps are typically 2 in to 4 in. Head laps vary by product; synthetic underlayment commonly requires a 4 in head lap. Fastening follows the manufacturer's pattern: synthetic underlayment requires cap nails or cap staples at specified spacing (commonly along the seams and across the field), while felt can be fastened with roofing nails or staples. Cap fasteners are required for synthetic because a bare staple can tear through the thin polymer sheet in wind; the cap distributes the holding force over a larger area. Under-driven or over-driven fasteners both compromise the seal — follow the manufacturer's depth guidance.
Common Installation Errors
- Drip edge at the eave installed AFTER the underlayment — traps water between the drip edge and the underlayment at the eave.
- Head laps too short — allows water to work back through the lap in wind-driven rain.
- Side laps lapped in the wrong direction — water flows into the lap instead of over it.
- Bare staples through synthetic underlayment — tears in wind; cap fasteners are required.
- Ice and water shield installed over the field underlayment at the eave instead of directly on the deck — breaks the bond between membrane and wood; the membrane must be in direct contact with the deck to seal around fasteners.
- Leaving underlayment exposed beyond the product's UV window — felt hardens and cracks; even synthetic has a rated exposure period. Cover exposed underlayment with roofing material as soon as practicable.
Worked Example: How Many Underlayment Rolls?
The example below calculates field underlayment rolls and ice and water shield quantity for a realistic residential roof. Use the same sequence with any footprint, pitch, and product coverage.
Project Parameters
Roof form: Rectangular hip roof, ridge along the 60-ft length
Footprint: 40 ft × 60 ft (2,400 sq ft)
Pitch: 8/12
Climate: Cold (ice dam protection required at eaves)
Field underlayment: Synthetic, 48 in × 250 ft (≈ 1,000 sq ft/roll)
Ice and water shield: 36 in × 66.7 ft (≈ 200 sq ft/roll); eave coverage 6 ft
Waste allowance for field underlayment: 10% for laps and cut-outs
| Step | Calculation | Result |
|---|---|---|
| 1. Footprint area | 40 ft × 60 ft | 2,400 sq ft |
| 2. Pitch multiplier (8/12) | √(8² + 12²) ÷ 12 = √208 ÷ 12 | 1.202 |
| 3. Roof surface area | 2,400 × 1.202 | 2,885 sq ft |
| 4. Field underlayment area with waste | 2,885 × 1.10 | 3,173 sq ft |
| 5. Synthetic rolls needed | 3,173 ÷ 1,000 = 3.173 | 4 rolls (round up) |
| 6. Eave length (both eaves) | 60 ft + 60 ft | 120 ft |
| 7. Ice and water shield at eaves | 120 ft × 6 ft coverage width | 720 sq ft |
| 8. Ice and water shield rolls (eaves only) | 720 ÷ 200 = 3.6 | 4 rolls (round up) |
| 9. Valley ice and water shield (2 valleys × 15 ft × 3 ft) | 2 × 15 × 3 | 90 sq ft (within spare from eave rolls or +1 roll) |
| 10. Total ice and water shield rolls | 4 rolls eave + valleys (use 5 to cover valleys and waste) | 5 rolls |
| 11. Total underlayment rolls | 4 synthetic + 5 ice and water shield | 9 rolls total |
What This Example Illustrates
Field underlayment and ice and water shield are calculated on completely different bases — field underlayment from roof area divided by roll coverage, ice and water shield from detail geometry (eave length × coverage width, valley length × width). Combining them into one roof-area formula produces wrong quantities in both directions: too much ice and water shield on the field (wasted money) and too little at the eaves (code violation and ice-dam risk). The pitch multiplier also matters: using bare footprint (2,400 sq ft) instead of sloped area (2,885 sq ft) would under-count synthetic underlayment by almost a full roll. Use the Roofing Calculator to run the same chain for other footprints, pitches, and product coverages — it converts area into underlayment rolls using the product coverage you specify.
Common Underlayment Mistakes
Most underlayment problems trace back to a small set of repeated errors — material selection, quantity estimation, and installation sequence. Review this list before finalizing any underlayment takeoff or installation.
| Mistake | Why It Fails | Fix |
|---|---|---|
| Using bare footprint area for underlayment rolls | Ignores the pitch multiplier; under-counts by 5% to 40%+ depending on pitch | Apply the pitch multiplier, or use a measured plane-area takeoff |
| Treating ice and water shield as a full-roof product | Ice and water shield is an ADDITIONAL layer at details — not a field-underlayment replacement on steep slopes | Calculate field underlayment from roof area; calculate ice and water shield from detail geometry (eave length × width, valleys, flashings) |
| Forgetting ice and water shield at the eaves in cold climates | Ice dams trap water at the eave; without membrane, water reaches deck and insulation | Install ice and water shield per IRC R905.1.2 and local code adoption; common planning value 6 ft eave strip |
| Installing eave drip edge AFTER the underlayment | Traps water between drip edge and underlayment at the eave | Eave drip edge goes on FIRST; underlayment laps over it |
| Installing rake drip edge BEFORE the underlayment | Water running down the rake flows under the drip edge instead of over it | Rake drip edge goes on AFTER the underlayment, over the top of it |
| Using bare staples on synthetic underlayment | Bare staples tear through polymer sheet in wind; no holding cap | Use cap nails or cap staples per manufacturer spacing requirements |
| Not adding waste for underlayment laps | Laps, cut-outs around penetrations, and roll-end scrap consume 10% to 15% beyond clean coverage | Add 10% to 15% waste, or follow the product's labeled coverage and manufacturer instructions |
| Leaving felt underlayment exposed beyond its UV window | Felt hardens and cracks after 30 to 60 days of sun exposure | Install roofing material as soon as practicable; use synthetic if exposure will exceed the felt window |
| Ignoring the product label and using generic coverage numbers | Roll sizes vary by manufacturer; generic figures can be off by 20% or more | Confirm coverage per roll on the actual product wrapper before finalizing quantities |
A Quick Sanity Check
Before locking an underlayment takeoff, ask three questions. (1) Did I use sloped roof area (footprint × pitch multiplier), not just footprint? (2) Did I calculate ice and water shield from detail geometry — eave length × coverage width, valley lengths — not from blanket roof area? (3) Did I confirm the coverage per roll on the actual product label, and did I add a waste allowance for laps? If all three answers are yes, the underlayment quantity is defensible. If any answer is no, the error is in that specific row — fix it there.
Frequently Asked Questions
Roof underlayment is a water-resistant or waterproof barrier layer installed directly on the roof deck, between the sheathing and the final roofing material (such as asphalt shingles, metal panels, or tile). It provides a secondary line of defense against wind-driven rain, ice dams, and moisture intrusion if the primary roofing material fails. Underlayment is not optional on most code-compliant roof assemblies — the International Residential Code (IRC) R905.1 specifies which underlayment materials are required by roof slope and roof covering type. The three main categories are asphalt-saturated felt (felt underlayment), synthetic underlayment, and self-adhering rubberized asphalt membrane (ice and water shield).
The three basic roof underlayment types are asphalt-saturated felt (commonly called felt underlayment or asphalt felt underlayment), synthetic underlayment, and self-adhering rubberized asphalt membrane (ice and water shield). Asphalt-saturated felt is a cellulose or fiberglass mat saturated with asphalt, available as #15 or #30 weight. Synthetic underlayment is made of polypropylene or polyethylene — it is lighter, stronger, tear-resistant, and now the dominant field underlayment on production roofing crews. Self-adhering rubberized asphalt membrane (ice and water shield) is a peel-and-stick waterproof layer used at eaves, valleys, walls, and penetrations where water is most likely to back up under the shingles. Most modern roofs use synthetic underlayment as the field layer plus ice and water shield at vulnerable details.
The felt vs synthetic underlayment comparison comes down to weight, durability, vapor permeability, and installation method. Asphalt felt underlayment (#15 or #30) is heavier per roll, tears easily when walked on or exposed to wind, wrinkles when wet, and can crack in cold weather. Synthetic underlayment is lighter per square foot, far more tear-resistant, UV-stable for 90 to 180+ days during installation, and typically non-vapor-permeable (felt is vapor-permeable and acts as a "smart" vapor retarder). Felt is fastened with roofing nails or staples; synthetic requires cap nails or cap staples. Synthetic rolls are larger — commonly 4 ft × 250 ft (about 1,000 sq ft per roll) — while felt rolls are smaller: #15 felt is typically 36 in × 144 ft (about 400 sq ft per roll) and #30 felt is 36 in × 72 ft (about 200 sq ft per roll). Synthetic costs more per roll but requires fewer rolls and fewer fasteners per square, so installed cost is often competitive. Both are acceptable under IRC R905.1 when the product carries the required ASTM classification and label.
Roof underlayment covers the entire roof deck, laid in horizontal courses from the eave up to the ridge, directly on the plywood or OSB sheathing and beneath the shingles or other roofing material. The drip edge at the eaves is installed BEFORE the underlayment at the eave, and the drip edge at the rakes is installed AFTER the underlayment — this layering sheds water over the underlayment at the eave and under the underlayment at the rake. Ice and water shield (self-adhering membrane) is installed as an ADDITIONAL layer over the field underlayment at the eaves (typically a 3 ft to 6 ft strip, or up to 24 inches past the interior wall line in cold climates per IRC R905.1.2), in valleys, around chimneys and walls, and at other penetrations where water is most likely to back up. The field underlayment (synthetic or felt) covers everything else between those details.
Calculate roof underlayment from the measured roof surface area (footprint × pitch multiplier, or a plane-area takeoff) divided by the product's roll coverage. Synthetic underlayment commonly covers about 1,000 sq ft per roll (4 ft × 250 ft). #15 asphalt felt covers about 400 sq ft per roll (36 in × 144 ft). #30 asphalt felt covers about 200 sq ft per roll (36 in × 72 ft). Ice and water shield covers about 200 sq ft per roll (36 in × 66.7 ft) and is used only at eaves, valleys, and penetrations — not as a full-deck replacement for field underlayment (unless the manufacturer or code requires full-deck self-adhered on very low slopes). The formula is: Rolls needed = Ceiling of (Roof area ÷ Coverage per roll). Add 10% to 15% waste for laps and cut-outs around penetrations, or follow the specific product's labeled coverage and the manufacturer's installation instructions. Always confirm the coverage printed on the roll wrapper — products vary.
IRC R905.1 requires that underlayment materials conform to approved standards and be installed per the manufacturer's instructions and the code tables. Accepted standards include ASTM D226 (asphalt-saturated organic felt), ASTM D1970 (self-adhering polymer-modified asphalt underlayment), ASTM D2626 (asphalt-saturated cellulose felt), ASTM D4869 (asphalt-saturated organic felt for slopes), ASTM D6380 Class M (asphalt-coated glass-felt), ASTM D6757 (glass-felt with asphalt), and ASTM D8257 (synthetic underlayment). The code provides tables for underlayment types by roof covering (Table R905.1.1(1)), application requirements (Table R905.1.1(2)), and fastening patterns (Table R905.1.1(3)). For asphalt shingles on slopes of 2:12 or steeper, one layer of underlayment is typically required; for slopes between 4:12 and 2:12, ice and water shield or self-adhering polymer-modified asphalt underlayment is required under the shingles; for slopes below 2:12, the roofing material must be specifically approved for that slope and self-adhered polymer-modified asphalt underlayment is commonly required over the entire deck. Always verify against the adopted edition of the IRC in your jurisdiction and the shingle manufacturer's installation instructions.
Ice and water shield is a self-adhering, waterproof rubberized-asphalt membrane that bonds directly to the roof deck and seals around fastener penetrations. It is used at the locations most vulnerable to ice dams and wind-driven rain: the eaves (typically a strip extending from the eave up the roof, commonly 3 ft to 6 ft in warm climates and up to 24 inches past the interior wall line in cold climates per IRC R905.1.2), valleys, walls and chimneys, and around plumbing stacks and other penetrations. Ice and water shield is an ADDITIONAL layer — it goes over the field underlayment (or directly on the deck in some code paths), not instead of it. Full-deck self-adhered polymer-modified asphalt underlayment is commonly required on very low slopes (below 4:12 in many jurisdictions) and on some specialty roofing systems. The required eave coverage distance varies by climate zone and local code adoption — confirm with your local building department.
It depends on the product, and the exposure rating is printed on the roll. Asphalt-saturated felt has almost no UV resistance and is usually covered within days, ideally the same day it is laid. Synthetic underlayment is commonly rated for 30 to 180 days of exposure, with 90 days a typical figure for the better products, and some premium membranes claim longer. A self-adhered membrane exposed beyond its rating becomes brittle and can lose adhesion at the laps. Exposure limits are a maximum, not a schedule: the safest practice is to dry in the roof as quickly as weather allows, and to check the roll label rather than assuming all synthetic products behave alike.
References
- National Roofing Contractors Association (NRCA), NRCA Roofing Manual — Architectural and Steep-Slope Roofing, nrca.net — industry-standard reference for underlayment selection, application, and roofing system assembly.
- Asphalt Roofing Manufacturers Association (ARMA), Residential Asphalt Roofing: Underlayment and Installation Guide, asphaltroofing.org — manufacturer guidance on asphalt shingle underlayment requirements, coverage, and installation expectations.
- International Code Council, International Residential Code (IRC) Chapter 9 — Roof Assemblies and Rooftop Structures, codes.iccsafe.org — R905.1 underlayment materials, application, and fastening tables; R905.1.2 ice-dam protection; R905.2.2 asphalt shingle minimum slope.
- InterNACHI (International Association of Certified Home Inspectors), Roof Underlayment — Types, Requirements, and Inspection, nachi.org — inspection guidance on underlayment types, condition, and installation quality.
- Occupational Safety and Health Administration (OSHA), Roofing — Fall Protection Requirements, osha.gov — fall-protection standards that govern residential steep-slope roofing work during underlayment installation.
- ASTM International, ASTM D226 / D1970 / D4869 / D8257 — Underlayment Material Standards, astm.org — material classification standards cited by IRC R905.1 for felt, self-adhering, and synthetic underlayment products.
Disclaimer: This guide provides general educational information about roof underlayment types, roofing underlayment installation, and related material planning and is not architectural, engineering, or building-code advice. Actual underlayment requirements vary by roof slope, roof covering type, climate zone, local building-code adoption, and manufacturer installation instructions. Code references cited here reflect mainstream IRC provisions — individual products, local amendments, and project-specific conditions may require different materials, coverage distances, or fastening patterns. Verify underlayment classifications, roll coverage, eave ice-dam protection distance, and fastening patterns against the manufacturer's label and installation instructions, and confirm requirements with your local building department and roofing contractor before finalizing a takeoff. Roofing work must follow OSHA fall-protection requirements and be performed by trained, insured professionals.