
ON THIS PAGE:
What Is Roof Pitch?
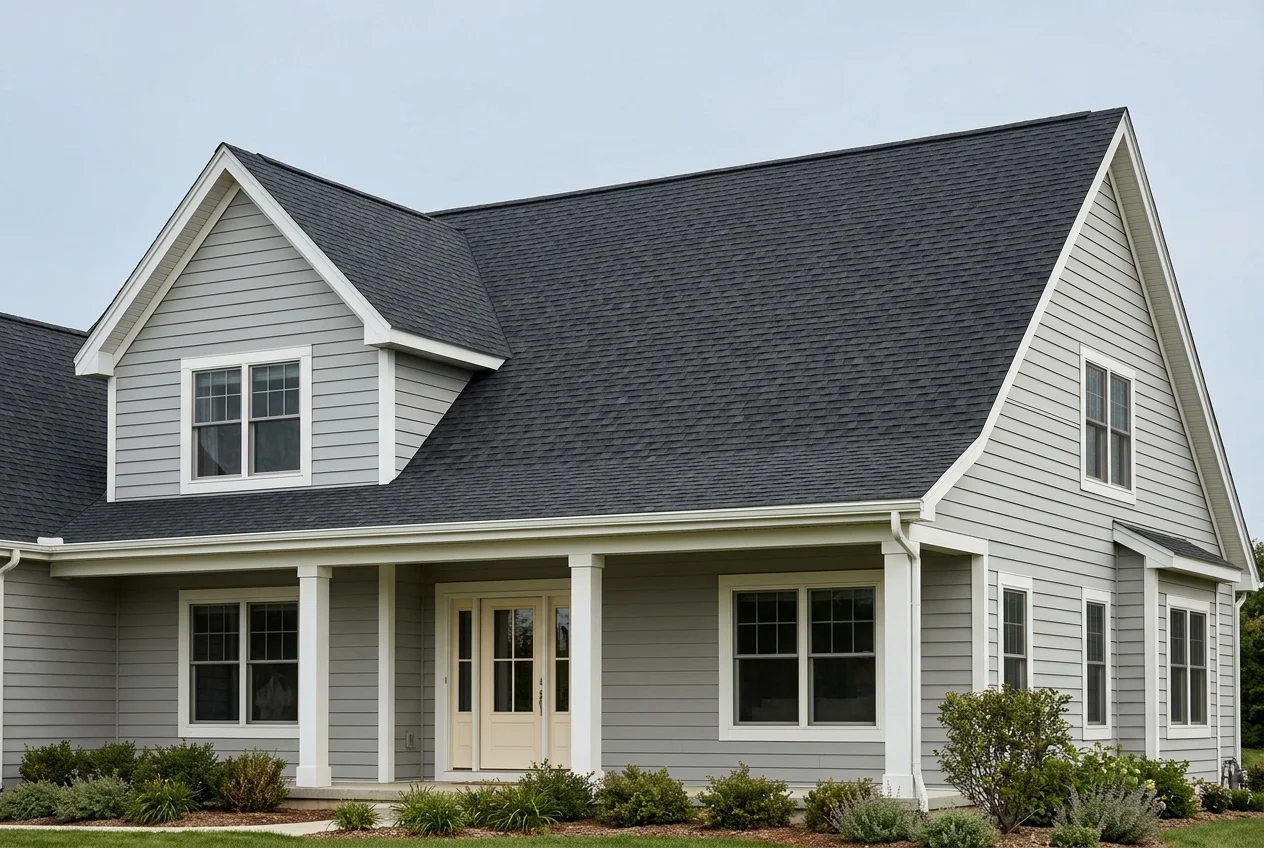
Roof pitch describes how steep a roof is. It is the ratio of the roof's vertical rise to its horizontal span — the slope of the roof plane expressed as a simple fraction that anyone can read from a set of plans or measure in the field. A 6/12 pitch roof rises 6 inches for every 12 inches of horizontal distance (one foot). A 12/12 pitch roof rises 12 inches per foot — a perfect 45-degree angle. A 2/12 pitch roof rises only 2 inches per foot — nearly flat.
Pitch is more than a number on a drawing. It determines which roofing materials are code-legal on the structure, how much roofing material the roof actually needs, how safely the roof can be walked on, how well it sheds snow and rain, how much it costs to install and maintain, and how the building looks. Changing pitch from 4/12 to 8/12 changes the roof's surface area by roughly 14 percent, changes the labor required, changes the underlayment and fastening schedule, and changes whether asphalt shingles are even an option without special detailing.
Why Pitch Matters on Every Job
Roof pitch drives nearly every downstream decision in a roofing project. Material selection starts with pitch — asphalt shingles typically need a minimum of 2/12 (with enhanced underlayment between 2/12 and 4/12), wood shingles and shakes need 3/12 or steeper, and standing-seam metal can go as low as 1/4:12 while exposed-fastener panels need 3/12. Cost follows pitch: steeper roofs take longer to install, require more safety equipment, and often need specialized materials. Roof area — the actual square footage of roof surface that must be covered — is the pitch multiplier applied to the building's footprint. A 2,000-square-foot footprint at 6/12 pitch has roughly 2,236 square feet of actual roof surface. Estimating materials from footprint alone without applying the pitch multiplier is one of the most common and most expensive mistakes in roofing takeoffs.
What This Guide Covers
This guide explains roof pitch from the ground up: how pitch, slope, and angle are defined and why they are not interchangeable, the four standard measurement methods with their accuracy, a complete conversion table from 1/12 through 24/12, pitch classification bands, the pitch multiplier and how it converts footprint into roof area, material minimum pitch requirements with IRC code references, walkability and safety ratings, snow load and water shedding behavior, a worked material takeoff example, cost impacts, gambrel and mansard pitch handling, common mistakes, and when to bring in a professional.
Pitch vs Slope vs Angle
Pitch, slope, and angle all describe roof steepness, but they are defined differently and are not interchangeable. Mixing them up is the most common source of estimation errors in roofing. The distinctions below are the ones that appear in building codes, manufacturer installation instructions, and takeoff software.
| Term | Definition | How It Is Expressed | Where You See It |
|---|---|---|---|
| Pitch | Rise divided by the full horizontal span of the roof (eave to eave), expressed as rise over 12 | Ratio: 6/12, 8/12, 12/12 | Residential plans, roofing contractor estimates, building code minimums, manufacturer installation guides |
| Slope | Rise divided by the horizontal run of one roof plane (eave to ridge), expressed as inches of rise per foot of run | Ratio: 6 in 12, or 6:12; percentage form: 50% | Structural framing drawings, rafter layout, roofing code sections (IRC Chapter 9), metal panel specifications |
| Angle | The actual angular measurement of the roof plane from horizontal, in degrees | Degrees: 26.57°, 45°, 53.13° | Engineered structural design, digital angle finder readings, architectural details, some manufacturer specs |
Why the Difference Matters
On a simple gable roof where the span equals twice the run, pitch and slope numerically match: a roof that is 6/12 by pitch is also 6 in 12 by slope. They diverge on other geometries. On a hip roof, each hip plane is shorter than half the span, so the slope of a hip rafter differs from the pitch of the roof as a whole. On a gambrel or mansard roof, different sections of the same roof carry different pitches. A framing plan that calls out 6/12 pitch tells you the overall roof ratio; a roof-plane detail that calls out 6:12 slope tells you the exact steepness of that particular plane. When a manufacturer says "minimum pitch 2/12," they are specifying pitch — rise over span. When a structural engineer specifies rafter slope, they are specifying rise over run. Reading the wrong one off a drawing, or applying one where the other is required, produces a roof that either does not shed water properly, violates code, or uses more material than the takeoff called for. The roof pitch angle — the measurement in degrees — is a third representation of the same steepness, and checking a code minimum written as a pitch ratio against a degree reading without converting is one of the most common specification errors on steep-slope work.
Converting Between Them
For a simple gable roof (two equal planes meeting at a ridge), pitch and slope are the same number, and the conversion to the roof pitch angle in degrees is a single calculation. The angle equals the arctangent of the rise over the run. For a 6/12 pitch gable roof, the angle is arctan(6/12) = arctan(0.5) = 26.57°. The slope percentage is the rise over run expressed as a percent: 6/12 = 0.5 = 50%. The full conversion relationships are:
- Angle (degrees) = arctan(pitch rise ÷ 12)
- Slope percentage = (pitch rise ÷ 12) × 100
- Pitch from slope = (slope inches per foot) × (12 ÷ run in feet) — only when run in feet is known
- Pitch multiplier = √(rise² + run²) ÷ run, where rise and run are in the same units
Use the conversion table in this guide to look up any pitch from 1/12 to 24/12 and read off its angle, slope percentage, and multiplier without doing the math yourself.
How Roof Pitch Is Expressed
Roof pitch appears in construction documents in several formats. All of them mean the same thing — how many units of vertical rise exist per 12 units of horizontal run — but the notation varies by discipline and region. The roof pitch ratio is the most common of these formats, and recognizing each notation prevents misreading a drawing.
The Standard Ratio Format
The most common format worldwide is the rise-over-12 ratio: 4/12, 6/12, 8/12, 12/12. The bottom number is always 12 (one foot of run). The top number is the rise in inches over that foot. A 4/12 pitch rises 4 inches per foot of run. A 12/12 pitch rises 12 inches per foot — a true 45° angle. Values above 12/12 are written the same way: 14/12, 16/12, 18/12, 20/12, 24/12 are all valid and appear on steep-slope and historic structures. The ratio format is what building codes cite (IRC R905.2.2, R905.7, etc.), what manufacturer installation instructions specify, and what roofing contractors quote against.
The Colon Format and the Word "In"
Some drawings and specifications write the same ratio with a colon — 6:12 — or with the word "in" — 6 in 12. Structurally these are identical to 6/12. The colon format is common in structural engineering and metal roofing specifications. The "in" format appears in framing layouts and older plan sets. A specification that reads "minimum slope 3 in 12" means the same minimum as "minimum pitch 3/12" for a simple gable roof.
Percentage Format
Slope is sometimes expressed as a percentage: 50%, 100%, 200%. The percentage is the rise divided by the run, multiplied by 100. A 6/12 pitch equals 50% slope (6 ÷ 12 = 0.5 = 50%). A 12/12 pitch equals 100% slope. Percentage notation appears in civil engineering, drainage design, and some international standards. To convert a percentage to pitch: multiply the percentage by 12, then divide by 100. A 75% slope equals (0.75 × 12) = 9 inches of rise per foot = 9/12 pitch.
Degree Format
Architectural details, engineered structural drawings, and digital measurement tools report roof steepness in degrees. A 26.57° roof is a 6/12 pitch gable. A 45° roof is 12/12. A 30° roof is approximately 6.9/12 — close to 7/12 (30.26°). Degree values are precise but require conversion before they can be checked against a code minimum that is written as a ratio. Never assume a degree value and a ratio value mean the same thing without converting — 25° is approximately 5.67/12, not 6/12.
Multi-Pitch Notation
Complex roofs carry more than one pitch. Gambrel and barn roofs are commonly written as two ratios, e.g., 20/12 lower and 7/12 upper. Mansard roofs similarly use two pitches — a steep lower slope (often 70–80°) and a shallower upper slope. Some modern designs mix low-slope and steep-slope sections, for example a 1/2:12 porch roof meeting a 6/12 main roof. In multi-pitch notation, always confirm which ratio applies to which roof plane before applying a pitch multiplier or checking a material minimum — the answer determines both the roof area calculation and whether the selected roofing material is legal on that plane.
Measuring Roof Pitch
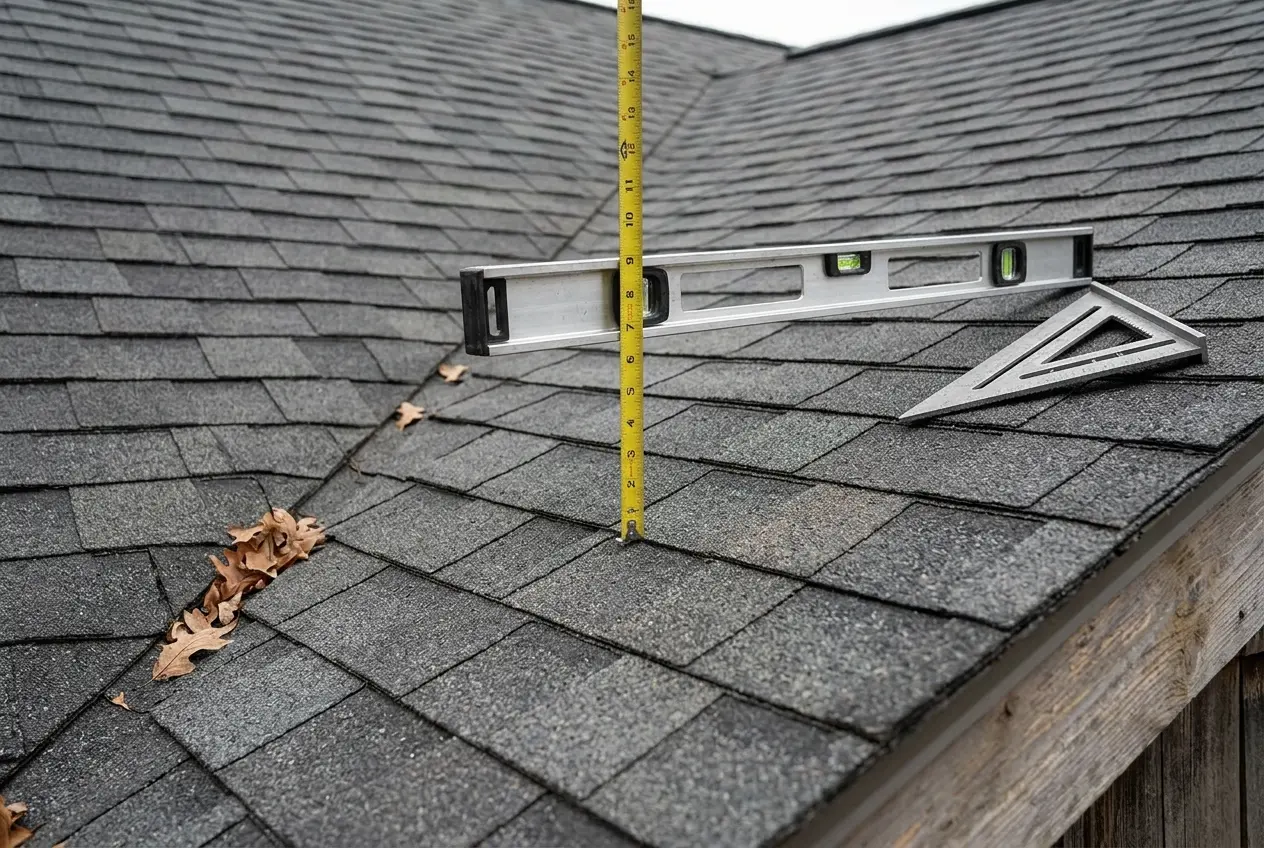
Roof pitch calculation starts with a measurement — and there is more than one correct way to get it. Four methods are commonly used to measure roof pitch in the field. Each has different accuracy, different tool requirements, and different risk levels. The method you choose depends on what information you already have, what tools you carry, and whether you are willing to go on the roof. How to calculate roof pitch from those measurements is covered in the conversion table further down this guide.
Method 1: Level and Tape on the Roof Surface
Lay a 2-foot level flat on the roof shingles (or other roofing surface). Measure vertically down from the far end of the level to the roof surface with a tape measure — this is the rise over the level's 24-inch run. Calculate pitch as (rise in inches ÷ 24) × 12, or simply rise in inches × 0.5 to get the pitch over 12. If the far end of the level sits 12 inches above the roof surface, the pitch is 12 × 0.5 = 6/12. This method is direct and requires only a level and tape measure, but it means you are standing on the roof — with all the safety implications that carries.
Method 2: Level and Tape from the Attic
From inside the attic, find a rafter or roof sheathing. Hold a 2-foot level horizontally with one end against the rafter. Measure vertically up from the far end of the level to the underside of the rafter or sheathing. This vertical measurement is the rise over the level's 24-inch run. Apply the same formula: pitch = (rise ÷ 24) × 12. This method avoids going on the roof entirely — a major safety advantage — and is often more accurate than on-roof measurement because the level sits directly against the structural member rather than on top of layered roofing materials. The limitation is attic access: if the attic is insulated to the roof deck (blown-in or spray foam), the rafters are not accessible and this method does not work.
Method 3: Digital Angle Finder or Smartphone
Place a digital angle finder flat on the roof surface (or against a rafter in the attic) and read the angle in degrees directly from the display. Many smartphones now include a built-in angle measurement feature in their measurement or level apps. This method gives you degrees immediately — which is useful if you need to check against an engineered specification — but the reading depends entirely on the device sitting flat on an uneven roofing surface. Shingles, tiles, and metal panels are not perfectly flat; a device bridging two shingle courses can read high or low by one to three degrees. Use this method for quick checks, not for final takeoffs, and always cross-verify with a level-and-tape measurement if the angle is near a code minimum.
Method 4: Speed Square
A speed square (rafter square) placed on the roof surface reads pitch directly on its degree scale and common-pitch scale. Set the pivot point of the square against the roof surface, rotate the square until its bottom edge matches the roof plane, and read the pitch where the corresponding mark aligns with the square's edge. This is the traditional carpenter's method and is fast when you already carry a speed square on a framing crew. Its accuracy depends on the square sitting flat against the roofing surface — on steep roofs with textured shingles, the square can rock and give inconsistent readings. On new framing (before roofing material is installed) the speed square reads directly against the sheathing and is quite accurate.
Method Accuracy Comparison
| Method | Tools Required | Accuracy | Roof Access Needed | Best Used For |
|---|---|---|---|---|
| Level and tape on roof | 2-ft level, tape measure | High (±1/12 pitch) when level sits flat on shingles | Yes — must be on the roof | Field verification when already on the roof for inspection or repair |
| Level and tape in attic | 2-ft level, tape measure | Highest (±1/12 or better) — measures the structural rafter directly | No — attic access only | Existing homes with open attics; final verification of pitch for takeoffs |
| Digital angle finder / phone | Digital angle finder or smartphone | Moderate (±2–3° on textured roofing; better on flat surfaces) | Depends — on-roof or attic placement | Quick degree readings; checking against engineered specifications |
| Speed square | Speed square (rafter square) | Moderate on roofing material; high on bare sheathing | Yes — must be on the roof or against sheathing | Framing crews during rough-in; quick field checks when square is already in hand |
For material takeoffs that determine how much roofing you buy, the attic level-and-tape method is the gold standard when it is available — it measures the actual structural geometry, not the roofing surface that sits on top of it. If the attic is inaccessible, do a level-and-tape measurement on the roof surface and add a small allowance for the roofing material buildup if the pitch is very close to a material minimum.
Pitch Conversion Table
The table below converts every common roof pitch from 1/12 through 24/12 into its equivalent angle in degrees, slope as a percentage, pitch multiplier (the factor that converts building footprint into actual roof surface area), classification band, and typical use. Use this table to translate between formats without recalculating, and to look up the multiplier for a material takeoff.
Full Conversion Table: 1/12 Through 24/12
| Pitch | Angle (°) | Slope (%) | Multiplier | Classification | Common Use |
|---|---|---|---|---|---|
| 1/12 | 4.76° | 8.3% | 1.003 | Low-slope / flat | Flat and low-slope commercial roofing; some porch and shed roofs with membrane or standing-seam systems |
| 2/12 | 9.46° | 16.7% | 1.014 | Low-slope | Low-slope residential sections; asphalt shingles at the code minimum with enhanced underlayment |
| 3/12 | 14.04° | 25.0% | 1.031 | Low-slope / conventional | Porch roofs, additions, garage roofs; wood shingles and exposed-fastener metal at their code minimum |
| 4/12 | 18.43° | 33.3% | 1.054 | Conventional | Most common low-end residential pitch; standard asphalt shingle installation without special underlayment upgrades |
| 5/12 | 22.62° | 41.7% | 1.083 | Conventional | Mid-range residential; very common on ranch and Cape Cod homes |
| 6/12 | 26.57° | 50.0% | 1.118 | Conventional | Most common US residential pitch; balanced cost, drainage, and walkability |
| 7/12 | 30.26° | 58.3% | 1.158 | Conventional / steep | Upper conventional range; good snow shedding; walkable with caution |
| 8/12 | 33.69° | 66.7% | 1.202 | Steep-slope | Steep-slope residential; slate, tile, and premium shingles; walkability declines significantly |
| 9/12 | 36.87° | 75.0% | 1.250 | Steep-slope | Steep-slope and premium residential; brackets and harness required for safe work |
| 10/12 | 39.81° | 83.3% | 1.302 | Steep-slope | Steep-slope residential and church/commercial; significant area increase over footprint |
| 11/12 | 42.51° | 91.7% | 1.358 | Steep-slope | Steep-slope and historic reproductions; not walkable without fall protection |
| 12/12 | 45.00° | 100.0% | 1.414 | Steep-slope | Classic 45° roof; Victorian and steep-slope residential; roof area is 41.4% larger than footprint |
| 14/12 | 49.40° | 116.7% | 1.537 | Steep-slope | Very steep residential; gambrel lower slopes; specialty architectural work |
| 16/12 | 53.13° | 133.3% | 1.667 | Steep-slope | Gothic and steep-slope reproductions; significant material quantities vs footprint |
| 18/12 | 56.31° | 150.0% | 1.803 | Steep-slope | Church spires, steep Victorian, toboggan-style architecture; specialist installation only |
| 20/12 | 59.04° | 166.7% | 1.944 | Steep-slope | Gambrel and mansard lower slopes; historic reproductions; roof area nearly double the footprint |
| 22/12 | 61.39° | 183.3% | 2.088 | Steep-slope | Extreme steep-slope work; specialist contractors only; not walkable |
| 24/12 | 63.43° | 200.0% | 2.236 | Steep-slope | Church spires, very steep historic work; roof surface is more than double the building footprint |
How to read the multiplier column: multiply the building's flat footprint (in square feet) by the pitch multiplier to get the actual roof surface area. A 1,000-square-foot footprint at 6/12 pitch = 1,000 × 1.118 = 1,118 square feet of roof surface. At 12/12 pitch, the same footprint = 1,000 × 1.414 = 1,414 square feet — a 41.4% increase in material. Never estimate roofing materials from footprint alone.
Pitch Classification & Bands
Roof pitches fall into three broad classification bands. These bands drive code requirements, material options, installation methods, safety practices, and cost. The boundaries are not absolute — manufacturers and code sections sometimes shift a threshold by one increment — but the bands below reflect mainstream US residential practice and IRC Chapter 9 references.
| Band | Pitch Range | Angle Range | Characteristics | Typical Materials |
|---|---|---|---|---|
| Low-slope (flat) | 1/12 – 3/12 | 4.76° – 14.04° | Water drains slowly; ponding risk if not designed for it; special underlayment and fastening required; walkable with normal footwear | EPDM, TPO, modified bitumen, standing-seam metal (1/4:12 min), asphalt shingles (2/12 min with enhanced underlayment) |
| Conventional | 4/12 – 7/12 | 18.43° – 30.26° | Standard residential range; good water shedding; walkable with caution above 6/12; most cost-effective balance of area, labor, and performance | Asphalt shingles, architectural shingles, wood shingles and shakes, concrete and clay tile, most metal panel systems |
| Steep-slope | 8/12 and above | 33.69° and above | Excellent water and snow shedding; significant area increase over footprint; walkability declines sharply; fall protection required; premium labor costs | Slate, tile, premium architectural shingles, wood shakes, standing-seam metal, synthetic slate and shake |
Why the Bands Matter
Each band changes the installation rules. Low-slope roofs (1/12–3/12) require enhanced underlayment for asphalt shingles between 2/12 and 4/12 per IRC R905.2.2 — a single layer of underlayment is not enough at these pitches, and fastener patterns change. Conventional-pitch roofs (4/12–7/12) use standard installation details for most materials. Steep-slope roofs (8/12+) require fall protection, change the labor equation (longer installation times, higher insurance), and often require different fastening patterns — for example, more nails per shingle to resist wind uplift on steeper planes. Material minimums are the hard floor: a 3/12 pitch roof cannot legally receive wood shingles if the code minimum for that product is 3/12 and the manufacturer requires more; a 2/12 pitch roof cannot receive slate if slate's minimum is 4/12 without special engineering. Check the material's minimum before finalizing the roof design.
Pitch and Roof Area
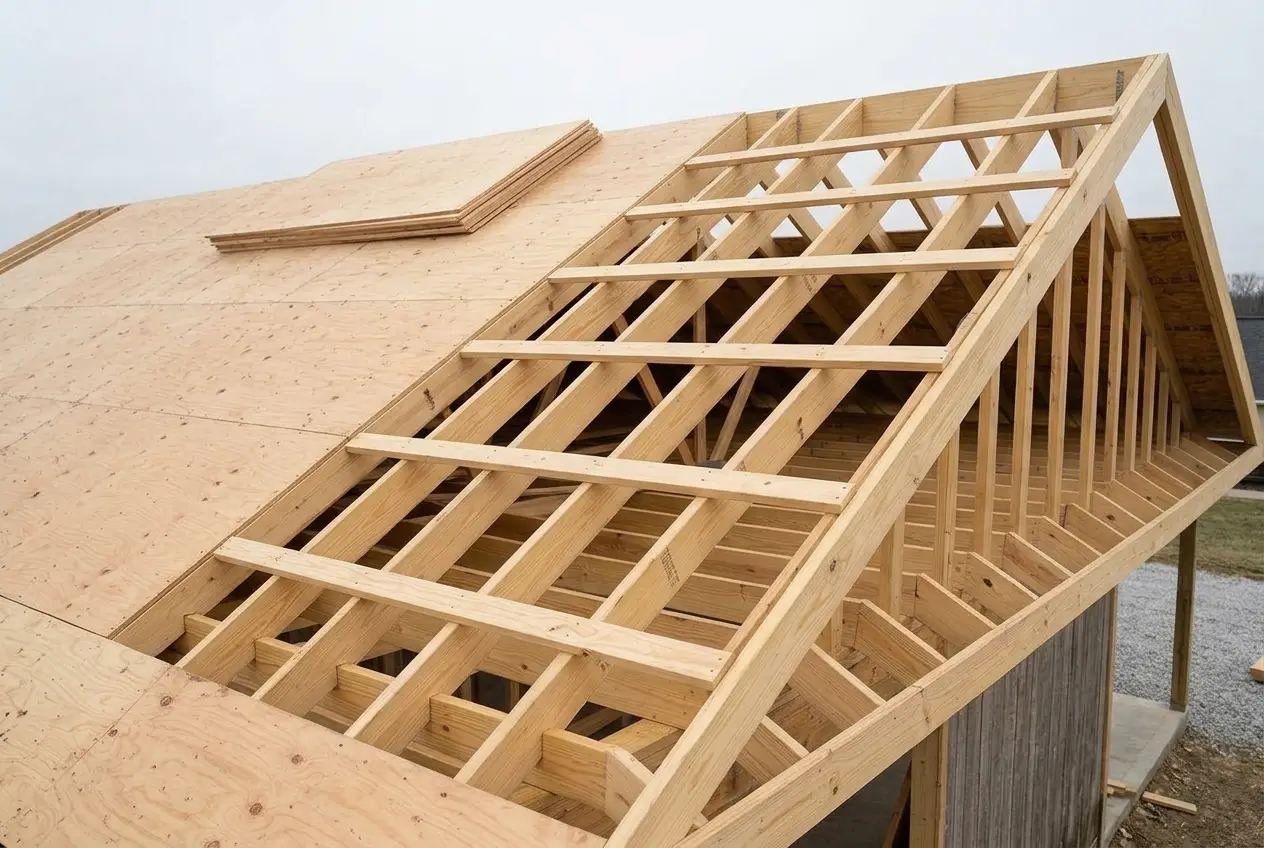
The most common estimation error in roofing is calculating material quantities from the building's footprint without applying the pitch multiplier. The footprint is the flat plan-view area of the building. The roof surface — the area that must actually be covered with roofing material, underlayment, and flashing — is always larger than the footprint on any pitched roof, and the steeper the pitch, the larger the difference.
The Pitch Multiplier Formula
The pitch multiplier (also called the roof area multiplier, slope factor, or roof factor) converts footprint area into actual roof surface area. It is derived from the Pythagorean theorem applied to the roof plane:
- Pitch multiplier = √(rise² + run²) ÷ run
- Where rise and run are in the same units — for a 6/12 pitch, rise = 6 and run = 12
- Pitch multiplier for 6/12 = √(6² + 12²) ÷ 12 = √(36 + 144) ÷ 12 = √180 ÷ 12 = 13.416 ÷ 12 = 1.118
The multiplier is always greater than 1.0 (except for a true flat roof, where it is 1.0). The higher the pitch, the larger the multiplier — 1.014 at 2/12, 1.054 at 4/12, 1.118 at 6/12, 1.202 at 8/12, 1.414 at 12/12, and 2.236 at 24/12. At 12/12 pitch, the roof surface is 41.4% larger than the footprint. At 24/12 pitch, it is more than double the footprint.
Worked Example: Footprint to Roof Area
A house has a rectangular footprint of 40 feet × 60 feet = 2,400 square feet. The roof is a simple gable with a 6/12 pitch.
- Footprint area = 40 × 60 = 2,400 square feet
- Pitch multiplier at 6/12 = 1.118
- Roof surface area = 2,400 × 1.118 = 2,683 square feet
- Difference from footprint = 2,683 − 2,400 = 283 square feet of additional roof surface
If the same house were re-roofed at 12/12 pitch instead of 6/12, the multiplier would be 1.414 and the roof surface area would be 2,400 × 1.414 = 3,394 square feet — 711 square feet more than at 6/12, a 26.5% increase in roofing material, underlayment, nails, ridge cap, and labor. This is why pitch must be applied before any material is ordered or priced.
Multi-Plane and Complex Roofs
The footprint-to-multiplier method works cleanly for simple gable and hip roofs where every plane carries the same pitch. For gambrel, mansard, and mixed-pitch roofs, calculate each plane's area separately: measure that plane's footprint (its plan-view area), apply that plane's own pitch multiplier, and sum the results. A gambrel roof with a 20/12 lower slope covering 600 square feet of plan area and a 7/12 upper slope covering 400 square feet of plan area has a total roof surface of (600 × 1.944) + (400 × 1.158) = 1,166 + 463 = 1,629 square feet — not (1,000 × some single multiplier). Hip roofs also need care: the four triangular hip planes are each shorter than half the span, so applying a single pitch multiplier to the whole footprint underestimates the hip rafter areas. For accurate takeoffs on hip roofs, either calculate each triangular plane separately or use a roofing-specific calculator that handles hip geometry.
Material Minimum Pitch Requirements
Every roofing material has a minimum pitch — the shallowest roof slope on which that material can be installed without compromising water shedding, fastener performance, or code compliance. Installing a material below its minimum pitch is a code violation in most jurisdictions and a warranty-voiding installation practice in nearly all of them. The table below lists minimum pitch requirements for common roofing materials, with IRC code references where applicable.
| Material | Minimum Pitch | Minimum Angle | IRC Reference | Notes |
|---|---|---|---|---|
| Asphalt shingles (standard) | 2/12 | 9.46° | R905.2.2 | Between 2/12 and 4/12, enhanced (double-layer or self-adhering) underlayment is required per code; below 2/12, asphalt shingles are not permitted |
| Wood shingles | 3/12 | 14.04° | R905.6 | Minimum 3/12; underlayment requirements increase below 4/12 |
| Wood shakes | 3/12 | 14.04° | R905.7 | Minimum 3/12; preservative treatment and fire classification requirements apply in many jurisdictions |
| Clay tile | 2.5/12 | 11.77° | R905.3 | Minimum 2.5/12; manufacturer requirements may be steeper depending on tile profile |
| Concrete tile | 2.5/12 | 11.77° | R905.3 | Minimum 2.5/12; high profiles often require 4/12 or steeper for proper interlock |
| Slate | 4/12 | 18.43° | R905.9 (typical) | Minimum 4/12; some heavy natural slate products require 6/12 or steeper — always check the manufacturer |
| Standing-seam metal | 0.25/12 (1/4:12) | ~1.2° | R905.10 | Minimum 1/4:12 for hydrostatic systems; some panel profiles require 3/12 for drainage — check the panel manufacturer |
| Exposed-fastener metal | 3/12 | 14.04° | R905.10 | Minimum 3/12; through-fastened panels are not hydrostatic and need the steeper slope for water to clear the fastener heads |
| EPDM rubber membrane | 0.25/12 (1/4:12) | ~1.2° | Manufacturer | Designed for low-slope and flat roofs; ballasted, mechanically attached, or fully adhered systems |
| TPO membrane | 0.25/12 (1/4:12) | ~1.2° | Manufacturer | Low-slope commercial and residential membrane; heat-welded seams |
| Modified bitumen | 0.5/12 | ~2.4° | Manufacturer | Low-slope roll roofing; torch-applied, cold-adhesive, or self-adhered |
Reading Minimum Pitch Correctly
Two details are easy to miss. First, "minimum pitch" in a code section refers to the roof pitch ratio (rise over 12), not to a degree angle or a slope percentage — but the table above includes those equivalents for cross-checking. Second, a code minimum is a floor, not a recommendation: just because asphalt shingles are code-legal at 2/12 does not mean 2/12 is a good roof for asphalt shingles. At the low end of the allowed range, enhanced underlayment is mandatory, fastener patterns change, and long-term moisture performance is reduced. Designing at the code minimum means designing at the material's weakest point. When in doubt, add an increment of pitch — a 4/12 roof performs far better with asphalt shingles than a 2/12 roof, at negligible extra cost for most structures.
Walkability Ratings
Roof pitch directly determines whether — and how safely — a roof can be walked on. This matters for installation, for maintenance and inspection, and for anyone who needs to get on the roof to clear debris, check flashing, or repair a leak. The walkability bands below reflect mainstream residential practice and are consistent with fall-protection requirements in OSHA construction standards.
| Walkability | Pitch Range | Angle Range | Safe Practice | Typical Activity |
|---|---|---|---|---|
| Easy | 0/12 – 4/12 | 0° – 18.43° | Walk normally with standard roofing footwear; no fall protection required for brief work | Inspection, gutter cleaning, minor repairs, installation |
| Cautious | 5/12 – 6/12 | 22.62° – 26.57° | Walk with care; rubber-soled roofing shoes recommended; stay aware of footing especially on wet or mossy surfaces | Inspection, installation, moderate maintenance |
| Brackets / harness required | 7/12 – 9/12 | 30.26° – 36.87° | Fall protection required: roof brackets, toe boards, or full body harness with anchor; never work alone | Installation by trained crews, professional inspection, specialized repair |
| Not walkable | 10/12 and above | 39.81° and above | Full fall-protection systems required; access only via ladder with tied-off anchor; specialist equipment and training | Specialist installation and repair only; inspection typically via drone or from interior |
The 6/12 pitch is widely considered the upper limit of "comfortable" walking on a residential roof — the pitch that a typical homeowner can navigate with reasonable caution. Above 6/12, the roof plane is steep enough that wet shingles become genuinely dangerous, and OSHA fall-protection requirements kick in for construction work at 6 feet or more above a lower level. Steep-slope roofs (8/12 and above) are professional territory: roof brackets, harnesses, and trained crews are not optional at these pitches, which is one reason steep-slope roofing costs more per square than conventional-pitch work.
Pitch, Snow Load, and Water Shedding
Roof pitch determines how well a roof sheds water and snow. Steeper roofs shed both faster and more completely, which is why steep pitches are preferred in high-rainfall and heavy-snow regions — and why very shallow pitches require special detailing to manage the moisture that accumulates on them.
Water Shedding
At low pitches (1/12–3/12), water moves slowly across the roof surface. Slow drainage increases the time water sits on joints, fasteners, and laps, which raises the risk of wind-driven rain infiltration and freeze-thaw damage at the fasteners. This is why low-slope roofs rely on continuous membranes (EPDM, TPO, modified bitumen) rather than lap-joint products like shingles, and why asphalt shingles at 2/12 require enhanced underlayment — the underlayment becomes the primary water barrier because the shingle laps are less effective at shallow angles. At conventional pitches (4/12–7/12), water sheds at a rate that standard shingle and tile installations handle comfortably. At steep pitches (8/12+), water sheds rapidly, which improves performance but also means water reaches the eaves faster and with more velocity — proper drip edge, gutter sizing, and kick-out flashing become more important, not less.
Snow Shedding and Snow Load
Snow behaves like water: it slides off steeper roofs and accumulates on shallower ones. Freshly fallen dry powder has an estimated weight of roughly 5 pounds per square foot; settled or packed snow commonly reaches 20 to 30 pounds per square foot, and ice dams and layered snow can exceed 40 pounds per square foot. A flat or very low-slope roof carries the full weight of whatever snow falls on it — no shedding occurs. A 6/12 to 7/12 roof (roughly 30°) is often cited as the minimum effective angle for snow to shed reliably in cold climates, though wet snow, ice crusting, and roof friction can prevent shedding even at these pitches. Steeper roofs shed snow faster, reducing the accumulated load but increasing the risk of snow and ice slides onto walkways and vehicles below — another reason steep-slope roofs in snow regions often carry snow guards or snow retention systems.
| Pitch | Angle | Snow Shedding Behavior | Considerations |
|---|---|---|---|
| 1/12 – 2/12 | 4.76° – 9.46° | No shedding; full snow load accumulates | Structural engineer must design for full snow load; membrane roofing standard |
| 3/12 – 5/12 | 14.04° – 22.62° | Minimal shedding; heavy or wet snow typically stays | Design for near-full snow load; ice dam risk at eaves in freeze-thaw climates |
| 6/12 – 7/12 | 26.57° – 30.26° | Intermittent shedding; dry powder may slide, wet snow stays | Common minimum for snow regions; snow guards often recommended for safety below |
| 8/12 – 12/12 | 33.69° – 45.00° | Good shedding for most snow types; ice crusting can still hold snow | Reduced accumulated load; snow guards recommended where people or vehicles are below |
| 14/12 and above | 49.40° and above | Excellent shedding; most snow types slide off quickly | Minimum structural snow load; high velocity of shed snow and ice — snow guards strongly recommended |
Local building codes determine the design snow load for a structure — not the roof pitch alone. Pitch affects how much of that load actually accumulates, but the engineer sizes the structure for the code-specified ground snow load adjusted by exposure, thermal, and importance factors. If you are building in a snow region and the roof is low-pitched, confirm with a structural engineer that the framing is designed for the full snow load, not just the typical residential live load.
Pitch and Material Quantities
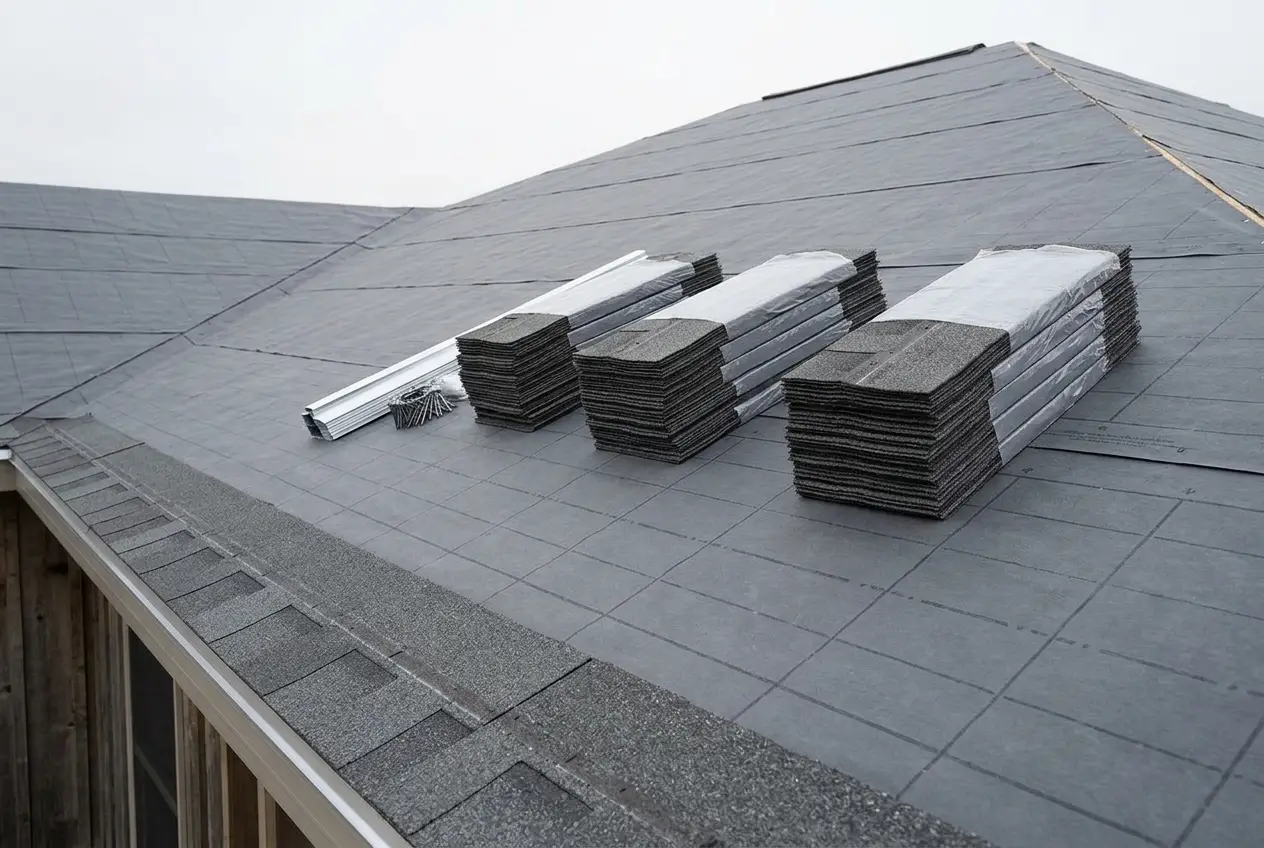
The pitch multiplier is the bridge between a building's footprint and the actual quantities of roofing material, underlayment, fasteners, and trim that the project requires. The worked example below applies the full takeoff chain — footprint, pitch multiplier, waste allowance, and material conversions — for a real residential roof.
Worked Example: Full Material Takeoff at 6/12 Pitch
Project parameters: Rectangular residential roof, 40 ft × 60 ft footprint (simple gable, ridge running along the 60-ft length), 6/12 pitch, asphalt shingles, 10% waste allowance.
| Step | Calculation | Result |
|---|---|---|
| 1. Footprint area | 40 ft × 60 ft | 2,400 sq ft |
| 2. Pitch multiplier (6/12) | √(6² + 12²) ÷ 12 = √180 ÷ 12 | 1.118 |
| 3. Roof surface area | 2,400 × 1.118 | 2,683 sq ft |
| 4. Area with waste allowance (10%) | 2,683 × 1.10 | 2,952 sq ft |
| 5. Squares (1 square = 100 sq ft) | 2,952 ÷ 100 | 29.52 squares |
| 6. Bundles (3 bundles per square) | 29.52 × 3 | 88.56 → round up to 89 bundles |
| 7. Underlayment rolls (333 sq ft per roll) | 2,683 ÷ 333 | 8.06 → round up to 9 rolls (standard) or 16 rolls (enhanced, if 2/12–4/12 range) |
| 8. Ridge length (gable ridge) | 60 ft (full ridge) | 60 ft of ridge cap |
| 9. Eave length (both eaves) | 60 ft + 60 ft | 120 ft of starter strip and drip edge |
| 10. Rake length (both gable ends) | 2 × (√(20² + 10²) × 2) = 2 × (22.36 × 2) | 89.4 ft of rake trim and drip edge |
What Changes at Different Pitches
Run the same 40 ft × 60 ft footprint at different pitches and watch the quantities move:
| Pitch | Multiplier | Roof Area (no waste) | Area with 10% Waste | Bundles (3/sq) |
|---|---|---|---|---|
| 4/12 | 1.054 | 2,530 sq ft | 2,783 sq ft | 84 |
| 6/12 | 1.118 | 2,683 sq ft | 2,952 sq ft | 89 |
| 8/12 | 1.202 | 2,885 sq ft | 3,174 sq ft | 96 |
| 10/12 | 1.302 | 3,125 sq ft | 3,438 sq ft | 104 |
| 12/12 | 1.414 | 3,394 sq ft | 3,733 sq ft | 112 |
Going from 6/12 to 12/12 on the same footprint adds 23 bundles of shingles, roughly 711 square feet of roof area, and proportionally more underlayment, nails, ridge cap, and labor. This is why pitch must be confirmed before materials are ordered — not after. Use the Roofing Calculator to run these numbers for any footprint, pitch, and waste percentage.
Pitch and Cost
Roof pitch affects cost through three channels: material quantity (higher pitch = more roof surface = more material), labor difficulty (steeper roofs take longer to install and require fall protection), and maintenance access (steep roofs are harder and more expensive to inspect and repair over the roof's lifetime).
Installation Cost by Pitch Band
| Pitch Band | Relative Installation Cost | Cost Drivers |
|---|---|---|
| Low-slope (1/12–3/12) | Similar to flat; roughly 10% above a true flat roof | Enhanced underlayment required at low end; specialized membrane systems if not using shingles; slower drainage requires more careful detailing |
| Conventional (4/12–7/12) | Baseline — standard residential pricing | Standard installation details; walkable; no special fall protection for most work; material quantities track closely to the multiplier |
| Steep-slope (8/12+) | 20–30%+ above conventional pitch | Fall-protection equipment and setup; slower installation; higher insurance premiums for crews; premium materials (slate, tile) often selected at these pitches; more material per square foot of footprint |
Maintenance Cost Over the Roof's Life
Steep roofs cost more to maintain, not just to install. Inspection and repair visits on steep-slope roofs typically run $200 to $400 more per visit than on conventional-pitch roofs, purely for the equipment, time, and safety measures involved. Over a 25-year roof life with periodic inspections and minor repairs, that difference can add thousands of dollars. Low-slope roofs have their own maintenance cost profile: ponding water, membrane seams, and drain maintenance create a different but real service expense. The lowest lifetime cost is usually found in the conventional band — 4/12 to 7/12 — where installation, performance, and maintenance all sit at reasonable levels.
Material Cost Reference
Material pricing also varies with the pitch band because different materials are typically selected at different pitches. As a general national reference range in the United States: asphalt shingles run roughly $3.19 to $4.43 per square foot installed at conventional pitches; wood shake and premium metal systems run roughly $7.35 to $10.73 per square foot installed, typically at steep-slope pitches. These are national average ranges — local labor rates, material availability, roof complexity, and regional code requirements drive significant variation. Get multiple quotes, and confirm that each quote applies the pitch multiplier to the actual roof area, not to the building footprint.
Gambrel and Mansard Roofs
Gambrel and mansard roofs use two different pitches on the same structure — a steep lower slope and a shallower upper slope — to maximize usable interior space under the roof. This two-pitch geometry changes how roof area is calculated, how materials are selected, and how the roof performs.
Gambrel Roofs
A gambrel roof (common on barns and Dutch Colonial homes) has a very steep lower pitch — often 20/12 to 24/12 (approximately 59° to 63°) — transitioning to a much shallower upper pitch of roughly 6/12 to 8/12 (approximately 27° to 34°). The steep lower slope creates a large interior volume; the shallower upper slope reduces the overall roof height and material load at the ridge. Because the two sections carry different pitches, roof area must be calculated separately for each section: measure the plan-view area of the lower slope, apply the lower-slope multiplier (e.g., 1.944 at 20/12); measure the plan-view area of the upper slope, apply the upper-slope multiplier (e.g., 1.202 at 8/12); then add the results. Applying a single average multiplier to the whole footprint will under- or over-estimate material quantities depending on the relative sizes of the two sections.
Mansard Roofs
A mansard roof (common on Second Empire and French-inspired architecture) has an even steeper lower slope — typically 70° to 80° (roughly 17/12 to 27/12 pitch equivalent) — with a shallow upper slope of roughly 2/12 to 4/12. The very steep lower slope is nearly vertical, often finished with dormer windows that create usable attic-level rooms. The shallow upper slope is frequently a flat or low-slope membrane roof hidden behind the steep lower edge. As with gambrel roofs, calculate each section separately with its own pitch multiplier, and confirm that the selected roofing material meets the minimum pitch for each section independently — a material that is legal on the shallow upper slope may not meet the steeper lower slope's requirements, and vice versa.
| Roof Type | Lower Pitch | Upper Pitch | Lower Multiplier | Upper Multiplier | Calculation Approach |
|---|---|---|---|---|---|
| Gambrel (typical) | 20/12 (59.04°) | 7/12 (30.26°) | 1.944 | 1.158 | Calculate each section's plan area separately, multiply by its own multiplier, sum the results |
| Gambrel (shallow upper) | 20/12 (59.04°) | 6/12 (26.57°) | 1.944 | 1.118 | Same two-section approach; upper section multiplier decreases as upper pitch flattens |
| Mansard (typical) | ~20/12 (59.04°) | 3/12 (14.04°) | 1.944 | 1.031 | Calculate separately; upper slope often uses membrane roofing, lower uses shingles, tile, or slate |
On multi-pitch roofs, flashing at the pitch transition — where the steep lower slope meets the shallow upper slope — is a critical detail. Water running down the steep section arrives at the transition with more velocity than on a uniform-pitch roof, and the joint between two different roofing systems (for example, shingles on the lower slope meeting a membrane on the upper) requires purpose-built transition flashing. Specify this detail explicitly; do not assume standard ridge or valley flashing covers a pitch-transition joint.
Historical Roof Pitches
Roof pitch has varied dramatically across cultures and centuries, driven by climate, available materials, building technology, and architectural fashion. Understanding historical pitch ranges is useful when working on historic structures, specifying reproductions, or reading old plans.
| Era / Style | Typical Pitch | Typical Angle | Driver |
|---|---|---|---|
| Ancient Greek temples | ~1/4:12 to 1/3:12 | 12.5° – 16° | Terracotta tile construction; low profile suited to Mediterranean climate and classical proportion |
| Roman architecture | ~1/2:12 to 1/1:12 | 24° – 34° | Concrete and tile vaulting; moderate slopes for drainage without extreme height |
| English medieval / Gothic | ~20/12 to 24/12 | 60°+ | Steep slate roofs for rapid shedding in heavy rain climates; timber framing capable of supporting steep planes |
| Elizabethan / Tudor | 24/12 and above | 63°+ | Extreme steepness as architectural statement; tall gables and complex roof forms |
| Early American colonial | 8/12 – 14/12 | 34° – 49° | Wood shake and shingle roofing; steep enough to shed snow in northern colonies |
| Victorian era | 12/12 – 18/12 | 45° – 56° | Steep mansards, gables, and turrets; slate and polychrome detailing |
| Mid-20th century suburban | 4/12 – 6/12 | 18° – 27° | Asphalt shingle mass production; cost efficiency and standardization |
| Contemporary US residential | 4/12 – 8/12 | 18° – 34° | Asphalt shingles dominant; 6/12 remains the most common single pitch |
Historic steep pitches — 12/12 and above — are structurally expensive in modern terms: more framing, more roofing material per square foot of floor area, and higher labor. When restoring or reproducing a historic roof, confirm that the existing framing is designed for the steeper pitch (it usually is, if original) and that the specified roofing material meets the manufacturer's minimum for that pitch. Many modern synthetic slate and shake products are engineered for steeper pitches and can reproduce historic appearances at lower weight and cost than natural materials.
Common Mistakes
Roof pitch errors are among the most consequential mistakes in roofing estimation and installation. The table below lists the most frequent pitch-related mistakes, what causes them, what they produce, and how to prevent them.
| Mistake | Cause | Result | Prevention |
|---|---|---|---|
| Estimating materials from footprint without the pitch multiplier | Assuming roof area equals floor area; forgetting that pitch increases surface area | Material shortage of 5–40%+ depending on pitch; mid-project supply runs, cost overruns, schedule delays | Always apply the pitch multiplier from the conversion table before ordering; when in doubt, over-estimate area rather than under |
| Confusing pitch with slope or angle | Reading a degree value as a pitch ratio, or applying a slope figure where a pitch figure is required | Wrong material minimum check; wrong multiplier; potential code violation and warranty void | Use the pitch-vs-slope-vs-angle distinction section; convert degrees to pitch before checking material minimums |
| Installing material below its minimum pitch | Ignoring the material minimum in favor of the design pitch; assuming the code minimum applies to every product | Code violation; water infiltration; shortened material life; voided warranty | Check the specific product's minimum pitch, not just the generic material category; when the design pitch is at or near a minimum, confirm with the manufacturer |
| Applying a single multiplier to a multi-pitch roof | Using one pitch figure for a gambrel, mansard, or mixed-pitch roof | Wrong total roof area; material shortage on steeper sections, surplus on shallower sections | Calculate each roof plane's area separately with its own multiplier; sum the results |
| Measuring pitch on a wet or mossy roof with a digital device only | Relying solely on a smartphone angle reading on an uneven, textured surface | Pitch reading off by 2–3° or more; wrong material selection and takeoff near a minimum threshold | Cross-verify with a level-and-tape measurement; use the attic method when available |
| Ignoring the enhanced-underlayment requirement at 2/12–4/12 | Treating all asphalt shingle installations the same regardless of pitch | Code violation at low pitches; water infiltration through shingle laps that are too shallow to shed effectively | Per IRC R905.2.2, specify enhanced (double-layer or self-adhering) underlayment between 2/12 and 4/12 |
| Forgetting that steep roofs need fall protection in the budget | Quoting steep-slope work at conventional-pitch labor rates | Underbid project; unsafe working conditions; potential OSHA citations | Price steep-slope work (8/12+) at a 20–30%+ labor premium to cover fall-protection equipment, setup, and slower installation |
| Not accounting for hip geometry on hip roofs | Applying a single pitch multiplier to the whole footprint on a hip roof | Underestimation of hip rafter and hip cap quantities; material shortage on the hips | Calculate hip triangular planes separately, or use a roofing calculator that handles hip geometry |
| Assuming a low pitch is always cheaper | Equating lower pitch with less material without considering underlayment upgrades, drainage detailing, and membrane systems | Surprising cost at very low pitches; performance problems from inadequate drainage | Price the complete system at each candidate pitch — material, underlayment, labor, and detailing — before assuming lower is cheaper |
| Ignoring snow guards on steep roofs in snow regions | Assuming steep pitch alone handles all snow concerns | Snow and ice slides onto walkways, vehicles, and below-grade entries; liability exposure | Specify snow retention systems on steep-slope roofs where people or property are below the eaves |
Two of these mistakes — skipping the pitch multiplier and confusing pitch with slope or angle — account for the majority of roof takeoff errors. Both are preventable with the conversion table and the worked example in this guide. When in doubt about a pitch figure, re-measure before ordering materials; the cost of a second measurement is trivial compared to the cost of a material shortage on a steep roof.
When to Call a Professional
Understanding roof pitch empowers better questions and better estimates — but some roof pitch situations genuinely require professional involvement. Recognizing those situations protects both the project and the people working on it.
Situations That Require a Professional
| Situation | Why It Requires a Professional | Professional Response |
|---|---|---|
| Pitch near or below a material minimum | The difference between a legal and an illegal installation can be a single pitch increment; manufacturer requirements are specific and product-dependent | Manufacturer consultation on the specific product; possible engineered underlayment system; possible product substitution |
| Steep-slope work (8/12 and above) | Fall-protection requirements, specialized equipment, and insurance obligations exceed homeowner scope | Licensed roofing contractor with steep-slope experience, fall-protection training, and adequate insurance |
| Low-slope roof with ponding water | Ponding indicates inadequate slope for the drainage design; corrective work may involve structural modification | Roofing contractor or structural engineer to assess drainage, possible taper insulation or re-pitching |
| Structural concern about pitch and snow load | Snow load capacity depends on framing design, not just pitch; low-pitched roofs in snow regions carry full load | Structural engineer to verify framing adequacy for the code-specified ground snow load |
| Historic or architecturally significant roof | Historic preservation requirements, matching materials, and complex multi-pitch geometry demand specialist knowledge | Historic roofing specialist or architect with preservation experience |
| Mixed-pitch roof with system transitions | Where two different roofing systems meet at a pitch transition, flashing details are critical and custom | Experienced roofing contractor who has detailed similar transitions; request references for comparable work |
| Roof pitch uncertain or disputed | An incorrect pitch figure poisons every downstream decision — material selection, takeoff, cost, code compliance | Professional measurement from the attic or by a roofing estimator before any material is specified or ordered |
For straightforward conventional-pitch asphalt shingle roofs on simple gable or hip geometries, a homeowner with the conversion table, a level, and a tape measure can understand the pitch, estimate the roof area, and have an informed conversation with a roofing contractor. The pitch understanding in this guide gives you the vocabulary to ask the right questions: what is the pitch, what is the multiplier, does the material meet the minimum for that pitch, and is the quote based on roof area or footprint? Those questions alone prevent most pitch-related estimation surprises.
Frequently Asked Questions
Roof pitch is the ratio of a roof's vertical rise to its horizontal span, expressed as rise over 12 — for example, 6/12 means the roof rises 6 inches for every 12 inches (one foot) of horizontal run. It describes how steep a roof is and determines which roofing materials are code-legal, how much material the roof requires, how safely it can be walked on, and how well it sheds water and snow. Pitch is different from slope (rise over the run of a single roof plane, often written as "6 in 12") and from angle (the measurement in degrees — a 6/12 pitch equals 26.57°). On a simple gable roof, pitch and slope are the same number; on hip, gambrel, and mansard roofs, they can differ.
To calculate roof pitch, measure the roof's vertical rise over a known horizontal run, then express the result as rise over 12. From the roof surface: lay a 2-foot level flat, measure the vertical distance from the far end of the level down to the roof surface, then multiply that measurement (in inches) by 0.5 to get the pitch over 12 — if the level sits 12 inches above the roof at the far end, the pitch is 12 × 0.5 = 6/12. From the attic (preferred for accuracy): hold the level horizontally against a rafter, measure the vertical distance from the far end of the level up to the rafter, and apply the same formula. The pitch in degrees equals arctan(rise ÷ 12) — arctan(6 ÷ 12) = 26.57° for a 6/12 pitch. The pitch multiplier (roof area factor) equals √(rise² + 12²) ÷ 12 — for 6/12, that is √180 ÷ 12 = 1.118.
Roof pitch is rise divided by the full horizontal span of the roof (eave to eave), written as a ratio over 12. Roof slope is rise divided by the horizontal run of one roof plane (eave to ridge), also commonly written over 12 — but on non-gable geometries the numbers diverge. On a simple gable roof where the span equals twice the run, a 6/12 pitch is also a 6:12 slope. On a hip roof, the slope of a hip rafter differs from the roof's overall pitch because each hip plane is shorter than half the span. On gambrel and mansard roofs, different planes carry different pitches. Building code material minimums are written as pitch ratios; structural framing drawings often specify slope. Always confirm which term a drawing or specification uses before applying it to a material check or a takeoff.
6/12 is the most common roof pitch in US residential construction — a 26.57° slope that balances cost, drainage, walkability, and appearance. 6/12 sheds water and snow effectively, is walkable with reasonable caution, uses standard asphalt shingle installation details without enhanced underlayment, and keeps the roof area to a manageable 1.118× the building footprint. 4/12 and 5/12 pitches are also very common, especially on ranch-style and lower-cost housing, while 8/12 and steeper appear on premium homes, steep-slope styles, and historic reproductions. The "right" pitch for a given structure depends on climate (snow and rainfall), local code, architectural style, roofing material selected, and budget — but 6/12 remains the default reference point in US residential practice.
Asphalt shingles have a code minimum pitch of 2/12 per IRC R905.2.2. Between 2/12 and 4/12, enhanced underlayment — a double layer of underlayment or a self-adhering polymer-modified asphalt underlayment — is required instead of a single layer, because shingle laps are less effective at shedding water at shallow angles. Below 2/12, asphalt shingles are not permitted under the IRC and the roof must use a low-slope membrane system (EPDM, TPO, modified bitumen) or standing-seam metal. While 2/12 is the legal minimum, it is not the ideal pitch for asphalt shingles — the low end of the range requires the enhanced underlayment upgrade and performs better with more pitch. Most residential asphalt shingle roofs are installed at 4/12 or steeper, where standard installation details apply and water shedding is reliable.
Roof pitch increases the actual roof surface area above the building's flat footprint, and the pitch multiplier is the factor that converts one into the other. The multiplier equals √(rise² + run²) ÷ run — 1.054 at 4/12, 1.118 at 6/12, 1.202 at 8/12, 1.414 at 12/12. To find roof area, multiply the footprint by the pitch multiplier: a 2,400-square-foot footprint at 6/12 pitch has 2,400 × 1.118 = 2,683 square feet of actual roof surface. Then add a waste allowance (typically 10–15% for shingles, more for complex roofs) before converting to squares, bundles, and rolls. Estimating materials from footprint without applying the multiplier produces a shortage of 5% to 40%+ depending on pitch — one of the most common and most expensive mistakes in roofing takeoffs.
Yes — a 6/12 pitch roof (26.57°) is walkable with reasonable caution using rubber-soled roofing footwear. It is widely considered the upper limit of comfortable walking on a residential roof. Wet, mossy, or icy surfaces at 6/12 become genuinely slippery, so conditions matter as much as pitch. Above 6/12 — at 7/12, 8/12, and steeper — fall protection such as roof brackets or a body harness with an anchor becomes necessary for construction work, and OSHA fall-protection requirements apply at 6 feet or more above a lower level. At 10/12 and above (roughly 40°), the roof is considered not walkable without full fall-protection systems and specialist access methods. When in doubt, treat any roof above 6/12 as professional territory.
There is no single universal minimum pitch for snow regions — building codes specify a design snow load for each location, and the structure must be engineered to carry that load regardless of pitch. However, as a practical guideline, 6/12 to 7/12 (roughly 27° to 30°) is often cited as the minimum effective pitch for snow to shed reliably in cold climates. At these pitches, dry powder snow typically slides off, while wet snow, ice crusting, and roof friction can still hold snow in place. Below 5/12, expect snow to accumulate and design the framing for near-full snow load. Freshly fallen dry snow weighs roughly 5 pounds per square foot; settled or packed snow commonly reaches 20 to 30 pounds per square foot, and ice dams can push localized loads much higher. Steep-slope roofs (8/12 and above) shed snow effectively but create a slide hazard below the eaves — snow guards or snow retention systems are strongly recommended wherever people, vehicles, or walkways are beneath the roof edge.
Convert roof pitch to degrees by taking the arctangent (inverse tangent) of the rise divided by 12. For a 6/12 pitch: arctan(6 ÷ 12) = arctan(0.5) = 26.57°. For a 4/12 pitch: arctan(4 ÷ 12) = arctan(0.333) = 18.43°. For a 12/12 pitch: arctan(12 ÷ 12) = arctan(1) = 45°. The conversion works on any scientific calculator, spreadsheet function (ATAN or DEGREES(ATAN(rise/12))), or the pitch conversion table in this guide — which lists angles for every pitch from 1/12 through 24/12. Remember that degree values and pitch ratios are different units for the same physical steepness: a code minimum written as "2/12" cannot be checked against a degree reading without converting first — 2/12 equals 9.46°, and a 9° reading is below the minimum even though it looks close.
References
- International Code Council, International Residential Code (IRC) Chapter 9 — Roof Assemblies and Rooftop Structures, codes.iccsafe.org — code minimum roof pitch requirements for asphalt shingles (R905.2.2), wood shingles (R905.6), wood shakes (R905.7), tile (R905.3), and metal roofing (R905.10).
- National Roofing Contractors Association (NRCA), NRCA Roofing Manual — Roof Systems and Pitch Requirements, nrca.net — industry-standard roofing manual covering roof assembly requirements, minimum pitch by material, and installation best practices.
- National Association of Home Builders, Roofing — Construction Practices and Pitch Considerations, nahb.org — residential roofing construction guidance including pitch bands and material selection.
- InterNACHI (International Association of Certified Home Inspectors), Roof Slope and Pitch, nachi.org — authoritative distinction between pitch, slope, and angle; measurement methods; inspection guidance by pitch band.
- U.S. Department of Energy, Roofing — Insulation and Ventilation, energy.gov — roof assembly performance including pitch effects on drainage and ventilation.
- Asphalt Roofing Manufacturers Association (ARMA), Low-Slope Roofing Systems — Installation Guidelines, asphaltroofing.org — manufacturer requirements for asphalt shingle and low-slope membrane installations including minimum pitch and underlayment at low slopes.
- Metal Roofing Alliance, Metal Roofing Installation — Pitch Requirements, metalroofing.com — minimum pitch requirements for standing-seam and exposed-fastener metal panel systems.
- Slate Roofing Contractors Association of North America (SRCA), Slate Roofing — Installation Standards, slateroofers.org — minimum pitch requirements and installation guidance for natural slate roofing.
- Occupational Safety and Health Administration (OSHA), Roofing — Fall Protection Requirements, osha.gov — fall-protection standards for work on roofs at 6 feet or more above a lower level, including steep-slope residential roofing.
- American Wood Council, Wood Frame Construction Manual (WFCM) — Roofs and Rafters, awc.org — engineered wood framing guidance for rafter layout, pitch, and structural roof design.
- U.S. Department of Housing and Urban Development (HUD), Residential Construction — Roofing and Pitch Considerations, hud.gov — residential construction guidance including roof assembly performance and pitch-related design considerations.
Disclaimer: This guide provides general educational information about roof pitch, slope, and angle and is not architectural, engineering, or building-code advice. Actual roof pitch requirements vary by roofing material, manufacturer installation guidelines, local building codes, climate, and structural design. Material minimum pitch figures cited here reflect mainstream IRC Chapter 9 references and common manufacturer guidance — individual products may require steeper minimums. Roof pitch measurement accuracy depends on method, conditions, and tools; when a measured pitch sits near a code or manufacturer minimum, have it verified by a qualified roofing professional. Steep-slope roofing work must follow OSHA fall-protection requirements and be performed by trained, insured contractors. Always verify pitch requirements with your local building department and the specific roofing material manufacturer before finalizing a roof design or placing material orders.