
ON THIS PAGE:
Fence Post Spacing and Panel Sizes
A fence is a repeating pattern — a line of posts set into the ground, rails spanning between them, and pickets or panels closing each bay — so the whole project comes down to one number: how far apart the posts sit. The standard fence post spacing is 8 feet on center for wood privacy, picket, and vinyl fence, 8 to 10 feet for chain link, 8 to 10 feet for split rail, and 6 to 8 feet for ornamental aluminum or steel. Drop to 6-foot spacing when the fence is taller than 6 feet, the panels are solid, or wind exposure is high. Panel widths follow the same standard: 6 feet and 8 feet cover almost every residential fence panel size sold. From there the math runs in one direction: posts = fence length ÷ fence post spacing, rounded up, plus 1 for a straight run (a closed loop needs no plus-one because its start and end post are the same post); panels = fence length ÷ panel width, rounded up; rails = (posts − 1) × rails per section, with one rail allowed per 24 inches of fence height and never fewer than 2; pickets = fence length ÷ (picket face + gap), so a 3.5-inch picket with a 1.5-inch gap repeats every 5 inches and 100 feet needs 240 of them. Set posts one-third of the post length into the ground (a 6-foot fence gets a 9- or 10-foot post, 2.5 to 3 feet deep, below the frost line where it freezes), dig holes about three times the post width, and put 2 to 3 fifty-pound bags of concrete plus a few inches of drainage gravel around each 4×4. Whether you check the numbers by hand or run them through the Fence Material Calculator, this fence post spacing guide walks the same steps a crew does: space, count, dig, set.

What Fence Post Spacing Controls
Fence post spacing — the fence post distance from one post center to the next — decides almost everything else on the job, which is why it is the first measurement to fix and the last one to change. Widen the spacing and you need fewer posts, fewer holes, less concrete, and less labor; narrow it and each post carries a shorter span of rail and wind load. Every other quantity in the project is a function of that one dimension: the number of posts follows from spacing, the number of sections follows from the posts, the rails multiply sections by rails-per-section, and on a panel fence the panel count falls out of the same division. Get the fence post spacing wrong and the error repeats in every bay down the line.
Four forces set the spacing before you ever put a shovel in the ground. Material availability is the first: lumberyards sell rails, pickets, and pre-built panels in 8-foot increments, so an 8-foot fence post spacing lets every rail run post-to-post with no waste, and a 6-foot spacing does the same with 12-foot stock or two shorter pieces. Span strength is the second — a 2×4 rail spans about 8 feet before it sags under its own weight plus a wind load, while a 2×6 or a metal top rail can carry more, which is why chain link and livestock fence stretch comfortably to 10 feet and beyond. Weight and wind are the third: a solid privacy panel is a sail, and a 6-foot-tall wall of wood in an exposed yard wants 6-foot spacing to keep the posts from working back and forth in winter storms. The fence system itself is the fourth: vinyl panels are manufactured to exact widths and clip into routed posts, so the panel dictates the fence post distance completely — you do not choose a spacing so much as install the one the panel brings.
Those four forces are why the tables below separate fence types rather than giving one universal number. A spacing that is perfect for a backyard picket fence would over-build a chain-link run, and the chain-link spacing would leave a wood privacy fence waving in the wind. Match the fence type first, adjust for height and exposure second, and the counting formulas take care of themselves.
Fence Post Spacing by Fence Type
The table below is the master fence post spacing guide for residential and light-commercial work — every common fence type, its standard on-center spacing, the tighter spacing to use when conditions demand it, and the reason the number lands where it does. "On center" always means post center to post center, not the clear gap between posts. The tighter column is not a downgrade; it is what experienced builders switch to for tall, solid, or wind-exposed runs of the same fence type.
| Fence Type | Standard Spacing | Tighter Option | Why This Number |
|---|---|---|---|
| Wood privacy (board-on-board, dog-ear) | 8 ft on center | 6 ft | Matches 8-ft rails with zero waste; solid panels are heavy sails, so windy or coastal sites go to 6 ft. |
| Wood picket | 8 ft on center | 6 ft | Lighter panels let 8 ft span easily; 6 ft for 4-ft-tall picket runs that must stay perfectly rigid. |
| Shadowbox / board-on-board privacy | 8 ft on center | 6 ft | Alternating faces vent wind better than solid panels, but the double-sided weight still argues for 6 ft above 6 ft tall. |
| Vinyl / PVC panel fence | Equals panel width (6 or 8 ft) | 6-ft panels | Manufactured system: rails lock into routed posts, so the panel size sets the fence post spacing exactly. |
| Composite panel fence | 6–8 ft | 6 ft | Heavier than wood at the same size; many composite systems specify a maximum 8-ft bay and prefer 6 ft. |
| Chain link (residential) | 8–10 ft | 6–8 ft | Steel fabric and a tensioned top rail carry long spans; privacy slats or wind screens push spacing back toward 8 ft. |
| Ornamental aluminum / steel | 6–8 ft | 6 ft | Panel sections come in 6- and 8-ft lengths; 8 ft suits typical yard lines, 6 ft for taller or pool-side panels. |
| Split rail | 8–10 ft | 8 ft | Thick rails through-mortised into posts carry well; the open design adds no wind load, so wider bays are fine. |
| Wire field / livestock fence | 10–16 ft | 8–10 ft | Posts mainly tension the wire; spacing stretches wide on flat pasture and tightens at corners, gates, and hills. |
Two rows deserve a closer look. Vinyl fence is the one type where you never really pick a fence post spacing — the panel arrives at 6 or 8 feet wide and the posts go where the panel ends, so your layout job is to place panels, not to measure arbitrary fence post distance. Chain link sits at the other end: the fabric comes in rolls, so you choose the spacing from rail strength and terminal-post economics, and most residential jobs land on 10 feet between line posts with tighter spacing at gates and corners. For everything else, 8 feet on center is the working default, 6 feet is the conservative answer for height and wind, and the tables in the next sections turn whichever you choose into exact counts.
If your run length is not a clean multiple of the spacing, do not leave a stub bay at the end — set the posts at an even fence post distance across the whole run by dividing the total length by the number of sections instead. A 97-foot line at 8-foot spacing needs 13 sections (97 ÷ 8 = 12.1, rounded up), and setting all 13 sections at 97 ÷ 12 = 8.08 feet looks intentional from the street, while a 4-foot leftover bay at the gate reads as a mistake. The Fence Calculator runs this adjusted spacing automatically; the same adjustment appears in the worked example below.
Fence Height, Wind, and Rail Span
Fence height changes the spacing answer because both load and leverage grow with height. Every extra foot of fence adds surface area to catch wind and moves the sail's center of pressure higher up the post, multiplying the tipping force at the base. A 3-foot picket fence barely loads its posts; a 6-foot solid privacy fence on the same posts works hard in every storm. The practical rules that follow from this are simple enough to apply on site.
The height threshold. Fences up to about 4 feet tall behave well at 8-foot spacing even with ordinary 2×4 rails. Between 4 and 6 feet, 8-foot spacing still works for open or semi-open designs, but solid panels at 6 feet are where builders standardize on 6-foot spacing — it cuts the rail span by a quarter and doubles the posts resisting each square foot of wind. Above 6 feet (privacy walls, sound barriers, commercial lines) assume 6-foot spacing or closer and check whether the post size, embedment, and footings should be engineered rather than assumed.
The wind factor. Exposure matters as much as height. A fence in an open field, on a ridge, along a shoreline, or in a region with regular thunderstorm gusts should drop one spacing tier: 10 feet becomes 8, 8 becomes 6. Solid privacy and shadowbox panels catch far more wind than picket, split-rail, or chain-link fence, so the same yard may honestly take 8-foot spacing on the picket run along the street and 6-foot spacing on the privacy run along the back property line. Where wind is a known problem, add the belt-and-suspenders moves too: deeper embedment, larger holes with more concrete, 6×6 posts instead of 4×4 at corners and gate ends, and rails fastened with structural screws rather than smooth nails.
Rail span. Rails are beams, and every beam has a span it can carry without visible sag. A 2×4 rail is comfortable at about 8 feet for typical privacy loads; a 2×6 roughly doubles the stiffness; a 2×3 is fine only on short, light picket bays. This is why the spacing-by-type table aligns with lumber dimensions: 8-foot spacing and 8-foot 2×4 rails are one system, not two coincidences. If you tighten spacing to 6 feet you may still buy 8-foot rails (they simply get cut), but if you widen spacing beyond 8 feet you must step up the rail section or accept sag. Chain link sidesteps the issue with a steel top rail, which is one reason it can span 10 feet comfortably while wood cannot.
Fence Panel Sizes
Pre-built fence panels — sometimes sold as sections or intervals — are manufactured to a short list of standard widths, and that list is the backbone of the how-many-panels half of any fence takeoff. In the United States the widths concentrate on 6 feet and 8 feet, with heights in 1-foot steps from 3 to 6 feet (and occasional 8-foot privacy specials). The table below covers the fence panel sizes you will actually find on a lumberyard rack or a vinyl supplier's price list, plus the chain-link exception that explains why chain link is counted by posts instead.
| Panel Type | Standard Widths | Standard Heights | Counting Notes |
|---|---|---|---|
| Wood privacy panel (dog-ear, board-on-board) | 6 ft, 8 ft | 4, 5, 6 ft (occasional 7–8) | Most common residential panel; 8-ft width pairs with 8-ft post spacing. |
| Wood picket panel | 6 ft, 8 ft | 3, 3.5, 4 ft | Pre-built picket sections or site-built from individual pickets — both count the same way. |
| Vinyl privacy panel | 6 ft, 8 ft | 5, 6 ft (occasional 4) | Panel width equals post spacing exactly; posts are pre-routed at those centers. |
| Vinyl picket / semi-privacy panel | 6 ft, 8 ft | 3, 4, 5 ft | Same fixed-width logic as vinyl privacy; gaps are molded in, not site-spaced. |
| Composite panel | 6 ft, 8 ft | 4, 5, 6 ft | Confirm the system's maximum bay; heavier panels often specify 6-ft centers. |
| Ornamental aluminum / steel panel | 6 ft, 8 ft | 4, 5, 6 ft | Panel sections clip between line posts; pool-grade panels fix picket gaps at 4 inches or less. |
| Split-rail panel (2-rail, 3-rail) | 8 ft (rail length) | 3.5, 4, 5 ft | Counted by rails through-routed posts rather than assembled panels in many systems. |
| Chain link (roll goods) | 50 ft, 100 ft rolls | 3, 4, 5, 6 ft | No panels — count posts first; fabric = run length plus stretch allowance, plus 1 foot per terminal. |
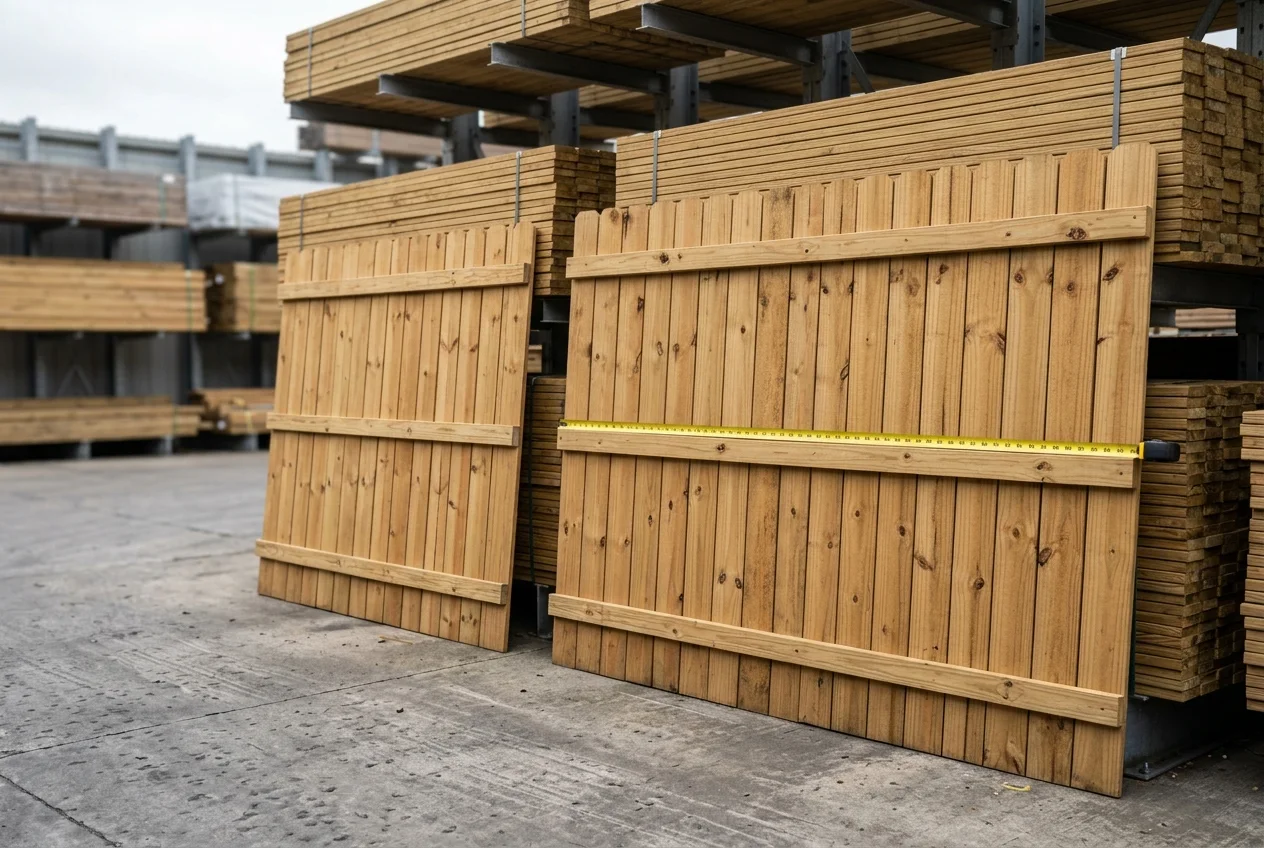
Metric note for mixed plans: the 6- and 8-foot standards correspond to roughly 1.8 meters and 2.4 meters, and many imported or regional panels are sold at 1.80 or 2.40 meters wide — the same two-width system in metric clothing. Whether your tape reads feet or meters, confirm the actual panel width from the product sheet before counting: nominal widths drift with brands, and a "6-foot" vinyl panel can measure a few inches different from a wood one. The panel width is the divisor in every panel count on this page, so a few inches of error in the input becomes a whole panel of error in the answer.
Panel size also decides your post spacing for manufactured systems and constrains it for wood: if you are building from 8-foot panels, your fence post spacing is 8 feet, full stop, and the layout becomes "place posts at panel centers plus half a panel at each end." If you are site-building with individual boards, you keep the freedom to choose 6 or 8 and the picket-spacing section below handles the board math.
How Many Fence Posts Do I Need
Every fence post count comes from one formula, and the formula contains the most common mistake in fence estimating — the off-by-one. Sections and posts are not equal in number: a straight line of fence has one more post than it has sections, because both ends of every line must be closed. The fence post count formula is:
sections = fence length ÷ fence post spacing, rounded up
posts = sections + 1 (straight run, open ends)
posts = sections (closed loop: a paddock, yard perimeter, or any run that returns to its start)
The loop case is why the question "how many fence posts do I need" has no single answer without knowing the shape. Walk a square yard fence back to where you started and the last bay shares the first post — n sections, n posts. On an open run — a backyard line, a side run, a run that ends at a wall — the far end needs its own post: n sections, n + 1 posts. Buy one too few and the last panel has nowhere to land; this classic fence-post problem is the single most common takeoff error on both DIY and pro jobs. A closed perimeter uses the exact division when the numbers cooperate: a 200-foot square yard at 8-foot spacing is 25 sections and exactly 25 posts, no rounding, no plus-one.
The reference table below answers the how-many-fence-posts-do-i-need question directly for common run lengths at 6-, 8-, and 10-foot fence post spacing, using posts = ceil(length ÷ spacing) + 1 for straight runs. Read across for your length, or use it to sanity-check a calculator:
| Fence Length | Posts at 6 ft Spacing | Posts at 8 ft Spacing | Posts at 10 ft Spacing |
|---|---|---|---|
| 50 ft | 10 | 8 | 6 |
| 75 ft | 14 | 11 | 9 |
| 100 ft | 18 | 14 | 11 |
| 150 ft | 26 | 20 | 16 |
| 200 ft | 35 | 26 | 21 |
| 300 ft | 51 | 39 | 31 |
Three adjustments get folded into that base count on real projects. Gates: subtract each gate opening from the run before dividing, then add one extra post for each gate — the opening gets its own pair of posts, and one of the pair is already counted at the edge of the fenced run. Corners: each corner is a post in its own right; on a rectangular yard the corner posts fall out of the straight-run math for each side, but an L-shaped or dog-legged run that you calculate as one continuous length should budget one extra post per inside or outside turn so overlapping runs do not share a post that the math assumed were separate. Terminal posts: end posts, corner posts, and gate posts are usually heavier than line posts (4×6 or 6×6 instead of 4×4; 3-inch pipe instead of 2-inch on chain link), so count them as their own line in the materials list even though they count as one post each in the total.
Then divide the fence post distance evenly across what is left. If the length does not divide cleanly by your target spacing, compute the true even spacing — actual spacing = fence length ÷ (posts − 1) — and set every post at that number instead of leaving one short bay. A run of 120 feet that wants 8-foot spacing works out to 16 sections; 120 ÷ 16 = 7.5 feet per bay, and setting all 16 bays at exactly 7 feet 6 inches looks deliberate, while 14 full bays and one 2-foot stub at the gate does not. This even-spacing adjustment is the difference between a fence that reads as a straight line from the street and one that visibly waves.
How Many Fence Panels Do I Need
Panel fences replace the picket-and-rail takeoff with a single division. Because each pre-built panel spans from post to post, the panel count is the fence run divided by the panel width, rounded up, and the post count follows as panels + 1 on a straight run:
net run = total length − gate openings
panels = net run ÷ panel width, rounded up
posts = panels + 1 (straight run) + 1 per gate
last panel: cut to fit — expected, not an error
Rounding up is mandatory because partial panels do not exist: 100 feet ÷ 8-foot panels = 12.5, and 12 panels leave half the fence uncovered, so the answer is 13 panels and 14 posts. The same run in 6-foot panels is 100 ÷ 6 = 16.7 → 17 panels and 18 posts. Subtract gates first — that 100-foot line with a 4-foot gate has 96 feet of paneling, 96 ÷ 8 = 12 panels — and remember that the last panel is almost always trimmed to close the final bay, which is normal and is exactly why the count rounds up rather than down.
The table below pre-computes how many fence panels do I need for common lengths in both standard widths, with the post count for the 8-foot case alongside:
| Fence Length | 6 ft Panels Needed | 8 ft Panels Needed | Posts (8 ft Panels) |
|---|---|---|---|
| 50 ft | 9 | 7 | 8 |
| 75 ft | 13 | 10 | 11 |
| 100 ft | 17 | 13 | 14 |
| 150 ft | 25 | 19 | 20 |
| 200 ft | 34 | 25 | 26 |
| 300 ft | 50 | 38 | 39 |
One caution when panel width and fence post spacing meet: on vinyl and ornamental systems the two numbers are locked together (panel width is the spacing), but on wood you may site-build panels between posts at a spacing slightly different from the catalog panel width — in that case count sections with the spacing formula and spec pickets or boards instead of panels. And for chain link, skip the panel table entirely: count posts from the spacing table, then allow fabric equal to the run plus about a foot per terminal post for stretching and barbed-wire or rail ties. When the layout has gates, corners, and multiple runs, the Fence Calculator does the segment-by-segment version of this math in one pass.
Fence Rail Spacing
Fence rail spacing — how many horizontal rails run through each section, stacked from bottom to top — is governed by fence height rather than by taste. The working rule is one rail for every 24 inches of height, with two rails as the absolute minimum even on the shortest fence, because two rails (top and bottom) are what keep a board from cupping and what tie the pickets into the posts. From that rule the whole scale falls out:
| Fence Height | Rails per Section | Rail Placement |
|---|---|---|
| Up to 3.5 ft (picket, ranch) | 2 | Top and bottom, roughly 6–8 in from each end. |
| 4 ft (picket, pool fence) | 2 (3 for solid privacy) | Two at ~8 in from ends; add a center rail if boards are solid and full-height. |
| 5 ft | 3 | Top, middle, bottom — even thirds. |
| 6 ft (standard privacy) | 3 | Top, middle, bottom; the middle rail is what stops 6-ft boards from bowing. |
| 7–8 ft (tall privacy, commercial) | 4 | Four rails at even spacing; some systems add a fifth at 8 ft in wind zones. |
| Split rail (3-rail) | 3 | Rails pass through mortised posts; 2-rail versions for shorter runs. |
The total rail count is then one multiplication: rails = (posts − 1) × rails per section, where (posts − 1) is the number of sections. A 150-foot fence with 20 posts has 19 sections; at 3 rails per section that is 57 rails. Rails are bought in standard lengths (8 feet for wood privacy at 8-foot centers; 6 feet for 6-foot centers; 8 or 10 feet for split rail), cut to the actual bay if you tightened the spacing — a 7.5-foot even bay still consumes an 8-foot 2×4. On chain link, the rail system is a continuous top rail plus occasional mid-rails, so count pipe rather than boards: top rail ≈ run length in 10- or 20-foot sticks with couplers, plus a rail brace assembly at each terminal post.
Rail placement matters as much as count: keep the bottom rail 6 to 8 inches above grade so it does not wick moisture from mulch and soil, keep the top rail just under the top of the boards (or inside the top cap on vinyl), and space the middle rail exactly between them. Fasten rails to posts with structural screws or through-bolts on privacy fence — nails pull out under wind cycling — and use hot-dipped galvanized or stainless fasteners everywhere outdoors. The Lumber Calculator converts a rail schedule like this into board counts when you also want the pickets and trim on the same list.
Fence Picket Spacing
Fence picket spacing is arithmetic dressed as aesthetics: the picket count comes from one repeating unit — picket face width plus the gap beside it — called the pitch. Divide the fence length by the pitch and round up, and you have the picket count before waste:
pitch = picket face width + gap
pickets = fence length ÷ pitch, rounded up
example: 3.5-in dog-ear picket + 1.5-in gap = 5-in pitch; 100 ft = 1,200 in ÷ 5 in = 240 pickets
Standard dog-ear pickets are sold as nominal 4-inch boards with an actual face of 3.5 inches, and 1.5 inches of gap is the classic semi-privacy rhythm — enough to see through, enough to feel enclosed. The table below covers the common fence picket spacing patterns and the pitch each one produces:
| Style | Picket Face | Gap | Pitch | Pickets per 100 ft |
|---|---|---|---|---|
| Open picket (traditional) | 3.5 in | 1.5–2.25 in | 5–5.75 in | 240–253 (at 5–5.75 in) |
| Semi-privacy spaced | 3.5 in | 2.5–3 in | 6–6.5 in | 207–185 |
| Solid privacy (dog-ear board) | 5.5 in | 0 in (touching) | 5.5 in | 219 |
| Board-on-board (shadowbox) | 5.5 in face | ~1 in visual, alternating | ~5.5 in per side | ~219 per face side |
| Stockade (pointed, interlocking) | 3.5–4 in | 0 in | 3.5–4 in | 360–300 |
| Pool barrier | Any | ≤ 4 in sphere rule | System-defined | Per panel spec |

Three practical notes keep the count honest. First, waste: add 5 to 10 percent to the picket count for splits, knots, bad cuts, and the trim piece at every corner — 360 pickets becomes a budget of about 400. Second, pool code: any fence serving as a pool barrier must stop a 4-inch sphere from passing through, which caps openings at 4 inches and effectively fixes picket gaps well below the decorative 1.5- to 3-inch range — confirm the barrier rules with your building department before laying out a pool-side run. Third, rhythm at the ends: with a fixed pitch, the last bay often needs a picket closer to (or farther from) the post than the pattern — either absorb it in the end gap or nudge the whole run's gap by a fraction of an inch so the pattern lands clean; what you must not do is leave one board-width gap that reads as a missing picket. For site-built fences, run the pitch math first and buy pickets in matching production lots so color and treatment do not drift across the run.
Worked Example: A 150-Foot Fence, Start to Finish
Put every formula above into one job. A straight backyard run, 150 feet long, 6-foot wood privacy fence, posts at 8-foot spacing, 3 rails per section, solid dog-ear boards at 5.5-inch face (no gap), one 4-foot gate, flat ground. Here is the complete takeoff, step by step, in the same order a fence material calculator would run it.
Step 1 — Sections and Posts
Net run with the gate removed: 150 − 4 = 146 feet.
Sections = 146 ÷ 8 = 18.25 → 19 sections (round up — no partial section exists).
Posts for the run = 19 + 1 = 20, plus 1 extra for the gate pair = 21 posts total.
Even spacing across the run = 146 ÷ 19 = 7.68 feet ≈ 7 ft 8¼ in on center — set every bay to that number so no stub section survives at the gate.
Step 2 — Rails
6-foot-tall fence → 3 rails per section (one per 24 inches, minimum 2).
Rails = 19 sections × 3 = 57 rails. Buy them in 8-foot 2×4s: each bay is about 7.68 feet, so every rail is a full stick trimmed slightly — 57 pieces of 2×4 × 8 ft. Fasteners: structural screws or 8d hot-dipped galvanized ringshank, roughly 2 screws per rail end.
Step 3 — Boards (Pickets)
Pitch = 5.5-inch face + 0 gap = 5.5 inches.
146 ft = 1,752 in ÷ 5.5 in = 318.5 → 319 boards.
Add 8 percent for cuts and waste: 319 × 1.08 ≈ 345 → budget 345–350 boards (1×6 × 6 ft to match the panel height).
Step 4 — Panel Alternative
If this were built from pre-built 8-foot panels instead: 146 ÷ 8 = 18.25 → 19 panels, posts = 19 + 1 + 1 gate = 21 — the same post count, with the panel count replacing boards and rails in one line. This is the comparison worth running both ways on every job: site-built for irregular runs and custom spacing, panels for standard lengths where the 8-foot math lines up with the panel sizes exactly.
Step 5 — Holes, Gravel, and Concrete
Hole diameter = 3× the post: 4×4 post → 10-inch hole; depth = one-third of a 10-foot post = about 30 inches (and below frost where it freezes — 36 to 48 inches across the north).
Drainage gravel: 4 inches per hole in a 10-inch hole ≈ 0.16 ft³ × 21 posts ≈ 3.5 ft³ — call it 7 half-cubic-foot bags.
Concrete: net 10-in × 30-in hole minus the post ≈ 1.15 ft³ per post; at 0.37 ft³ per 50-lb bag that is about 3 bags per post — 21 posts × 3 = 63 bags of 50-lb concrete (or the equivalent in tube-set or ready-mix).
Step 6 — The Materials List
21 posts (4×4 × 10 ft, plus 6×4×6 or 4×6 for the two gate posts) · 57 rails (2×4 × 8 ft) · ~345 boards (1×6 × 6 ft) — or 19 panels if buying pre-built · 63 bags of 50-lb concrete · 7 bags pea gravel or ½-in drain stone · structural screws and galvanized nails · post caps · gate kit with hardware · string line, stakes, and marking paint. That list — posts, rails, boards, concrete, gravel, fasteners, hardware — is the fence installation materials takeoff in full; the Fence Calculator and the Post Hole Calculator reproduce Steps 1, 5, and 6 for any dimensions you enter.
Post Depth, Holes, and Concrete
Spacing decides how many holes; depth decides whether the fence is still standing in five years. Two rules govern the set: embed about one-third of the post's total length in the ground, and go below the frost line wherever the ground freezes. A 6-foot fence therefore uses a 9- or 10-foot post set 2.5 to 3 feet deep; a 4-foot fence uses a 7-foot post at about 2.3 feet. Minimums apply for light fences — never less than 2 feet of embedment for a line post on open ground, more where soil is soft.
| Fence Height | Post Length | Embedment | Hole Diameter (4×4 / 6×6) |
|---|---|---|---|
| 3 ft | 5–6 ft | 2 ft (min) | 10 in / 16 in |
| 4 ft | 6–7 ft | 2–2.5 ft | 10 in / 16 in |
| 5 ft | 7–8 ft | 2.5 ft | 10 in / 16 in |
| 6 ft | 9–10 ft | 2.5–3 ft | 10 in / 16–18 in |
| 8 ft | 11–12 ft | 3–4 ft | 12 in / 18 in |
| Gate post (any height) | +1–2 ft over line posts | Same as run, deeper in soft soil | 12–18 in (heavier loads) |
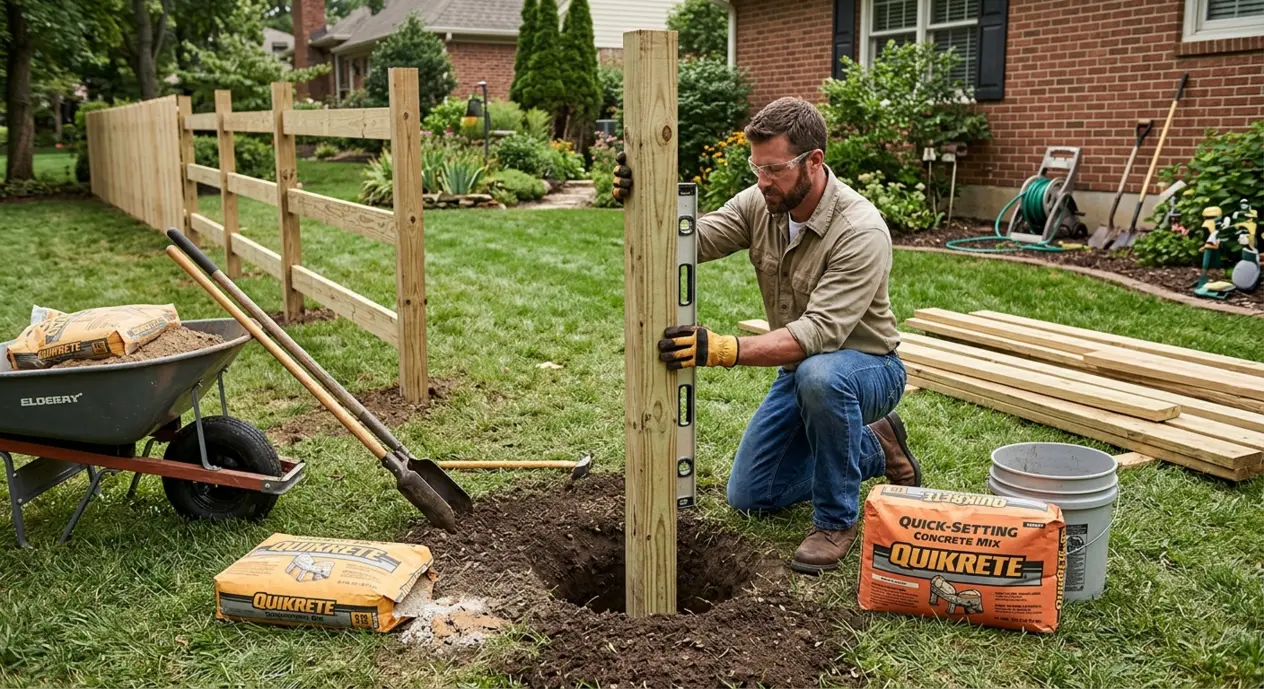
Hole diameter follows a simple ratio — about three times the post's width, which is why a 4×4 (actually 3.5 inches) gets a 10-inch hole and a 6×6 gets 16 to 18 inches. The gap around the post is not waste; it is the concrete sleeve that transfers wind load into the ground. Bottom prep: drop 4 to 6 inches of ½-inch or pea gravel into the hole and set the post on it, so water drains away from the end grain instead of pooling under the post — the difference between a post that rots in three years and one that lasts fifteen. In heavy clay, drill a few extra inches deeper than the frost requirement and add more gravel; in sand, widen the hole rather than deepening it alone.
Concrete per hole is volume math: bags = (hole volume − post volume) ÷ bag yield, with yields of roughly 0.30 ft³ (40 lb), 0.37 ft³ (50 lb), 0.45 ft³ (60 lb), and 0.60 ft³ (80 lb). Common cases:
| Hole (dia × depth) | Post | Net Concrete | 50-lb Bags (approx.) |
|---|---|---|---|
| 8 in × 20 in | 4×4 picket | ≈ 0.5 ft³ | 1–2 |
| 10 in × 24 in | 4×4 line | ≈ 0.9 ft³ | 2–3 |
| 10 in × 30 in | 4×4 line, frost zone | ≈ 1.15 ft³ | 3 |
| 12 in × 30 in | 6×6 line | ≈ 1.45 ft³ | 3–4 |
| 16 in × 36 in | 6×6 gate / high wind | ≈ 2.6 ft³ | 6–7 |
Fast-setting concrete can be poured dry around the post and watered in — it sets in 20 to 40 minutes and reaches working strength in a day, which lets a crew set an entire run before the rails arrive. Standard-set concrete gives more working time and a higher final strength; either way, plumb each post against the string line before the mix kicks, and brace it. Slope the concrete crown slightly away from the post so water sheds off the collar instead of standing against the wood — a small detail that doubles the life of the embedment. For post-by-post sizing on real holes, the Post Hole Calculator runs the same volume-minus-displacement math.
Gates, Corners, and Slopes
Real fences are not one straight line, and each interruption in the line changes the count. Gates first: subtract every gate opening from the total length before dividing by spacing, then add one post per gate. A 100-foot line with one 4-foot gate has 96 feet of fence: 96 ÷ 8 = 12 panels (or sections) and 12 + 1 + 1 = 14 posts total. Gate posts carry swinging loads that line posts never see — use 4×6 or 6×6 wood, or heavy-wall terminal pipe on chain link, and set them 25 to 50 percent deeper with extra concrete. Wide gates compound the problem: anything over about 5 feet of opening wants a heavier frame, a diagonal brace, or a wheel/cantilever support, and double-drive gates need their center latch post set like a terminal post.
Corners are where straight-run math gets over-counted or under-counted. On a rectangular yard, run each side separately: each side's end post is the corner, so the corner post is counted once, not once per side. On an L or U run calculated as one continuous length, add one extra post per corner beyond the section formula. Every corner post is a terminal post — size it up, set it deeper, and never terminate two rails into the same face of a corner without a structural connection; the corner is the post that fails first when wind gets under a fence.
Slopes force a choice between two layouts. Racked (raked) construction follows the ground: posts stay plumb, rails angle, and the fence keeps constant fence post distance measured along the slope — good for gentle grades and for picket and rail fence where the visual line matters more than horizontal boards. Stepped construction keeps every panel level and steps the fence down the hill: each panel is a standard size, posts get cut to different heights, and gaps appear under the panels on steep ground — the standard answer for pre-built panels, vinyl, and ornamental systems, and often the only clean option past about a 3:1 grade. On a racked run, measure the length along the slope for material counts; on a stepped run, the post spacing is measured horizontally, which is slightly shorter than the slope distance.
Whichever geometry you choose, the even-spacing discipline still applies: set the first and last post (or corner and corner), divide the actual run by the section count, and place every post at the computed fence post distance. Check the diagonal on rectangular layouts with the 3-4-5 method before digging — a rectangle that is out of square by a few inches shows up as one bad bay at the very end, which is precisely where the stub-bay mistake likes to hide.
Fence Installation Materials
The complete fence installation materials list falls into five groups: structure, infill, setting, fastening, and hardware. Buying against the list — rather than against a per-section guess at the yard — is what keeps a trip to the lumberyard from becoming two. Cost ranges below are typical U.S. material figures for orientation only; regional pricing, freight, and grade move them substantially.
| Group | What to Buy | Typical Sizes | Orientation Cost |
|---|---|---|---|
| Posts (structure) | Line, corner, end, and gate posts | 4×4 × 8–10 ft line; 4×6 or 6×6 × 10 ft corners/gates; 2⅜-in or 2½-in pipe for chain line, 3-in terminal | $8–$25 per wood post; $15–$40 per terminal pipe |
| Rails (structure) | Horizontal stringers, 2–4 per section | 2×3, 2×4, or 2×6 × 6/8/10 ft; 1⅝- or 1⅞-in top rail for chain | $4–$14 per rail |
| Boards / pickets (infill) | Privacy boards, pickets, or pre-built panels | 1×4, 1×6 (5.5-in face) × 3–6 ft; dog-ear, pointed, shadowbox; panels 6 × 4–6 ft and 8 × 4–6 ft | $1.50–$6 per board; $65–$250 per panel |
| Concrete & gravel (setting) | Bagged concrete per hole, drainage stone | 40/50/60/80-lb bags; ½-in or pea gravel, 4–6 in per hole | $5–$7 per 50-lb bag; ~$5–$8 per bag gravel |
| Fasteners (fastening) | Screws, nails, ties, banding | Structural screws or 8d/10d hot-dipped galvanized ringshank; stainless for cedar & redwood; chain ties and tension band | $25–$60 for the job |
| Hardware & finish | Gate hardware, caps, sealer | Hinges, latch, cane bolt (drive gates); post caps; stain or sealer | $40–$150 per gate; caps $2–$8 each |
Two buying rules prevent the classic shortages. Count posts from the spacing table, then add spares for corner and gate upgrades — terminal posts are heavier pieces and are always short on delivery day. Match production lots: buy all boards or all panels from one delivery so color, moisture content, and treatment align; a second trip a week later brings a visibly different batch, especially with cedar and pressure-treated pine. Fastener choice deserves the same discipline: hot-dipped galvanized everywhere, stainless in cedar and redwood (where tannins corrode plain steel), and structural screws rather than smooth nails on any rail or post connection that will see wind. Add the consumables nobody remembers — string line, stakes, marking paint, a level, braces, and a post-hole digger or auger rental — to the same list. The Fence Calculator assembles posts, rails, pickets, and panels from your dimensions, and the Lumber Calculator extends the same count into boards and board feet when you are pricing stick-by-stick.
For cost context, material-only outlays for a typical residential wood privacy fence run roughly $10 to $20 per linear foot of fence in materials, with vinyl and ornamental systems higher and chain link lower; professional installation lands roughly two to three times the materials figure depending on region, terrain, and access. Treat any dollar figure as orientation, not a quote, and price your own list locally before committing — but price it from the counted list above, not from a round guess, because the count is where the money actually lives.
Permits, Property Lines, and 811
The administrative steps come before the first hole, and skipping them is the only mistake on this page that can cost more than materials. Start with utilities: call 811 (the national Call Before You Dig number) at least two to three business days before digging. The service is free, required by law in every state for excavation, and marks electric, gas, water, sewer, telecom, and cable lines around every planned post location. Fence posts are shallow, but utility lines sometimes are too — and the penalty for guessing is not just a repair bill.
Next, the property line. Do not trust the old fence, the hedge, or the neighbor's claim: pull the plat or survey and confirm where the boundary actually sits, then set the fence just inside your side of it (typical practice is a 2- to 6-inch offset onto your property, subject to local rules). Easements — drainage, utility, setback — may prohibit building at all along part of the line even when you own the soil. Then permits and rules: many jurisdictions allow rear- and side-yard fences up to 6 feet without a permit while capping front yards at 4 feet; others require a permit for anything over 3 or 4 feet. HOAs frequently govern height, style, color, and materials with rules stricter than the municipality's.
Assemble the answers before layout: (1) what height is allowed where, (2) which side of the line and how much offset, (3) whether a permit or plan submittal is required and how long it takes, (4) any gate or sight-triangle restrictions at driveways, and (5) HOA approval if applicable. With those five confirmed, the fence post spacing and layout from the earlier sections can be committed to marking paint with confidence — because a spacing that passes review is part of the fence post spacing guide that no calculator can give you: the local rule that overrides all the general ones.
Frequently Asked Questions
The standard fence post spacing for a wood privacy or picket fence in the United States is 8 feet on center, because lumber yards sell rails, pickets, and pre-built panels in 8-foot lengths. Chain-link fence typically runs posts 8 to 10 feet apart, split-rail fence 8 to 10 feet, and ornamental aluminum or steel 6 to 8 feet. Vinyl panels set the spacing for you: the fence post spacing equals the panel width, almost always 6 or 8 feet. Drop from 8 feet to 6 feet whenever the fence is taller than 6 feet, the panels are solid and heavy, or the site is exposed to strong prevailing wind — the fence post spacing guide used by most builders is 8 feet for ordinary conditions and 6 feet for demanding ones.
For a straight 100-foot run at the standard 8-foot spacing, divide 100 by 8 and round up: 12.5 rounds up to 13 sections, then add one post to close the far end, giving 14 posts. The same run at 6-foot spacing needs 18 posts and at 10-foot spacing needs 11. The general formula for how many fence posts do I need is posts = fence length ÷ fence post spacing, rounded up, plus 1 — the famous off-by-one: 13 sections need 14 posts because a straight line of sections has one more post than it has bays.
Standard fence panel sizes in the United States are 6 feet and 8 feet wide by 4, 5, or 6 feet tall for wood privacy panels; wood picket panels come 6 or 8 feet wide and 3 to 4 feet tall; vinyl and composite panels are also built on the 6-foot and 8-foot width standard with heights from 3 to 6 feet; ornamental metal panels come in 6- and 8-foot sections at 4 to 6 feet tall. Chain link is sold in rolls rather than panels, so its sections are simply the distance between posts. Always confirm the actual width of the panel you plan to use, because the panel width is what converts a fence run into a panel count and a post count.
Divide the fence length by the panel width and round up. With standard 8-foot panels, 100 ÷ 8 = 12.5, which rounds up to 13 panels, and the posts are panels + 1 = 14 posts. With 6-foot panels, 100 ÷ 6 = 16.7, which rounds up to 17 panels and 18 posts. Subtract any gate opening from the fence length first — a 4-foot gate in a 100-foot line leaves 96 feet of panels: 96 ÷ 8 = 12 panels. The last panel is normally cut down to close the run, which is expected because you cannot buy a fraction of a panel.
Fence rail spacing follows fence height: use one rail for every 24 inches of height with a minimum of two rails, so a 3- to 4-foot fence gets 2 rails per section, a 5- or 6-foot privacy fence gets 3 rails, and a 7- or 8-foot fence gets 4 rails. Fence picket spacing is set by picket face width plus gap: the classic semi-privacy look is a 3.5-inch dog-ear picket with a 1.5-inch gap, giving a 5-inch repeating pitch, which means 240 pickets per 100 feet. Solid privacy fences install boards with no gap, shadowbox designs alternate faces with roughly a 1-inch visual gap, and any fence surrounding a pool must leave no opening larger than 4 inches so a child cannot pass through.
Set the fence post about one-third of its total length in the ground, with a 2-foot minimum for light fences: a 6-foot fence uses a 9- or 10-foot post set 2.5 to 3 feet deep, and an 8-foot fence uses an 11- or 12-foot post set 3 to 4 feet deep. In cold climates the hole must reach below the local frost line — commonly 36 to 48 inches across the northern United States — or winter freeze-thaw will heave the posts out of plumb. Dig the hole about three times the width of the post (a 4×4 wants a 10-inch hole), add 4 to 6 inches of drainage gravel under the post, and set the post on the gravel rather than directly on undisturbed soil at the bottom of the hole.
Compute concrete as hole volume minus post volume, then divide by the yield of your bag. A typical 4×4 post in a 10-inch-diameter, 24-inch-deep hole needs about 0.9 cubic feet of concrete after the post displacement, which is 2 to 3 fifty-pound bags (a 50-pound bag yields roughly 0.37 cubic feet; 40-pound yields 0.30, 60-pound 0.45, 80-pound 0.60). Larger holes scale up: a 12-inch hole 30 inches deep for a 6×6 line post wants 3 to 4 fifty-pound bags, and a 16- or 18-inch gate-post hole can take 6 or more. Fast-setting concrete poured dry around the post and watered in place sets in about 20 to 40 minutes, which lets you set a full run of posts in one day.
It depends on your jurisdiction. Many municipalities allow fences under 6 feet tall in rear and side yards without a permit, while front-yard fences are often capped at 4 feet; HOAs frequently add their own height, style, and material rules. Before you dig, call 811 at least two business days ahead so utility lines can be marked for free — it is the law in every state for excavation work. Confirm the property line with a survey or plat rather than the existing hedge or old fence, check easements, and ask your building department about the local fence permit rules so the layout, height, and post spacing you plan will pass review the first time.
References
- International Code Council, International Residential Code (IRC) — iccsafe.org — model-code basis for fence height limits, pool-barrier opening rules, and permit triggers adopted by local jurisdictions.
- University of Missouri Extension, Building a Fence: Considerations and Planning — extension.missouri.edu — post spacing, materials, and layout guidance for residential fence work.
- Virginia Cooperative Extension, Fence Planning for Horses and Other Livestock — extension.vt.edu — post spacing and bracing practice for long runs and wire fence.
- Oregon State University Extension Service, Fencing for Livestock and Small Acreages — extension.oregonstate.edu — spacing tables, terminal-post sizing, and strain planning.
- 811 / Common Ground Alliance, Call Before You Dig — call811.com — the national one-call locates service used before any post-hole excavation.
- U.S. Consumer Product Safety Commission, Pool Safety: Barriers — cpsc.gov — the 4-inch maximum opening rule behind pool-fence picket spacing.
Disclaimer: This guide summarizes fence post spacing conventions, standard fence panel sizes, count formulas, rail and picket spacing patterns, and typical post depth and concrete quantities for general educational purposes. It is not an engineering design, a structural or wind-load calculation, or a permit determination for any specific site. Local codes, HOA rules, soil conditions, frost depths, and manufacturer specifications vary; verify spacing, height, and depth requirements with your local building department and the fence system's installation manual before digging, and call 811 before any excavation.