
ON THIS PAGE:
Retaining Wall Basics at a Glance
A retaining wall holds back soil at a change in grade, and every retaining wall basics decision follows from how much soil, how much water, and how much load sits behind it. Standard segmental retaining wall blocks run 12 inches wide × 4 inches tall × 9 inches deep; one full course is buried below grade on a 6-inch compacted crushed-base trench about twice the block depth wide. Behind the face goes a full-height column of clean ¾-inch stone — 12 inches wide on low walls, more on tall ones — with hollow cores filled, a 4-inch perforated retaining wall drainage pipe at the base, holes down, sloped 1 to 2 percent to daylight, and filter fabric between the stone and native soil. When does a retaining wall need engineering? Above 4 feet measured from the bottom of the footing, or at any height when a driveway, structure, rising slope, or upper tier surcharges it — the 4-foot line is the IBC language most residential codes mirror, and the buried course counts. Retaining wall height and permits go together: over the limit you need a permit and almost always a stamped design. Watch for the classic retaining wall failure signs — lean, middle bulge, stepped joints, seepage — because once a wall is visibly moving, the repair window has closed.
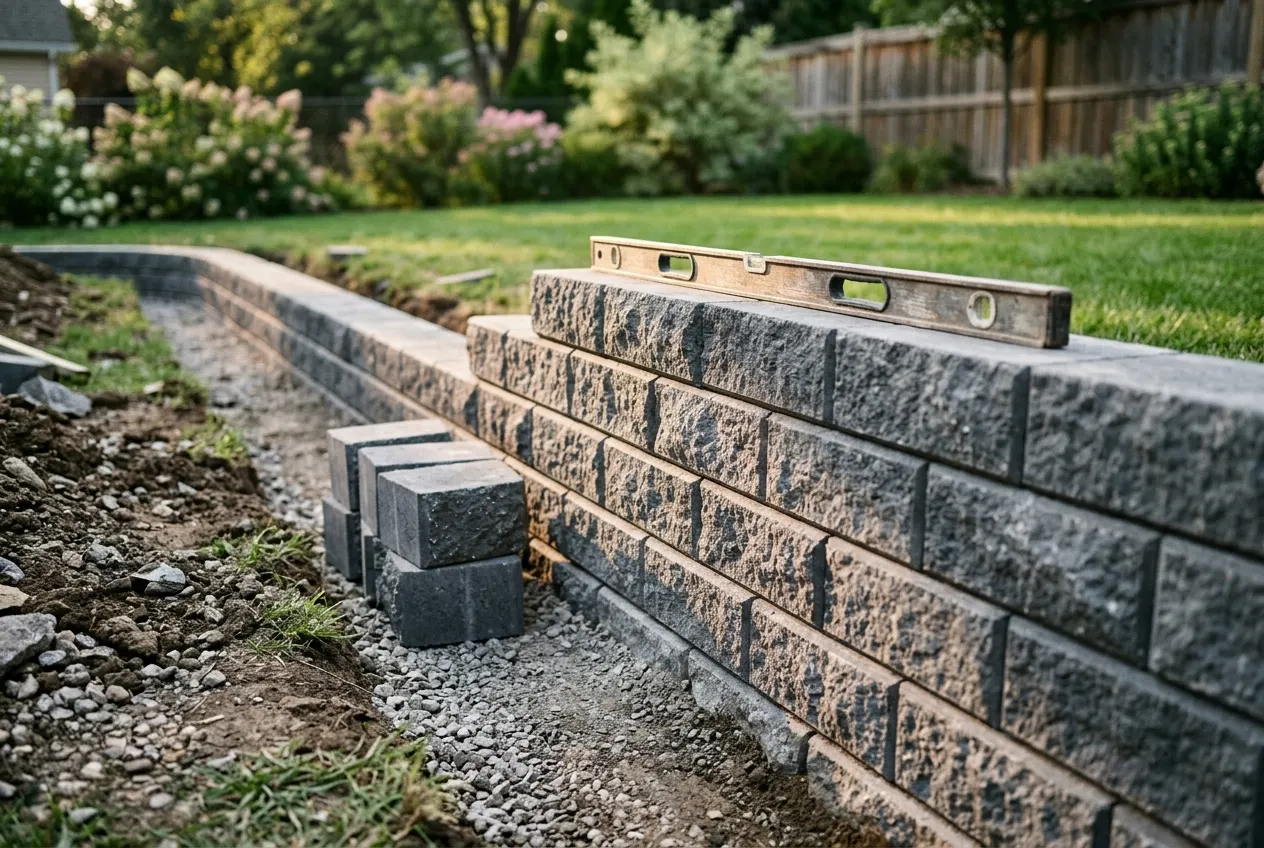
What a Retaining Wall Actually Does
A retaining wall is a structural barrier that holds soil at a grade change it could not hold on its own. Untouched soil stands at its natural angle of repose — the steepest dry slope it can maintain without sliding, commonly around 30 to 35 degrees for granular soils and much steeper for stiff clay when dry. Cut into that slope for a level patio, driveway, or building pad, and the soil behind the cut wants to push outward and downward. The wall's job is to resist that push: active earth pressure rising with the square of the height, multiplied by the soil's unit weight, plus anything extra — surcharge — sitting on the surface above.
Three forces act on every wall. Overturning tries to rotate the wall forward about its toe; mass, width, and reinforcement resist it. Sliding tries to push the whole wall sideways along its base; base friction and a key into the ground resist it. Bearing presses the toe down into the foundation soil; a wide, level, compacted base spreads that load. Water adds a fourth force most people forget until a wall fails: saturated backfill weighs far more than drained soil and pushes hydrostatically straight at the back of the wall. That is why retaining wall drainage — stone column, perforated pipe, filter fabric — is not an upgrade. It is the part of the design that keeps the other three forces at the numbers the wall was sized for.
Everything in the sections that follow — retaining wall types, block sizing, base preparation, the height and permit thresholds, geogrid — is one answer to the same question: given this height, this soil, and this load, what resists the push for the life of the property? Those three forces plus water are the physics behind every rule on this page; the sections that follow turn them into the retaining wall basics you can build from. The remaining half of that answer is where the water goes.
Retaining Wall Types
Retaining wall types fall into eight families, sorted by how each one resists earth pressure. The right choice depends on height, soil, available space, budget, and whether the wall must be engineered. Residential landscaping leans on segmental block, gravity stone, timber ties, and poured concrete; the taller and more loaded families — anchored, crib, MSE, sheet pile — are commercial and civil work that shows up on residential lots only on steep or waterfront sites. Choosing among the retaining wall types below is the first decision every wall project makes, and the one that sets the rules for everything after it.
| Type | How It Resists | Typical Height | Best Use |
|---|---|---|---|
| Gravity | Own mass — thick stone, mortared block, or poured concrete | Up to ~3–4 ft unreinforced | Garden terraces, planter walls, short grade changes |
| Cantilever | Reinforced L-shaped stem with base slab; soil weight on the heel | 4–20+ ft with design | Engineered residential and commercial grade changes |
| Anchored | Cables or rods drilled and grouted into the slope behind the stem | Any height with design | Steep backs, limited toe space, loading from above |
| Segmental block (SRW) | Interlocking dry-stacked units, buried course, friction, optional geogrid | Up to ~4 ft unreinforced; taller with geogrid | Most residential walls; the default DIY-capable system |
| Gabion | Wire baskets filled with stone; mass plus drainage | 3–30+ ft with design | Erosion control, steep slopes, industrial aesthetic |
| Crib | Interlocking timber or concrete cribs filled with aggregate | 6–30+ ft | Steep highway and hillside fills |
| MSE | Facing panels or blocks tied into layered reinforced backfill (geogrid or strips) | 20–60+ ft | Highway embankments, large commercial sites |
| Sheet pile | Steel sheets driven below grade; cantilever or anchored | Waterfront, temporary | Shorelines, cofferdams, excavation support |
Within the residential menu, the practical choice is usually among segmental block, mortared or dry-stacked natural stone, pressure-treated timber ties, and poured concrete. Segmental block wins on drainage (dry-stacked joints weep, cores fill with stone), speed, and the built-in setback every course steps back by. Natural stone looks unmatched and is pure gravity — no interlock, so height is limited and an engineer should look at anything above about 3 feet. Timber is the cheapest structural material but the shortest-lived in contact with wet soil; expect 10 to 20 years even with treated ties. Poured concrete is the strongest residential option and the one most often engineered: an L-shaped cantilever footing with rebar handles heights block cannot, at the cost of forming, curing time, and the need for formwork skill.
Which type is right for your wall? Run the pick in this order: under 3 feet, level behind, no surcharge — segmental block if you want drainage built in and a same-weekend build, natural stone if the look matters more than the clock, timber if the budget rules. Three to 4 feet — still segmental block territory with the full drainage system, or poured concrete if the soil is weak or the wall sits in front of a structure. Over 4 feet, or any surcharge, any rising ground behind, any tiering — stop choosing by material and start with a stamped design; the engineer will specify the system, and block facing on an engineered reinforced-soil or cantilever core is the usual residential answer. Gabions, crib, MSE, and sheet pile belong to commercial and civil work — if a contractor proposes them for a yard wall, ask which engineer is sealing it.
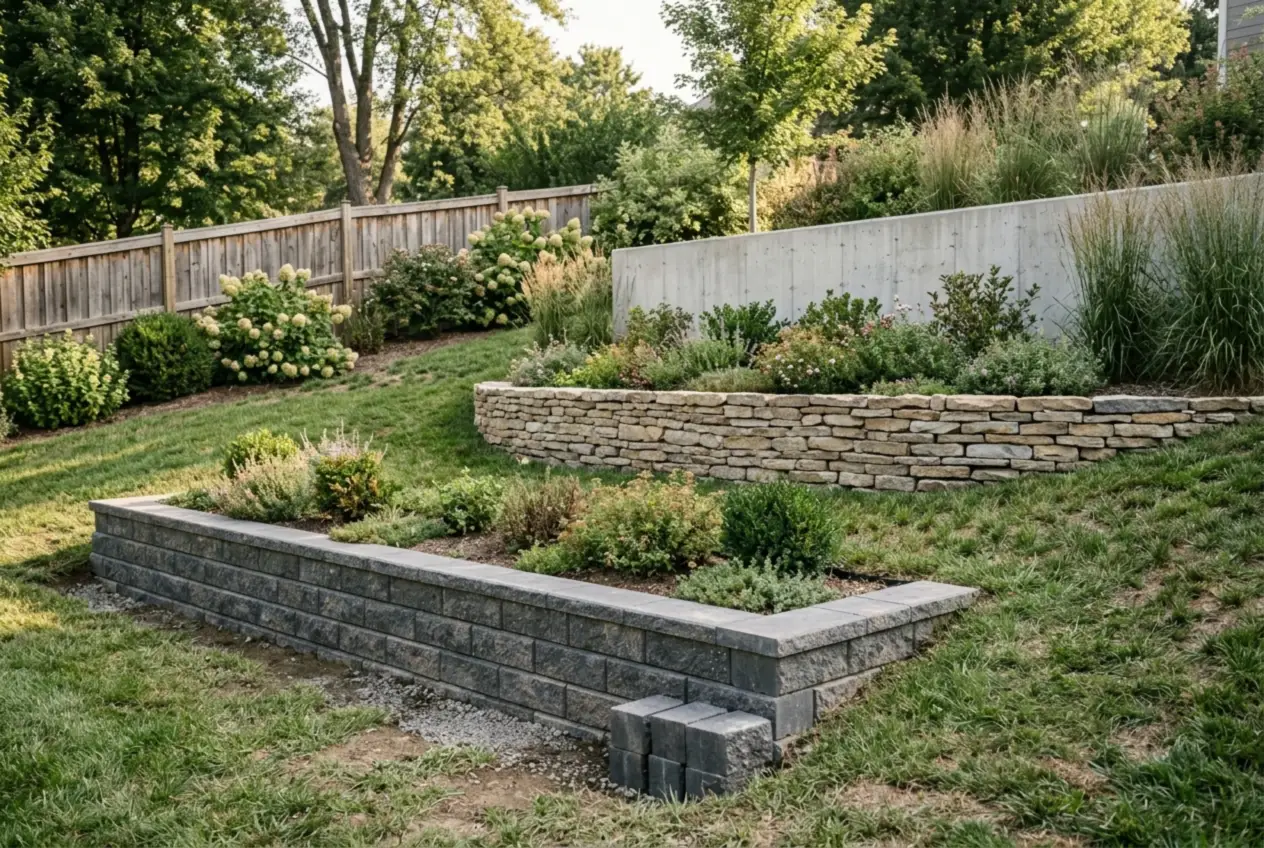
Retaining Wall Height and Permits: When Does a Retaining Wall Need Engineering
The question of when does a retaining wall need engineering has one clean code answer and one real-world answer that catches people out. Retaining wall height and permits sit at the center of the retaining wall basics decision tree because the building department — not the block catalog — decides what you are allowed to stack. The code answer: most U.S. jurisdictions draw the line at 4 feet, measured from the bottom of the footing to the top of the wall — the language the IBC uses and most residential codes mirror. Your buried first course counts toward that 4 feet; the measurement is not taken from the finished ground surface in front of the wall, which is the reading that gets homeowners into trouble. Some localities tighten the threshold to 3 feet. Check your building department before committing to a pallet.
The real-world answer is stricter: any surcharge behind the wall removes the exemption at any height. A surcharge is any additional load bearing on the soil the wall retains — a driveway, a parking pad, a slope rising behind the wall, a pool, a building foundation, or a second wall tiered above. A 3-foot wall holding back a level lawn is a weekend project. A 3-foot wall holding the edge of a driveway is an engineered structure in most jurisdictions, and it is the one that fails. The decision table below compresses the full test.
| Condition | Engineering? | Permit? |
|---|---|---|
| Under 3 ft, level ground behind, no surcharge | Usually not | Check locally; often exempt |
| 3–4 ft, level ground behind, no surcharge | Often not (unless locality tightens to 3 ft) | Usually required |
| Over 4 ft from bottom of footing | Stamped design in nearly all jurisdictions | Required |
| Any surcharge — driveway, structure, parking | Yes, at any height | Yes |
| Ground rises behind the wall (cut slope) | Yes | Usually |
| Tiered walls closer than 2× the lower wall height | Yes — behaves as one tall wall | Yes |
| Wall supports or undermines a foundation, pool, or septic | Yes | Yes |
| Over 8 ft any configuration | Geotechnical + structural engineering | Required |
The tiering rule is the one that surprises people most. Splitting a 6-foot grade change into two 3-foot walls does not automatically turn one engineered wall into two DIY walls. Unless the upper wall sits far enough back that its load falls behind the lower wall's influence zone, the two behave as a single tall structure. The commonly used spacing rule: the setback between tiers must be at least twice the height of the lower wall. Build a 3-foot lower wall, set the upper wall at least 6 feet back from its face, plant the bench between them, and you have two independent walls. Set them closer and you have built a 6-foot wall in two pieces — engineer it as one.
The engineering fee on a residential wall is typically a small fraction of the material cost — often $1,500 to $5,000 for a stamped design — and a vanishing fraction of the cost of rebuilding a failed wall plus whatever the failure took with it. If the answer is genuinely borderline, build shorter, tier wider, or regrade the slope instead. None of those choices is a compromise you will regret.
Retaining Wall Blocks: Sizing and Brands
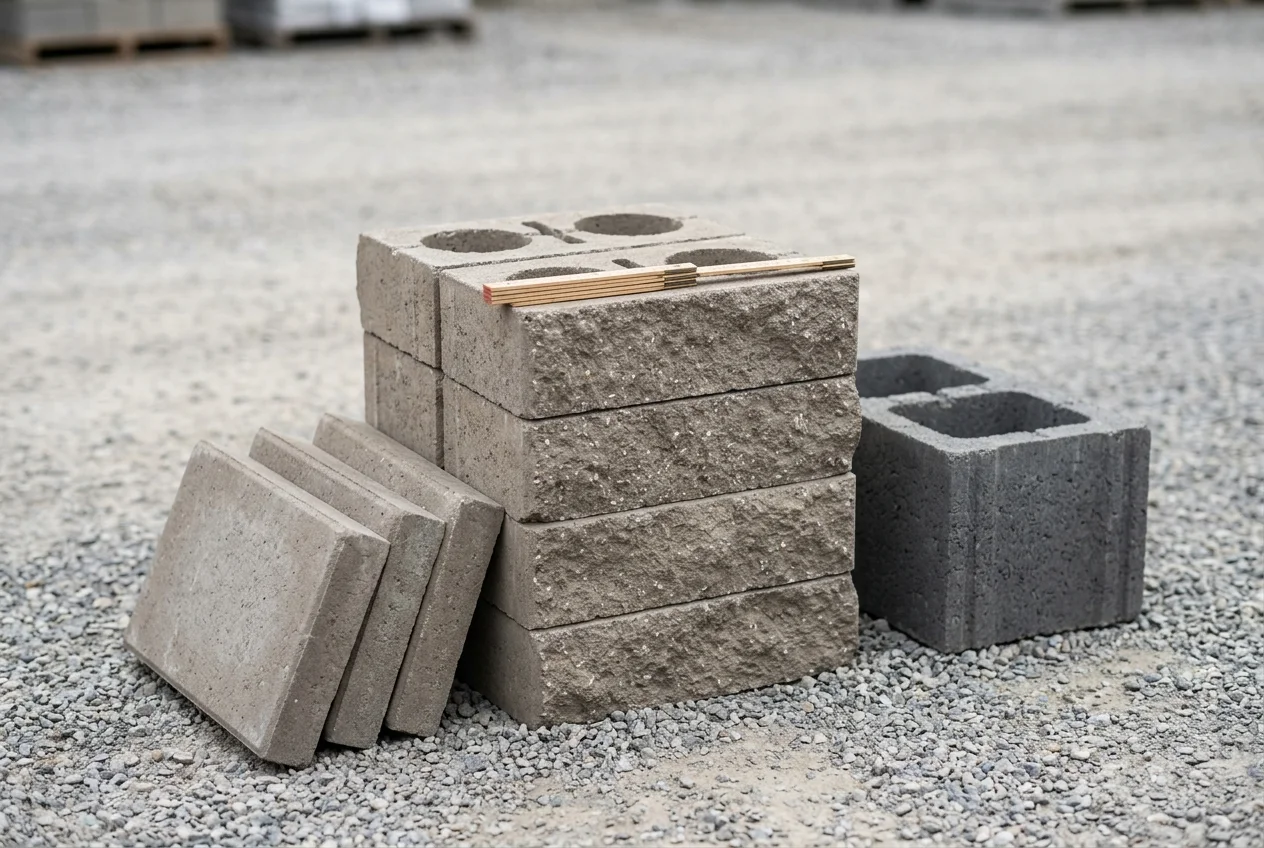
The block half of the retaining wall basics picture starts with size class. Standard segmental retaining wall blocks share one footprint across the major brands: roughly 12 inches wide × 4 inches tall × 9 inches deep, weighing 25 to 30 pounds — light enough to set by hand all day, deep enough to stand three feet of visible height on their own with the bottom course buried. Face width varies most (6, 8, 12, 16, 18 inches); depth and height often match within a product line. The table below lists the units most residential walls are built from.
| Unit | Nominal Size (W × H × D) | Weight | Notes |
|---|---|---|---|
| Allan Block AB Classic | 12 × 4 × 9 in | ~28 lb | Hollow-core; cores filled with drainage stone; built-in setback |
| Versa-Lok Standard | 12 × 4 × 9 in | ~28 lb | Solid face unit; pin-through connection; beveled rear for setback |
| Pavestone Anchor Diamond | 12 × 4 × 9 in | ~25–30 lb | Split-face segmental unit; cap and corner pieces available |
| Belgard Anchor / Mini-Creta | 12 × 4 × 9 in | ~25–30 lb | Common big-box and landscape-yard stock |
| Keystone ProStone / HP | 12 × 6 × 12 in | ~55–70 lb | Interlocking rear lip; hollow units for core fill |
| Large structural unit | 18 × 8 × 12 in | ~75–80 lb | Taller unreinforced stacks; needs equipment to set safely |
| Generic landscape block | 12 × 4 × 9 in | ~25–30 lb | Big-box non-engineered block — fine to 2–3 ft, verify specs |
Three features separate an engineered SRW unit from a landscaping block sold in the same aisle. First, a built-in setback — a rear lip, angled face, or pin system that forces each course to step back from the one below (typically 1 inch per course on a 12-inch-deep unit, about a 6-degree batter), which is what gives the wall its gravity-stability geometry. Second, hollow cores that get filled with the same clean drainage stone as the column behind the face, adding mass and continuing the drainage path through the wall itself. Third, matched caps — flat units that finish the top course and shed water off the wall instead of into it. Budget for caps; a wall without them looks unfinished and weeps into the top course.
Add 5 to 10 percent more retaining wall blocks than the course count demands. Cuts at corners, chipped faces pulled off the wall, and the occasional cracked unit are normal losses on every job. Caps are usually counted separately at one per course-length foot. The Retaining Wall Calculator runs the course count, block total, buried course, base gravel, and drainage stone for any wall length, height, and block size.
Retaining Wall Base Preparation
Retaining wall base preparation is the part of the job that never shows in a finished photo and determines whether the wall still looks right in ten years — the least glamorous half of the retaining wall basics menu and the most consequential. The base is a level, compacted strip of dense-graded crushed stone that spreads the wall's bearing load onto undisturbed soil and gives the first course a flat surface to lock against. Skipping the compaction or thinning the depth does not fail immediately — it fails as a wavy top line, stepped joints, and courses that begin to separate, all of which read as "the wall settled" and all of which trace back to the trench.
The build sequence:
1. Strip topsoil and vegetation down to firm, undisturbed soil along the full wall run.
2. Excavate a trench as deep as the buried first course plus 6 inches of compacted base material.
3. Make the trench about twice the block depth wide and never less than 24 inches, so the base extends behind the wall face as well as under it.
4. Fill with 6 inches of dense-graded crushed base — crusher run, road base, ¾-minus, the kind with fines in it — not clean drainage stone; the base needs the fines to lock under compaction.
5. Compact in 2 to 3 inch lifts with a plate compactor; a single thick dump never achieves uniform density.
6. Screed the top of the base flat and level within about ⅛ inch over 10 feet.
7. Set the first course fully buried, plumb and level, checking every block before the next goes down.
The buried course itself follows two overlapping rules of thumb. Most builders embed the first course about 10 percent of the wall height below grade — a 3-foot wall buries roughly 4 inches of block, a 6-foot wall 7 to 8 inches — and many SRW system manuals specify burying one full course regardless, which on a 4-inch-face unit is 4 inches of block sitting below finished grade with the 6-inch base under it. Both rules land in the same trench depth: total excavation equals the buried block plus the compacted base, typically 10 to 12 inches below finish grade for a low wall. Never seat a wall at surface level, even a garden wall — the frost and rain that work the top of any unprotected block line will shift it within a few seasons.
Retaining Wall Drainage: Stone Column, Pipe, and Fabric
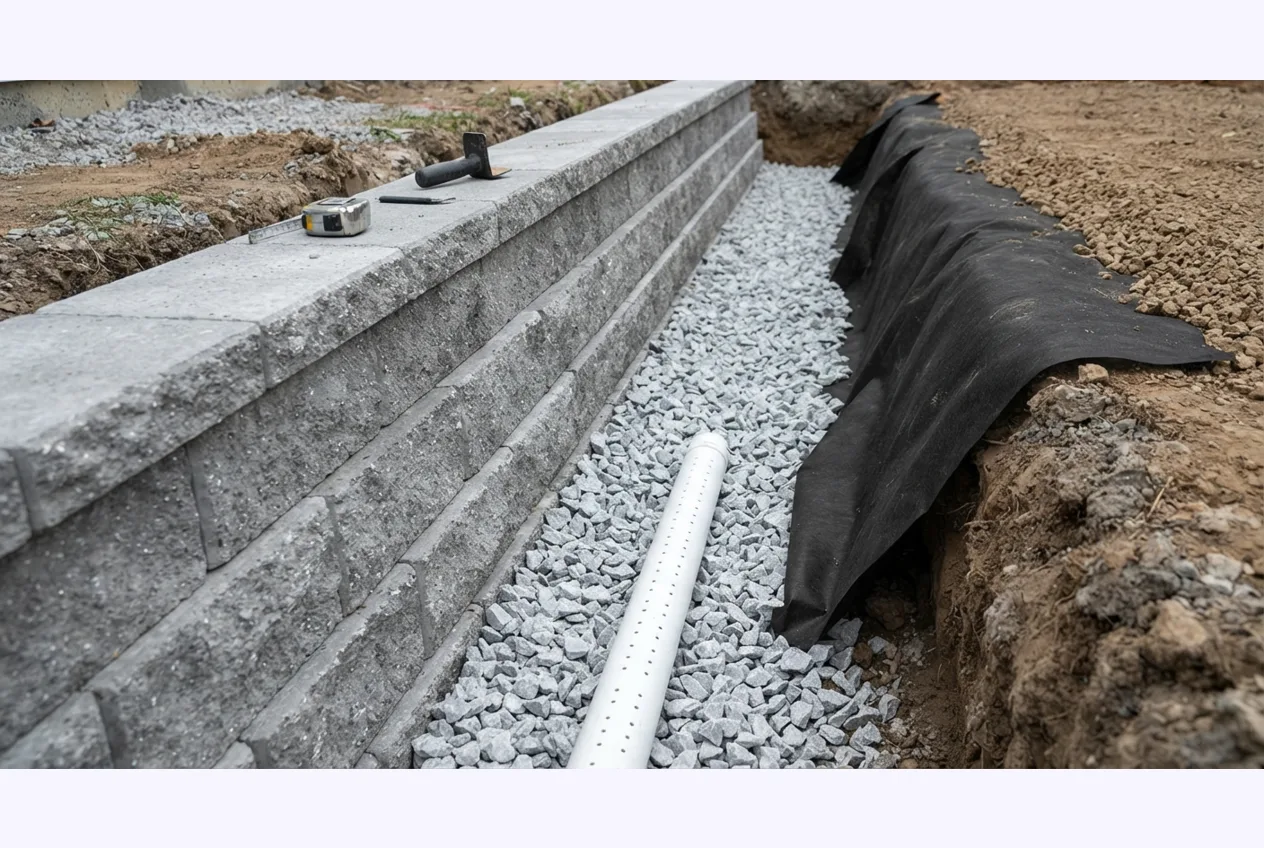
Water in the retained soil is the leading cause of retaining wall failure — saturated soil is far heavier than drained soil and pushes directly against the back of the wall. Retaining wall drainage is therefore a system, not a single part: a full-height column of clean, angular ¾-inch stone with no fines directly behind the block face; hollow cores filled with the same stone as the wall is stacked; a perforated retaining wall drainage pipe at the base carrying collected water out; and non-woven filter fabric separating the stone column from native backfill so soil cannot migrate in and plug the voids. Remove any one piece and the system degrades: no pipe and water pools at the base; no fabric and fines seal the stone within a few seasons; no core fill and the wall face becomes the dam.
Stone width and pipe detailing scale with wall height. The table below is the residential working range — the drainage half of the retaining wall basics picture — with the over-8-foot band pointing where design takes over from rule of thumb.
| Wall Height | Clean ¾-in Stone Column | Drain Pipe | Backfill Behind Column |
|---|---|---|---|
| Under 3 ft | 6–12 in wide, full height | Optional on free-draining soils; 4-in perforated if used | Native granular soil or compacted crusher run |
| 3 to 4 ft | 12 in wide, full height | 4-in perforated pipe at base | Compacted crusher run |
| 4 to 6 ft | 12–18 in wide, full height | 4-in perforated pipe, bedded on stone | Compacted crusher run to grade |
| 6 to 8 ft | 18–24 in wide, full height | 4-in perforated pipe wrapped in filter fabric | Compacted crusher run to grade |
| Over 8 ft | Engineered design required | Engineered | Engineered |
The retaining wall drainage pipe details matter as much as the stone. Use 4-inch perforated pipe — the standard residential size — laid at the lowest possible elevation in the stone column, on its own bed of clean stone, with the perforations facing down so water rises into the pipe from below and sediment settles out instead of silting the holes shut. Slope the run 1 to 2 percent — about ⅛ to ¼ inch per foot — toward daylight, a dry well, or a storm drain, and never dead-end the pipe inside the stone column: a drain with nowhere to discharge is just a manufactured place for water to pool. On walls taller than 4 feet, wrap the pipe in non-woven filter fabric as well, and overlap all fabric seams about 6 inches. Extend the stone column and pipe daylight past each end of the wall where grade allows, so water cannot find a path around the drain and back into the backfill.
Backfill behind the stone column is compacted crushed run in 8 to 12 inch lifts — never loose native topsoil, which holds water like a sponge and adds load for free. No heavy equipment within about 3 feet of the wall face during compaction; the lateral shove of a plate compactor run hard against a young wall is enough to kick courses out of plumb before the drainage stone is even placed.
Geogrid and Reinforcement: When the Soil Does the Work
Geogrid is a high-tensile synthetic mesh laid in horizontal layers within the compacted backfill behind a wall. It ties the soil mass back to the wall face through friction and interlock, effectively turning a larger volume of backfill into part of the wall's resisting mass — the difference between a wall standing on its own weight and a wall standing on an engineered block of reinforced earth. It is the standard tool for pushing segmental walls past the unreinforced height limit without switching to a cantilever concrete design, and the point where the retaining wall basics rules on this page hand off to engineered territory.
When reinforcement enters the picture: NCMA guidance and the major SRW system manuals put the typical unreinforced limit for segmental walls at about 4 feet with good granular backfill (soil friction angle φ ≥ 32°), dropping to roughly 3.5 feet with looser sand (φ ≈ 28 to 32°) and 3 feet with silty soil (φ < 28°). Above those heights, design — not habit — calls for geogrid layers. Dry-stack walls rely on friction between courses with no mortar bond, so they benefit from the added restraint earlier than a mortared wall of the same height.
How it is typically placed: geogrid sheets run from the back of the block units horizontally into the compacted backfill, extending 60 to 80 percent of the wall's total height into the slope (0.6 H to 0.8 H — longer grid for taller walls, weaker soils, and any surcharge). Layers are placed every two courses on standard SRW units, which on a 4-inch face height is about every 8 inches of wall, and every course is compacted over the grid before the next course goes down. Grid rolls are cut to the design length, wrapped tight against the back of the blocks, and covered with compacted lift immediately — geogrid left exposed to sunlight degrades, so it gets buried the day it goes in. In tight side-yard conditions where the grid length will not fit the available behind-the-wall space, the usual answers are a taller face unit (more depth per course), a switch to a cantilever concrete stem, or stepping the grade into shorter well-separated tiers instead of one reinforced wall.
Geogrid does not replace the drainage column — the stone and pipe still run full height in front of and through the reinforced zone. It also does not replace engineering: grid length, spacing, and the retained height each get calculated against the actual soil, slope, and surcharge on your site, not picked from a catalog table. Walls over 8 feet, walls with any significant surcharge, and walls on slopes that rise behind the wall belong in front of a licensed structural or geotechnical engineer before the first course is set.
Worked Example: 20-Foot Garden Wall at 3 Feet
A common first wall: 20 feet long, 3 feet of visible height, level lawn behind it, no driveway, no structure — well under the 4-foot engineering line, so a permit may not even be required depending on the jurisdiction. This worked example is the retaining wall basics arithmetic every quote should show you. The wall is built from standard 12-inch-wide × 4-inch-tall segmental blocks. Every quantity below is checkable with a tape measure and the arithmetic shown.
Blocks. Face width 12 inches means 20 blocks per course (20 ft ÷ 1 ft). With the bottom course buried, total stacked height runs about 3 feet 4 inches — 10 courses at the 4-inch nominal face. Add 10 percent extra for cuts and chipped units: 20 × 10 = 200 blocks, plus 10 percent = 220 blocks, plus one cap block per foot of top course length, about 20 caps. Pallet quantities vary by brand — commonly 45 to 60 units per pallet — so five pallets covers a 220-block count with room to sort.
Base gravel. Trench: 20 feet long × 2 feet wide (twice the 9-inch block depth, rounded up to the 24-inch minimum) × 6 inches deep of compacted crusher run. Volume = 20 × 2 × 0.5 = 20 cubic feet ÷ 27 ≈ 0.74 cubic yards — call it 0.75 yards, plus a little extra for the trench walls if the soil crumbles.
Drainage stone. Column 12 inches wide × total wall height about 3.67 feet × 20 feet long = 73 cubic feet, less the block displacement (the blocks themselves displace roughly 25 cubic feet of that column) plus core fill on hollow units ≈ 2.2 to 2.5 cubic yards of washed ¾-inch clean stone. Round up; voids in loose stone are real and short loads cost more per yard than the extra half yard would have.
Pipe and fabric. One run of 4-inch perforated pipe the full 20 feet, holes down, on a stone bed, plus about 80 square feet of non-woven filter fabric for the column face against native soil. Under 3 feet with free-draining native soil the pipe is optional per the drainage table above — on anything with clay in it, install it anyway; the pipe is cheap and the wall is not rebuildable from the back without excavating everything.
Total material picture: about 220 blocks, 20 caps, 0.75 yards of compacted base, 2.5 yards of clean drainage stone, one 20-foot drain pipe, a roll of fabric, one bag of leveling sand if needed for the first course, and a plate compactor rental. The Retaining Wall Calculator reproduces every line of this example for different dimensions and block sizes.
Cost by Material
Installed retaining wall cost tracks height, length, access, and material — labor is a large share on every wall because excavation, base work, and compaction do not shrink with cheaper blocks. The cost half of the retaining wall basics budget lives in these ranges: typical U.S. installed figures (materials plus labor) for residential walls; treat them as orientation, not quotes. Regional labor and haul distance move the numbers substantially.
| Material | Installed Cost per Sq Ft of Face | Notes |
|---|---|---|
| Segmental block (SRW) | $20–$40 | Most common residential choice; drainage stone and pipe add $3–$8 per sq ft |
| Pressure-treated timber ties | $15–$25 | Lowest first cost; shortest life in wet contact — 10 to 20 years |
| Natural stone | $25–$50 | Gravity-only; height-limited; masonry skill required |
| Boulder / rock | $25–$55 | Machine-placed; excellent drainage; irregular finish |
| Poured concrete | $30–$60 | Strongest residential option; usually engineered above 4 ft |
Two line items sit outside the per-square-foot numbers and surprise first-time builders. Engineered design — stamped plans from a structural or geotechnical engineer — typically runs $1,500 to $5,000 on a residential wall and is required above the 4-foot threshold or for any surcharged condition. Drainage systems (stone column, perforated pipe, filter fabric) add roughly $3 to $8 per square foot of wall face, and they are not optional line items to value-engineer out. For scale, a typical 25-foot × 4-foot concrete block wall lands around $5,000 to $5,500 installed in many markets, with the full residential range spanning roughly $3,500 to $10,000 and larger or fancier walls well beyond that.
Retaining Wall Failure Signs: What Each Distortion Means
Retaining wall failure signs are readable if you know what each distortion is telling you about the forces underneath — the final chapter of the retaining wall basics story every owner should know before the first course goes down. The seven failure modes below cover nearly every wall that has ever come down; the matching visible sign is what to look for on a wall you already own or a wall you are evaluating before you commit to a property.
| Failure Mode | What Is Happening | Visible Sign |
|---|---|---|
| Hydrostatic pressure | No drainage stone, no pipe, or a pipe with nowhere to discharge; saturated backfill pushes the middle out | Bulge or bow in the center of the wall face — the most common failure by a wide margin |
| Inadequate or unlevel base | Wall settles unevenly; interlocking lips shear under differential settlement | Wavy top line; courses separating; stepped joints along the run |
| Overturning | Wall rotates forward about its toe — not enough mass or reinforcement for the height | Wall leaning outward; a leaning wall is failing, not settled |
| Sliding | Base friction cannot resist the lateral push along the bottom course | Whole wall creeping forward at the base; gap opening behind the toe |
| Bearing failure | Toe punches into soft foundation soil | Front edge sinking; wall tipping forward over time |
| Global slope failure | The entire soil mass rotates beneath the wall; the wall was built correctly, the hillside was not | Cracks in the ground above the wall; wall moving as a unit with the slope |
| Frost heave | Water in poorly drained backfill freezes and expands against the wall in cold climates | Seasonal displacement; courses jacked up after winter; worsens each year |
Warning signs on an existing wall — a lean, a bulge in the middle, separated or stepped joints, blocks sliding forward at the top courses, soil or water seeping through the face, a crack running down through several courses — are all reasons to stop using the ground above the wall and get a licensed engineer out. Retaining walls rarely fail gradually once they start moving; the repair window is before visible movement. If a wall you are inspecting already shows these signs, price the engineering assessment into whatever you were going to pay for the property.
Frequently Asked Questions
A retaining wall needs a licensed engineer's stamped design when it exceeds 4 feet measured from the bottom of the footing — the threshold most residential codes copy from the IBC — and any surcharge behind the wall voids the exemption at any height. A driveway, parking pad, rising slope, pool, building foundation, or a second wall tiered above counts as surcharge. Also engineer the wall when the ground rises behind it rather than sitting level, when it works near a foundation, pool, or septic system, when tiers sit closer than twice the lower wall's height, or when the wall passes 8 feet, where full geotechnical and structural design becomes mandatory in practice.
In most U.S. jurisdictions the magic number is 4 feet, measured from the bottom of the footing to the top of the wall — not from the finished ground surface in front. The buried first course counts toward that height. Some localities tighten the threshold to 3 feet, so check with your building department before committing to material. Height is only half the test: any surcharge — a driveway, structure, or rising slope behind the wall — removes the exemption entirely, and a 3-foot wall holding the edge of a driveway is an engineered structure even though it stands below the 4-foot line.
The main retaining wall types are gravity walls (massive stone, mortared block, or poured concrete that resist earth pressure by weight alone), cantilever walls (L-shaped reinforced concrete with a base slab using soil weight on the heel), anchored walls (cable or rod anchors drilled into the slope behind the stem), segmental retaining walls (SRW — interlocking dry-stacked concrete blocks with buried courses and optional geogrid), gabion walls (wire baskets filled with stone), crib walls (interlocking timber or concrete cribs filled with aggregate), mechanically stabilized earth (MSE — facing panels or blocks tied into layered reinforced backfill), and sheet pile walls (steel sheets driven into the ground, mostly for waterfront or temporary work). Residential landscaping most often uses SRW, gravity stone, timber, and poured concrete.
Most jurisdictions require a building permit for a retaining wall over 4 feet — some over 3 feet — and many require one for any wall that supports a driveway, structure, or surcharge regardless of height. The permit review is where retaining wall height and permits collide with reality: the plan check will ask for wall dimensions, drainage details, and often a soil bearing description, and walls above the threshold need a stamped structural or geotechnical design attached. Even a small wall below the height limit may need a zoning or grading permit if it changes drainage onto a neighbor's property. Call the building department before material arrives, not after the blocks are in the driveway.
Proper retaining wall drainage is a full-height column of clean, angular ¾-inch stone (no fines) directly behind the block face — typically 12 inches wide for low walls and 12 to 24 inches for taller ones — with the hollow cores of the blocks filled with the same stone, a perforated 4-inch retaining wall drainage pipe at the base with its holes facing down, sloped 1 to 2 percent to daylight or a drain outlet, and non-woven filter fabric between the stone column and the native backfill so soil cannot migrate in and plug the voids. Wrap the pipe in fabric on walls taller than 4 feet. Water trapped behind a wall is the single leading cause of failure; the stone and pipe cost a few hundred dollars on a typical yard wall and prevent the only failure mode that destroys walls from the middle outward.
Standard segmental retaining wall blocks run about 12 inches wide × 4 inches tall × 9 inches deep and weigh 25 to 30 pounds — the size used by Allan Block AB Classic, Versa-Lok Standard, Pavestone Anchor Diamond, and most big-box wall block. Larger structural units (roughly 18 × 8 × 12 inches, 75 to 80 pounds) build taller unreinforced walls more efficiently but need equipment to set. Choose units with a built-in rear setback or lip so each course steps back automatically, hollow cores if you want them filled with drainage stone for mass and drainage continuity, and matching cap blocks for the top. Add 5 to 10 percent extra: chipped faces and cuts at corners are normal losses on every wall.
Retaining wall failure signs you can see: a lean outward (overturning — a leaning wall is failing, not settled), a bulge in the middle (hydrostatic pressure pushing the strongest part of the wall out), separated or stepped joints along the top line (uneven base settlement), blocks sliding forward at the top courses, soil or water seeping through the face, and a crack running down through several courses (structural break or global movement). Any of these means stop using the ground above the wall and get a licensed engineer out. Retaining walls rarely fail gradually once they move; the repair window is before visible movement, not after.
Retaining wall base preparation starts with stripping topsoil down to firm, undisturbed soil and excavating a trench as deep as the buried first course plus 6 inches of compacted base material. Make the trench about twice the block depth and never less than 24 inches wide so the base extends behind the wall as well as under it. Fill with 6 inches of dense-graded crushed base — crusher run, road base, or ¾-minus with fines, not clean drainage stone — compacted in 2 to 3 inch lifts with a plate compactor, then screed the top flat. Set the first course fully buried, level within an eighth inch over 10 feet, and plumb. A wall is only as good as the level strip of compacted stone it sits on; almost every wavy, settled wall traces back to a base that was soft, narrow, or unlevel when it was set.
References
- International Code Council, International Building Code, Section 105.2 and related earth-retention provisions, iccsafe.org — the 4-foot permit and design threshold language most residential jurisdictions mirror.
- International Residential Code, IRC Section R404.1, codes.iccsafe.org — design requirements for concrete and masonry foundation walls and retaining walls, including height and lateral-load provisions.
- National Concrete Masonry Association, TEK 15-5B, Segmental Retaining Walls — Allowable Stress Design, ncma.org — unreinforced height limits by soil friction angle and geogrid reinforcement guidance.
- National Concrete Masonry Association, Segmental Retaining Wall Design Manual, 3rd ed., ncma.org — full design procedure for SRW systems including global stability and drainage details.
- Allan Block Corporation, Retaining Wall Specification Manual, allanblock.com — wall-rock column width, core fill, and drain-pipe placement specifications for hollow-core SRW units.
- American Association of State Highway and Transportation Officials, AASHTO LRFD Bridge Design Specifications, Section 11.10 (Mechanically Stabilized Earth Walls), transportation.org — MSE and reinforced-soil wall design standards used on commercial and municipal work.
- Federal Highway Administration, NHI-10-024, Mechanically Stabilized Earth Walls Design and Construction Guidelines, fhwa.dot.gov — public-domain reference for reinforced soil wall geometry and reinforcement length.
- ASTM International, C1372 Standard Specification for Dry-Cast Segmental Retaining Wall Units, astm.org — dimensional and strength requirements for SRW blocks.
- ASTM International, D448 Standard Classification for Sizes of Aggregate and non-woven geotextile standards, astm.org — drainage stone gradations and filter fabric specifications used behind wall faces.
Disclaimer: This guide summarizes retaining wall types, block sizing, base preparation, drainage practice, height and permit thresholds, and failure diagnostics for general educational purposes. It is not a structural design, a geotechnical assessment, or a permit determination for any specific site. Soil conditions, local codes, and surcharge loads vary; walls over 4 feet from the bottom of the footing, walls with any surcharge, and walls on rising or unstable ground require review by a licensed structural or geotechnical engineer. Confirm permit requirements with your local building department before committing to material.